410
Select a tab to change the switcher bank/AUX bus
control block (AUX 1, AUX 2) to display.
3
Select the target display mode (1 to 6) to set.
4
Split the display using the [Split] switch.
On:
Split the display into two (upper and lower
areas).
Off: Do
not split the display.
5
Select the items to display.
When the [Split] switch is set to the on position
Press the [Upper Area] button and select an item to
d
isplay in the upper area from the pull-down list.
Press the [Lower Area] button and select an item to
d
isplay in the lower area from the pull-down list.
When the [Split] switch is set to the off position
Press the [Lower Area] button and select an item to
di
splay from the pull-down list.
To make the display background gray
Set the [Gray Bkgd] switch to the on state.
To set a display mode name
You can set the display mode name to display on buttons
i
n the cross-point pad in the cross-point control block/
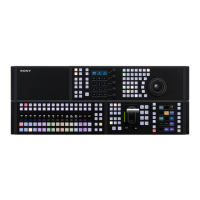
AUX bus control block on the ICP-X7000.
Press the [Name] button and enter a display mode name
(
up to 12 characters) using the keyboard.
Characters entered in lower case are all displayed in upper
case
when displayed on the cross-point pad buttons.
To return the settings to the defaults
Press the [Default Recall] button, check the message, then
press [OK].
Setting Utility Bus Mode
In utility bus mode, you can set the bus assigned to the 1st
row to 4th row in the cross-point control block.
For details about utility bus mode, see “Utility bus mode”
(page 86).
1
Open the Home > Setup > Panel > Xpt Module > Util
Button Bus Assign menu (19104.35).
2
Display the target switcher bank to set.
Select a tab to change the switcher bank to display.
A list of button rows is shown on the left and a list of
assi
gnable buses is shown on the right.
3
In the list on the left, select the target button row (1 to
4) to set.
4
In the list on the right, select a bus to assign.
5
Press the [Set] button.
To release the assignment
In the list on the left, select the target button row (1 to 4)
t
o release and press the [Clear] button.
To return the assignment to the defaults
Press the [Default Recall] button, check the message, then
press [OK]
.
Setting a Cross-Point Pad
You can set the buttons in the cross-point pad in the cross-
point control block/AUX bus control block on the
ICP-X7000.
Assigning functions to a cross-point pad
button
You can assign a different function to a button on each of
the 14 pages for the cross-point pad.
1
Open the Home > Setup > Panel > Xpt Module > Xpt
Pad Button Assign menu (19104.36).
2
In the [Select Bank] group, select the target switcher
bank/AUX bus control block (AUX 1, AUX 2) to set.
Place a check mark for the switcher bank/AUX bus
con
trol block to select.
You can also select multiple switcher banks/AUX
bus
control blocks and set cross-point pad buttons
simultaneously.
• A switcher bank and AUX bus control block cannot
be sel
ected simultaneously.
• When multiple switcher banks/AUX bus control
bl
ocks are selected, the last selected switcher bank/
AUX bus control block becomes the reference and
is displayed highlighted. The button names
configured on the reference switcher bank/AUX
bus control block are displayed on the cross-point
pad buttons.
When the reference switcher bank is deselected, the
re
ference will be set according to the following
order of priority.
M/E-1 > M/E-2 > M/E-3 > M/E-4 > M/E-5 > P/P
• In multi program 2 mode, main and sub can be set
sepa
rately. When a switcher bank is set to shared
main and sub, the button assignments are also
shared.
Note
Notes

 Loading...