453
Setting a Network AUX
Remote Panel
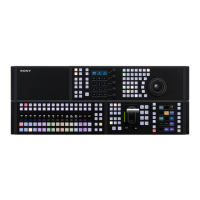
Network AUX remote panel
A network AUX remote panel is a function that provides
a simple connection of an MKS-R3210/R1620 Remote
Control Panel with a switcher, without using LSM (Live
System Manager), for using the MKS-R3210/R1620 as a
switcher remote panel. You can control the switching of
cross-points on the switcher from a remote panel on the
network.
Network AUX remote panel restrictions
• Up to 16 remote panels can be configured for a single
co
ntrol panel.
• The network AUX remote panel function is not
av
ailable if the MKS-R3210/R1620 Remote Control
Panel is connected to LSM.
• The network AUX remote panel function is not
av
ailable if control using the NS-Bus External Control
protocol is enabled.
• The following function and settings restrictions apply
t
o a remote panel.
• To use the same cross-point settings as the switcher on
a r
emote panel, cross-point assign table settings must be
copied to the remote panel.
For details, see “Copying a Table to a Remote Panel”
(page 385).
Setting the MKS-R3210/R1620 Remote Control
Pa
nel
On the [Network Settings] page of the web menu of the
r
emote control panel, configure the network (LAN1).
For details about setup, refer to the operating instructions
f
or the MKS-R3210/R1620.
For details about connection, refer to the ICP-X7000
I
nstallation Manual or ICP-X1224/X1124/X1216/X1116
Installation Manual.
Enabling/Disabling a Network AUX
Remote Panel
1
Open the System Configuration > Configuration >
Aux Remote Panel > Common Settings menu
(20101.21).
2
Enable/disable using the [Aux Remote Interface]
button.
On:
Enable the network AUX remote panel function.
Off:
Disable the network AUX remote panel
function.
Configuring a Remote Panel
You can select and set a remote panel from the list of
remote panels connected to the network.
Setting the control panel to connect
1
Open the System Configuration > Configuration >
Aux Remote Panel > Assign menu (20101.22).
The remote panel name, IP address of the remote
pan
el, and the connected control panels are displayed.
You can press [Name] to sort the display of remote
pan
els by name. Pressing [Name] switches between
ascending and descending order each time it is
pressed, and [v] (ascending) or [V] (descending) is
displayed on the right side of [Name].
2
Select the target remote panel to set.
To select and set multiple remote panels, place a
c
heck mark beside the target remote panels to set.
To select and set all remote panels, place a check
mark i
n the Select All checkbox.
3
In the [Panel] group, select a control panel to connect.
Panel 1: C
ontrol panel 1
Panel 2: C
ontrol panel 2
No Assign: Not assigne
d
4
Press the [Apply] button in the [Assign] group.
To return to the previous setting
Press the [Clear] button in the [Assign] group.
5
Check the message, then press [OK].
Item Restrictions
Functions The following functions are
not
available.
• Global salvo
•Protect
• Monitor
•Retrace
• Linkage
Levels Only 1 to 8 are available.
Operation button colors Set to “Local”
(Color Settings on the
D
isplay Settings page)
Source/destination names Source names set on the
s
witcher, and fixed bus
names
Alias name selection not
su
pported
(Alias Name Lists page)

 Loading...