– 6 –
SECTION 3
ADJUSTMENTS
3-1. MECHANICAL ADJUSTMENTS
PRECAUTION
1. Before adjusting, clean the following parts with a piece of cot-
ton moistened with alcohol.
record/playback/erase head pinch roller
rubber belt capstan
2. Demagnetize the record/playback/erase head using a head de-
magnetizer.
3. Do not use a magnetized screwdriver for adjustments.
4. After adjusting, apply screw-locking compound to the adjusted
parts.
5. Unless specified otherwise, use a specified voltage (3V DC) to
perform the adjustments.
Torque Measurement
Tape Speed switch : 2.4cm
Mode Torque Meter Meter Reading
Forward CQ-103M
5 – 13 g • cm
(0.07 to 0.180 oz• inch)
Fast Forward CQ-201M
5 – 13 g • cm
(0.07 to 0.180 oz• inch)
Rewind CQ-201M
more than 20 g • cm
(more than 0.28 oz• inch)
Tape Tension Measurement
Tape Speed switch : 2.4cm/s
Mode Torque Meter Meter Reading
FWD CQ-403M
more than 30 g
(more than 1.06 oz)
3-2. ELECTRICAL ADJUSTMENTS
Standard Output Level
Output terminal EAR
Load impedance 10kΩ
Output level 78mV (– 20dB)
Test Tape
Type Signal Used for
Tape speed
(cm/s)
S-2-A030A 3kHz, –20dB Azimuth Adjustment 2.4
WS-24
3kHz, –10dB Tape Speed Adjustment
2.4
WS-12 1.2
0dB=0.775V
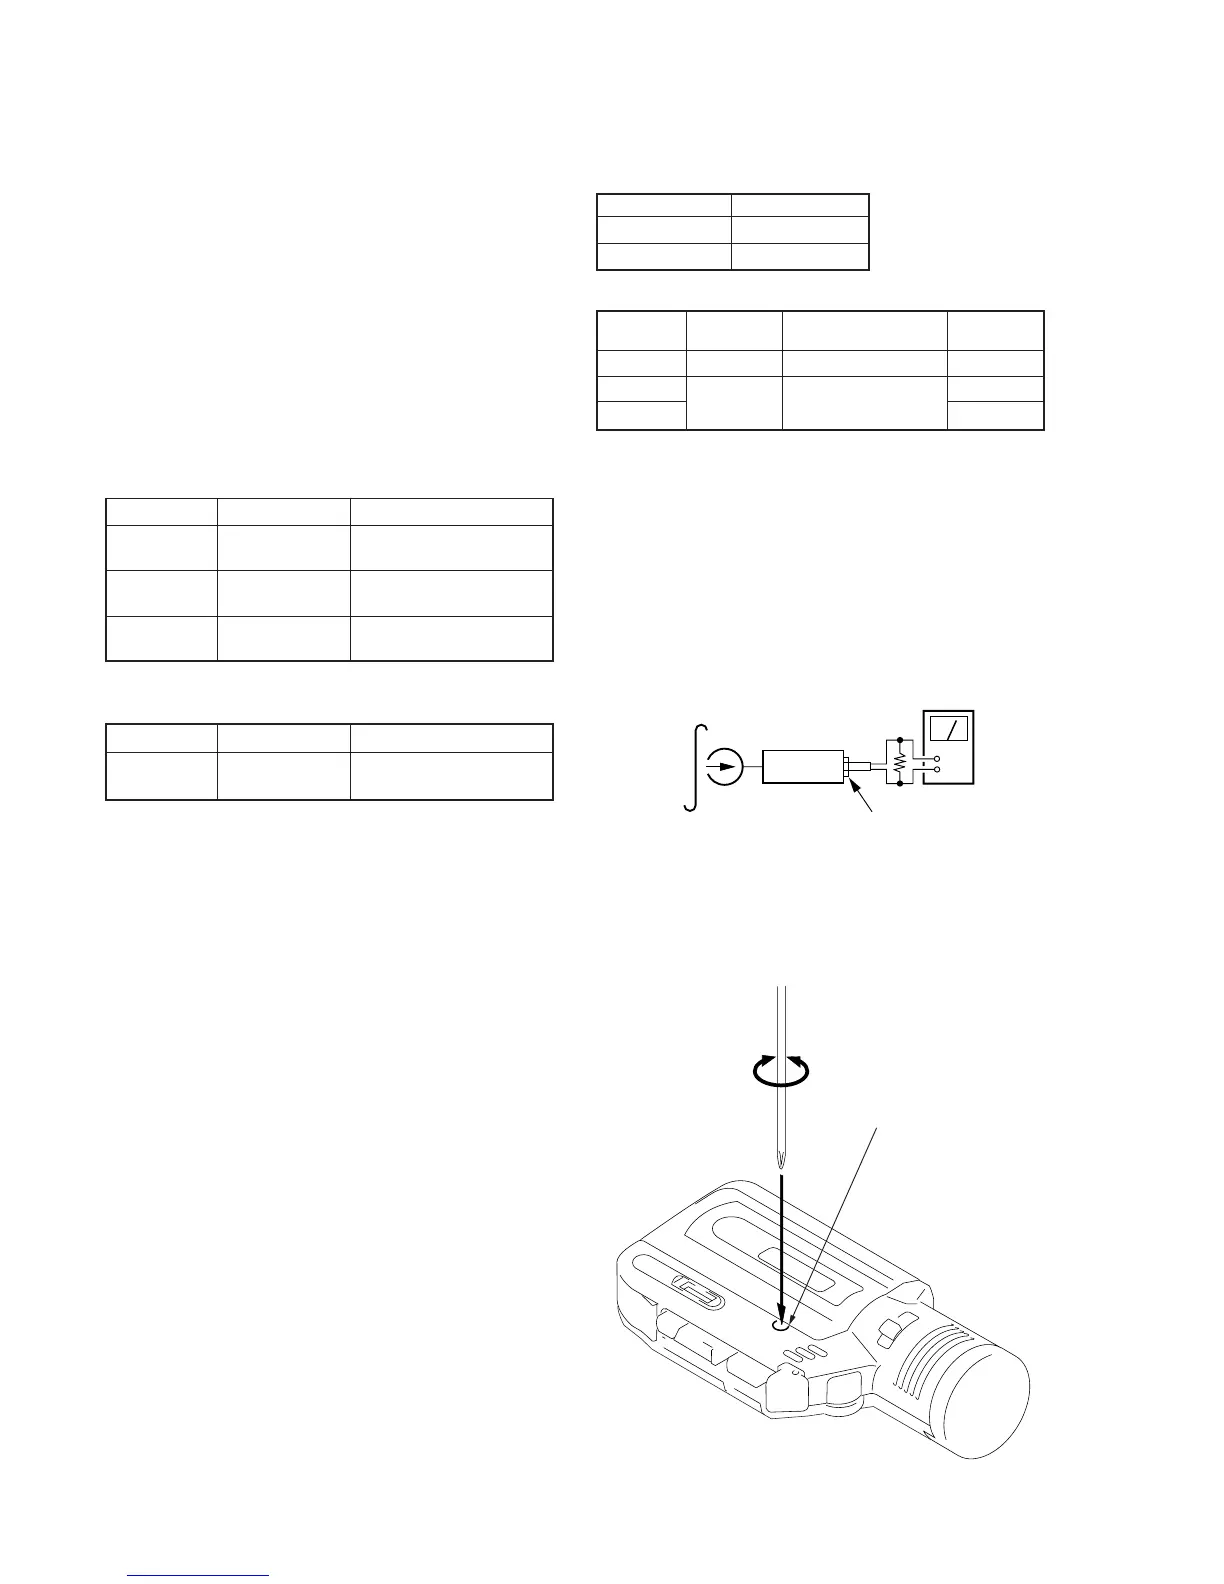
Record/Playback/Erase Head Azimuth Adjustment
Switch position
VOL control : Mechanical center
TAPE SPEED switch : 2.4cm
VOR switch : OFF
Procedure :
– FWD/REV playback –
• Rotate the screw to adjust level meter reading to the maximum.
Note : Adjust to the maximum peak though ther may be two or
three peaks
Adjustment Location :
set
test tape
S-2-A030A
(3kHz, –20dB)
level mete