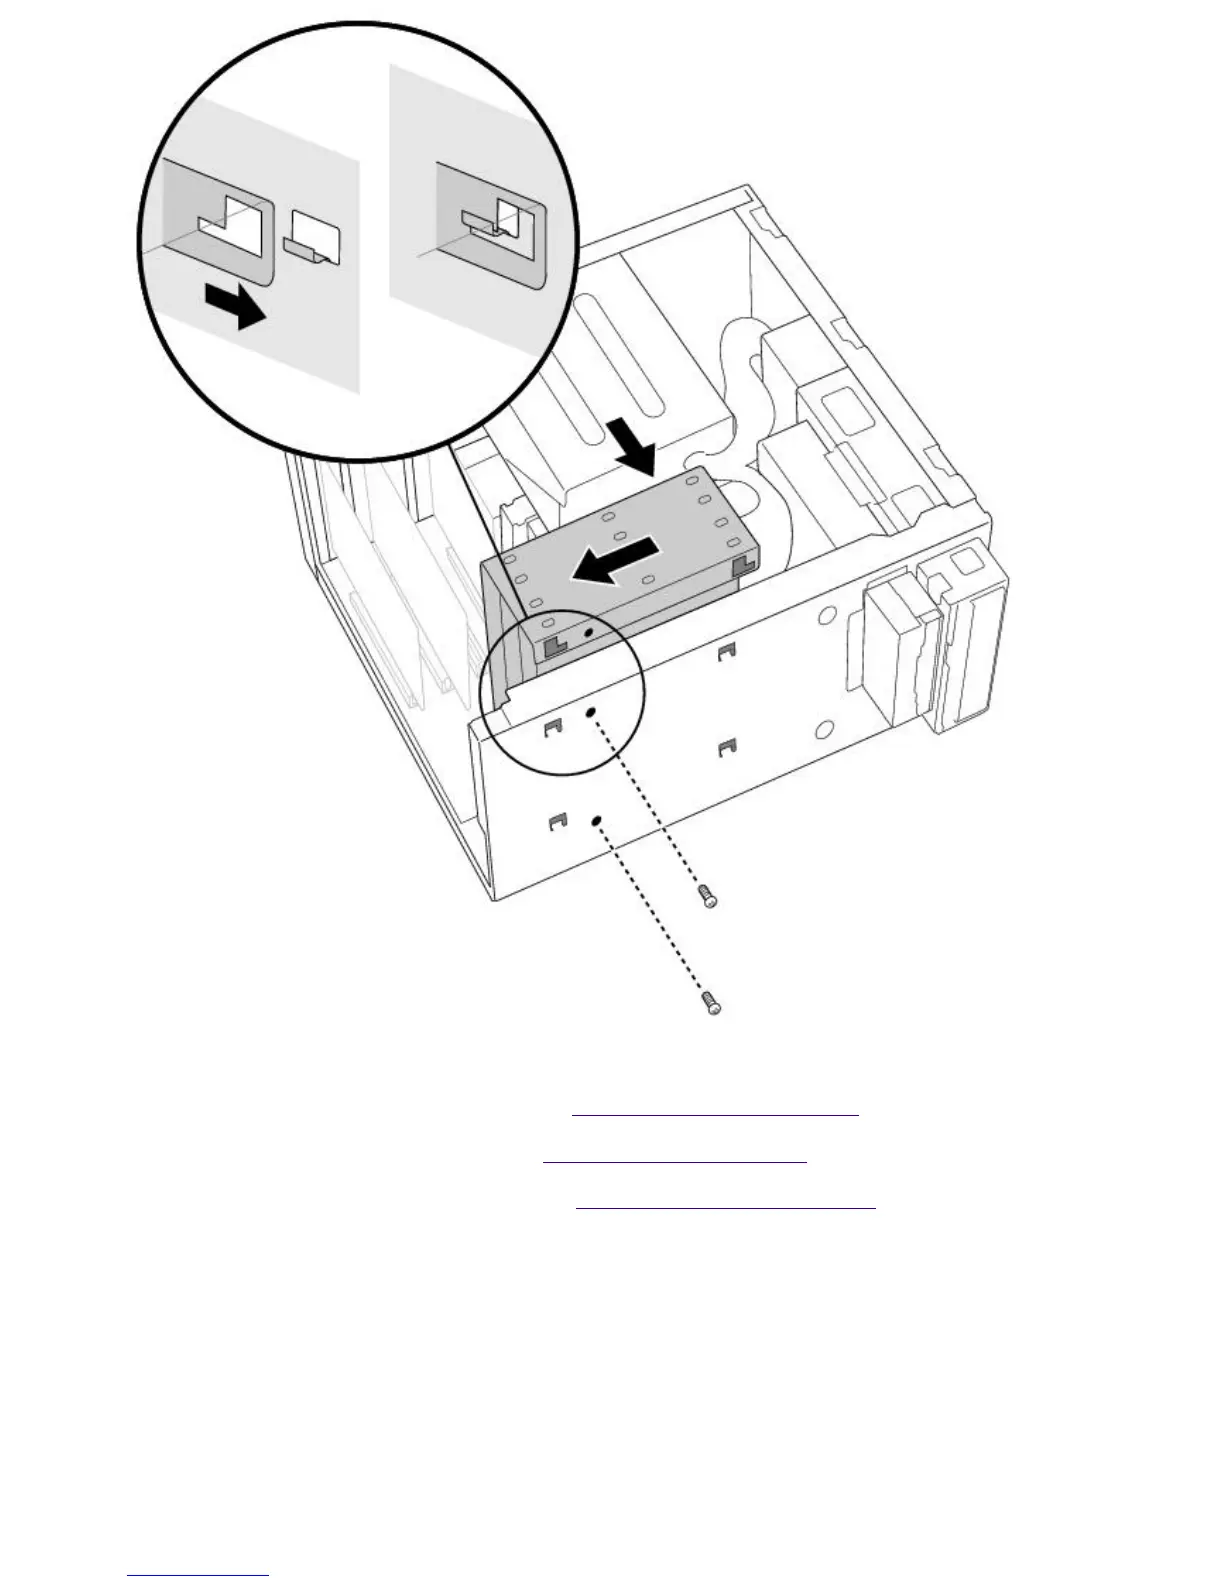
14.
Replace the two screws that secure the holder to the chassis.
15.
Replace the bottom panel, as described in Replacing the Bottom Panel.
16.
Replace the front panel, as described in Replacing the Front Panel.
17.
Replace the left-side panel, as described in Replacing the Left-Side Panel.
18.
Reconnect the power cord and then turn on your computer.
Your computer automatically recognizes the new drive and configures itself accordingly when you
turn it on. Format and partition the new drive following the instructions provided with the drive.
Removing the Left-Side Panel
To remove the left-side panel
1.
Remove the two screws that secure the panel to the chassis.
2.
Slide the panel back until it stops.
3.
Pull the panel straight out to remove it.
Page 736