Do you have a question about the Sony PS-X6 and is the answer not in the manual?
Details core features for both PS-X6 and PS-X7 models, highlighting automatic functions.
Highlights specific features exclusive to the PS-X7 model, like carbon fiber arm pipe.
Instructions on how to correctly assemble the turntable components after unpacking.
Procedure to achieve horizontal balance for the tonearm before setting tracking force.
Steps to set the correct tracking force for the stylus based on cartridge recommendations.
Verifies the stylus overhang for optimal record tracking using an alignment protractor.
Adjusts anti-skating force to counteract record groove friction and prevent distortion.
Notes that lateral balance is fixed and requires no user adjustment for tonearm movement.
Guide to operating the turntable using its automatic start, stop, and return functions.
Preparatory steps required before initiating record playback, including arm setup.
Instructions on how to safely stop the record playback and return the tonearm.
How to activate and deactivate the repeat playback function for continuous play.
Steps for initiating playback at a specific point on the record manually.
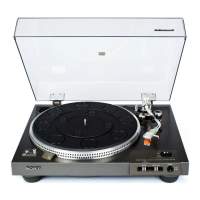
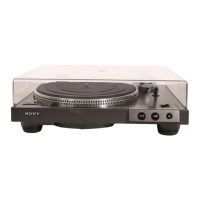
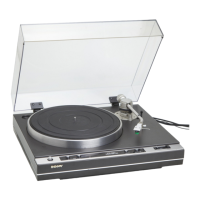
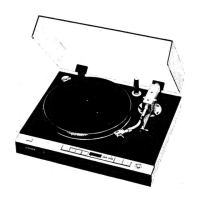
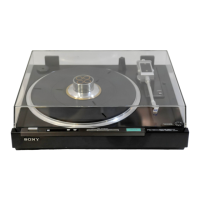
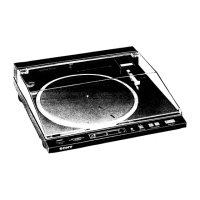
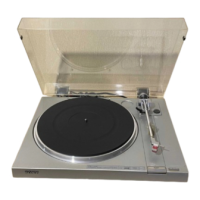
The Sony PS-X6 and PS-X7 are automatic stereo turntable systems designed for high-fidelity audio playback. These models offer a blend of advanced features for ease of use, precise performance, and durability.
The primary function of these turntables is to play vinyl records with exceptional accuracy and minimal interference. They are equipped with an automatic operation system that handles the entire playback process from start to finish. This includes auto start, auto stop, auto return, and auto repeat functions, all activated by simply touching the logic-controlled START/STOP or REPEAT switches. This automation ensures a smooth and consistent user experience, protecting both the records and the stylus from accidental damage.
At the heart of the PS-X6 and PS-X7 is the Crystal Lock System, which maintains the turntable at an accurate nominal speed regardless of voltage fluctuations, temperature changes, or aging. This system ensures excellent initial drift and load/speed characteristics, contributing to stable and precise playback. The turntables utilize a newly developed BSL (brushless and slotless) Motor, which provides a high torque of 1 kg.cm, allowing for excellent starting characteristics—achieving nominal speed within a third of a revolution at 33 1/3 rpm. This motor, combined with a servo system featuring a magnet-coated rim and an 8-pole magnetic pick-up head, ensures minimal wow and flutter and a high signal-to-noise ratio. The turntable can also quickly attain nominal speed when switching between 33 1/3 rpm and 45 rpm.
A Luminous Sensor (photoelectric circuit) is employed for smooth arm return, eliminating mechanical force on the cartridge or tonearm during automatic operations. The automatic operation system is also designed to be robust; it will not affect the tonearm if accidentally touched during auto start or auto return, or if the record size selector position is changed during an operation mode.
For enhanced sound quality and durability, the turntables incorporate acoustic material SBMC (Sony Bulk Mold Compound) in their frame construction. This material effectively reduces outside vibration effects, minimizing interference with playback. Additionally, newly developed resilient feet further prevent acoustic feedback, isolating the mechanism from external shock and vibration.
The PS-X7 model includes additional enhancements: an arm pipe made of carbon fiber to suppress resonance interference and a fluid-filled rubber mat designed to absorb disc vibrations, further improving sound clarity.
Setting up the turntable involves a few key steps. Users must first remove transit screws, carefully place the platter on the motor board, and then position the rubber mat. Cartridge installation is critical for optimal performance. The manual provides guidance on selecting appropriate mounting screws and ensuring the correct distance between the shell end and the stylus tip (49 mm). Lead wires from the shell must be connected to the corresponding pins on the cartridge.
Tonearm assembly and adjustment require careful attention to detail. This includes securing the tonearm, plugging in the shell, inserting the counterweight, and balancing the tonearm horizontally. Longitudinal balance adjustment is performed by setting the record size selector to MANUAL, touching the START/STOP switch, and then turning off the power and stopping the turntable by hand after a few rotations. The anti-skating compensator should be set to "O" during this process. Tracking force is adjusted by turning the counterweight until the recommended tracking force for the cartridge is aligned with the center line on the tonearm. An overhang check, using the supplied Alignment Protractor, ensures the stylus is correctly positioned for minimal tracking error. Finally, anti-skating compensation is set according to the tracking-force value used, to counteract the inward force on the tonearm during playback.
Connecting the turntable to an amplifier involves plugging the phono cord into the amplifier's PHONO inputs and the power cord into an AC outlet, preferably an unswitched type. Proper grounding is also essential to prevent hum.
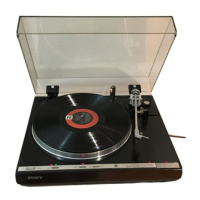
For record playing, the amplifier volume should be lowered, and the input selector set to PHONO. After placing a record and, if necessary, the 45-rpm adaptor, the cueing lever is lowered, and the arm rest clasp released. The user then selects the record speed (33 or 45 rpm) and the correct record size using the selector. Touching the two metallic strips of the START/STOP switch initiates playback, with the lamp illuminating. The tonearm will automatically rise and return to the arm rest at the end of the record, and the turntable will stop.
The cueing lever allows users to lift the stylus or change the listening point during playback. The stroboscope and neon lamp provide visual confirmation of precise turntable speed, with patterns for 45 rpm and 33 1/3 rpm. The neon lamp is energized by a 120-Hz pulse from a built-in crystal oscillator, ensuring accurate speed indication.
Manual playing is also possible for starting playback part-way through a record. This involves setting the record size selector to MANUAL, positioning the tonearm over the desired point, and then touching the START/STOP switch.
Regular maintenance is straightforward, focusing on cleaning and proper handling to ensure longevity and optimal performance. The cabinet and dust cover should be cleaned periodically with a soft, dry cloth. Solvents like alcohol, benzine, or thinner should be avoided as they can damage the finish. If the rubber mat becomes dirty, it can be gently wiped with a soft cloth slightly dampened with water. No lubrication is required for the turntable, as the motor shaft is factory lubricated for the life of the unit.
Proper record handling is emphasized: records should be handled by their edges to avoid touching the music grooves, which can lead to dust accumulation and impaired tone. The stylus should be cleaned with a soft brush from back to front, never with a finger. For routine record cleaning, a barely damp soft cloth or a fluid-type cleaner can be effective, ensuring the cleaner has dried completely before playback to prevent damage. Records should be stored vertically without pressure or inclining to minimize warpage and kept away from heat sources, direct sunlight, and excessive dust or moisture.
For shipping, the original carton and packing material should be retained. The tonearm should be clipped to the arm rest and bound with tape, and the transit screws fastened in their original position to secure internal parts.
The manual also includes a trouble checks section to help users diagnose and resolve common issues, such as impaired tone quality, no audio from one channel, groove skipping, or low-pitched hum. This self-help guide encourages users to consult a Sony Service Station or dealer if problems persist.
| Speeds | 33 1/3 and 45 RPM |
|---|---|
| Overhang | 15 mm |
| Tonearm | Static balance type |
| Cartridge weight range | 4 to 10 g |
| Drive method | Belt-drive |
| Motor | DC servo motor |