SA-WP5000/SS-CNP5000/CRP5000/CRP7001/MSP5000/SRP5000
3
SECTION 1
DISASSEMBLY
Note: Follow the disassembly procedure in the numerical order given.
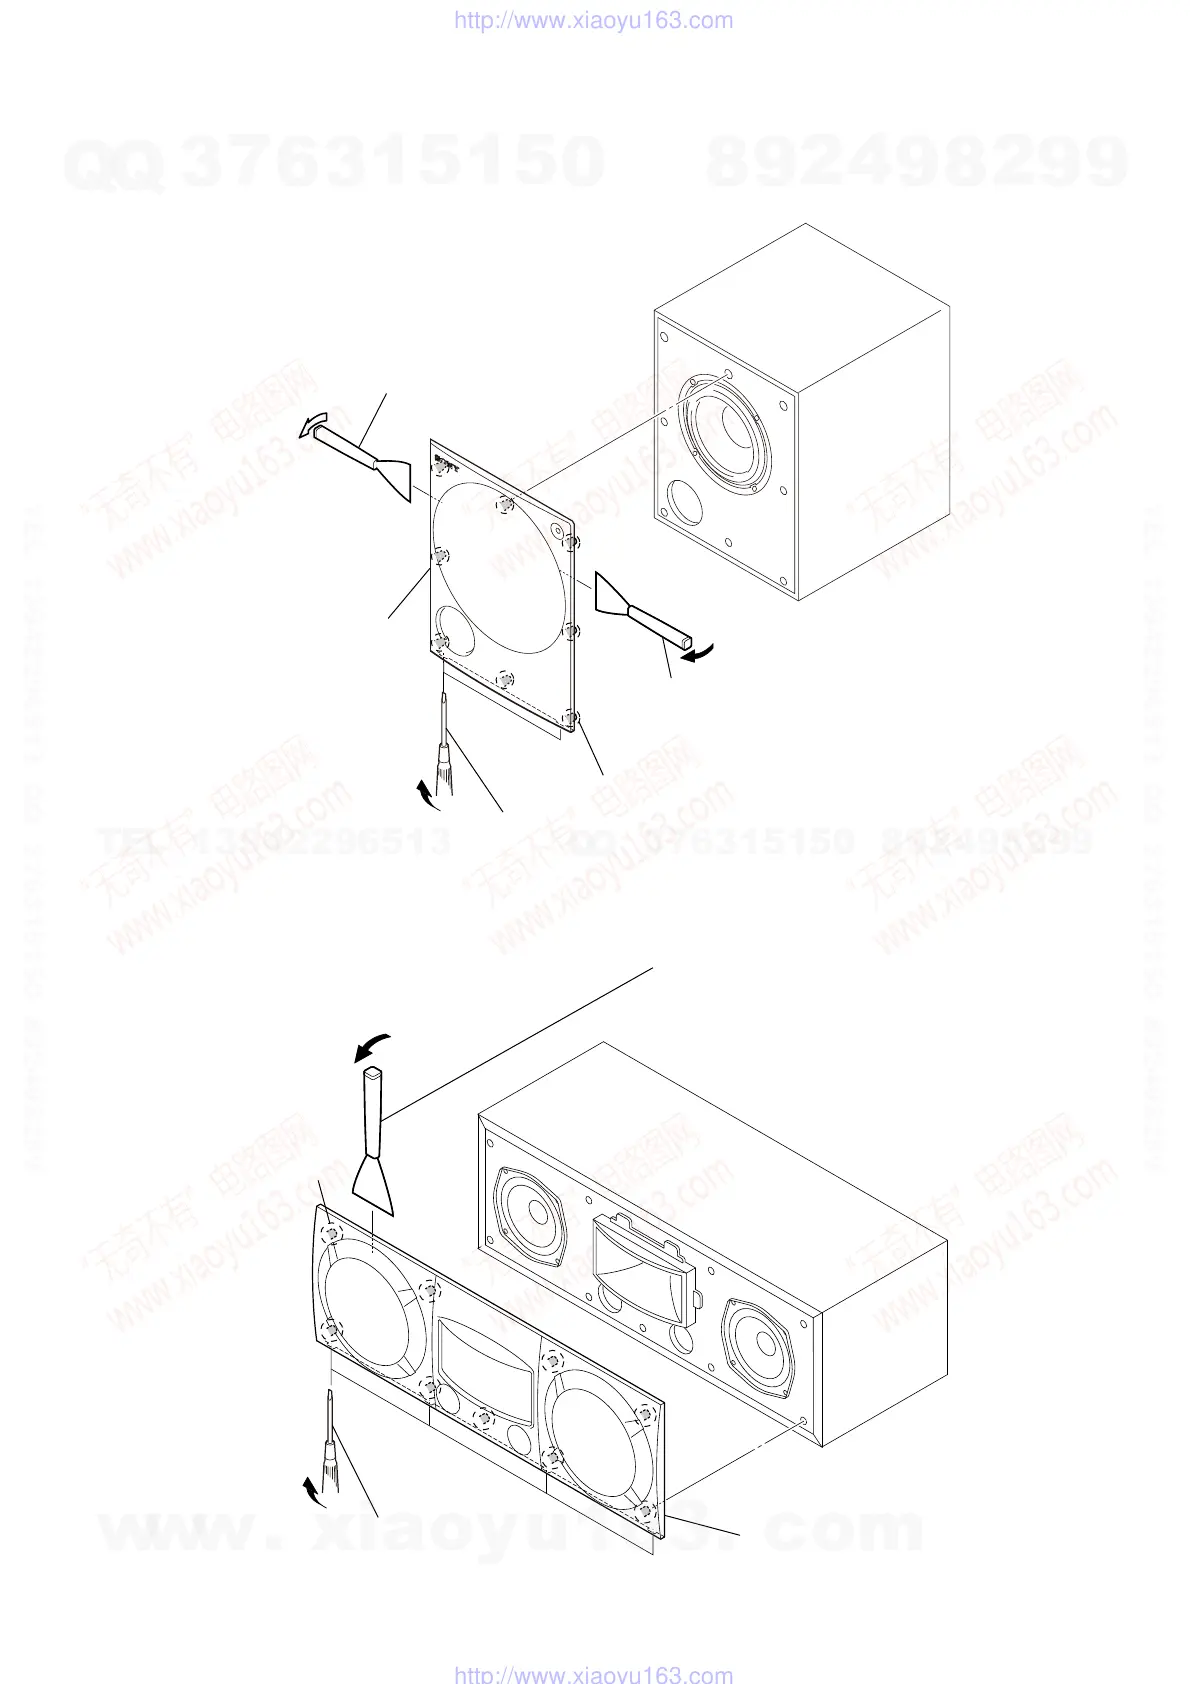
1-1. FRONT PANEL ASSY (SA-WP5000)
1-2. FRONT PANEL ASSY (SS-CNP5000)
Insert the jig (J-2501-238-A) into a space
and raise the front panel assy gradually.
Note: When using a jig, please work so as not
to injure front panel and speaker cabinet.
Insert the jig (J-2501-238-A) into a space
and raise the front panel assy gradually.
Note: When using a jig, please work so as not
to injure front panel and speaker cabinet.
eight bosses
front panel assy
Insert a flat-tip screwdriver into a recess
in the bottom of the set
to raise the front panel assy a little.
Insert the jig (J-2501-238-A) into a space
and raise the front panel assy gradually.
Note 1: When using a jig, please work so as not
to injure front panel and speaker cabinet.
Note 2: Please insert jig from a gap on the front
panel assy underside and expand the
surrounding gap in turn.
nine bosses
front panel assy
Insert a flat-tip screwdriver
into a recess in the bottom of the set
to raise the front panel assy a little.
w
w
w
.
x
i
a
o
y
u
1
6
3
.
c
o
m
Q
Q
3
7
6
3
1
5
1
5
0
9
9
2
8
9
4
2
9
8
T
E
L
1
3
9
4
2
2
9
6
5
1
3
9
9
2
8
9
4
2
9
8
0
5
1
5
1
3
6
7
3
Q
Q
TEL 13942296513 QQ 376315150 892498299
TEL 13942296513 QQ 376315150 892498299
http://www.xiaoyu163.com
http://www.xiaoyu163.com