6-3
6-1-2 Head Switching Point Adjustment
1) Playback the alignment tape.
2) Intermittently short-circuit the two Test Points on Main PCB while setting the adjustment mode. (See Fig. 6-2)
3) Press the “1, 0” buttons ; remote control adjustment operates automatically. (See Fig. 6-1)
6-1-3 NVRAM Option Setting
1) NVRAM Option is adjusted in the factory.
2) In case Main PCB Micom (IC601) and NVRAM (IC603 ; EEPROM) are replaced, be sure to set the corresponding option number of the
required model. (If the option is not set, the unit will not operate )
1) Intermittently short-circuit the two Test Points on Main PCB. (See Fig. 6-2)
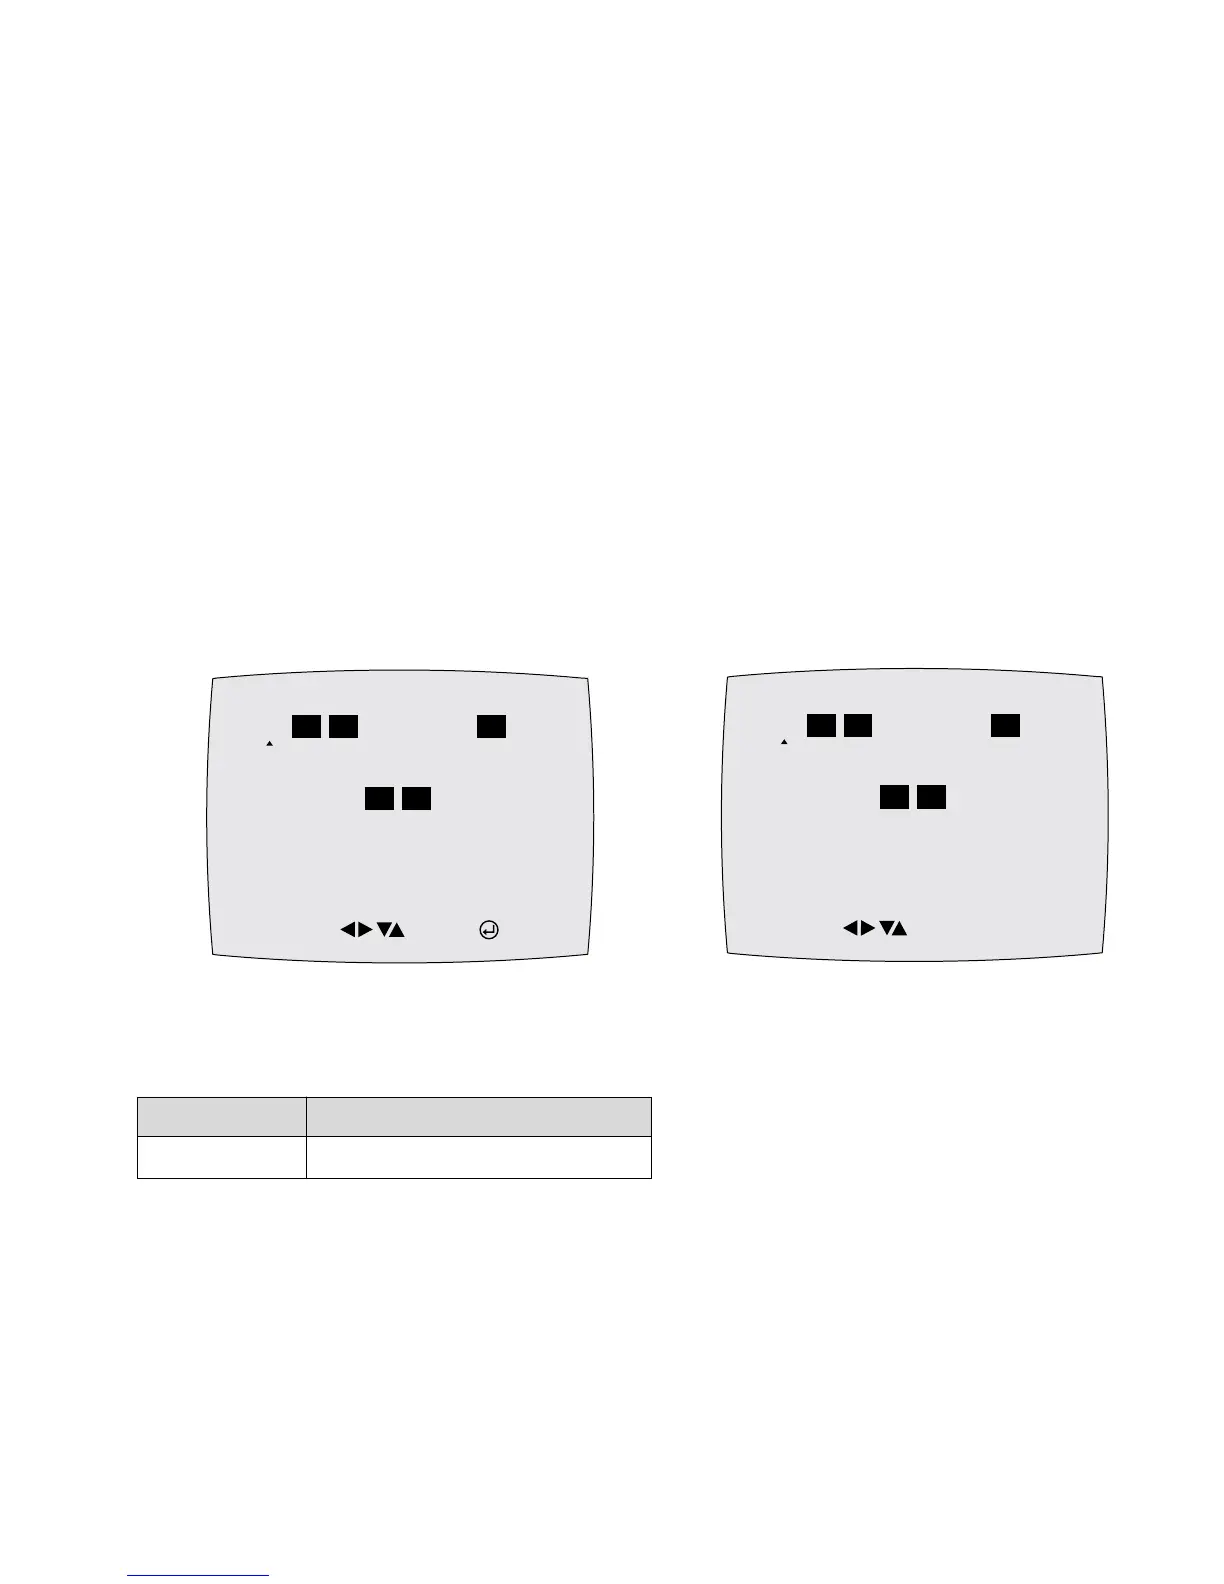
2) Press the “1, 4” buttons on the remote control, then option setting appears. (See Fig. 6-3)
3) Select the option number (See table 6-1) of corresponding model with “b, B, v, V” buttons on the remote control.
4) After selecting the option number is completed, press the “v” button of remote control.
(If “v” button is pressed, the selected number is changescolor. ; See Fig. 6-4)
5) Press the “ENTER” button of remote control again to store the option number.
6) Turn the Power off.
Fig. 6-3 Fig. 6-4
<Table 6-1 NVRAM Option Table>
MOVE : SAVE : ENTER
01 02 03 04 05 06 07 08
09 10 11 12 13 14 15 16
17 18 19 20 21 22 23 24
25 26 27 28 29 30 31 32
33 34 35 36 37 38 39 40
MOVE : COMPLETE
01 02 03 04 05 06 07 08
09 10 11 12 13 14 15 16
17 18 19 20 21 22 23 24
25 26 27 28 29 30 31 32
33 34 35 36 37 38 39 40
MODEL OPTION NUMBER
SLV-D300P 2, 3, 7, 20, 21



 To Next Page