86
Printing images directly using a PictBridge compliant printer
3 Select [OK] with V/B, then press
z.
The image is printed.
• Do not disconnect the cable for multi-use
terminal (DSC-W55) or remove the USB
cable (DSC-W35) while the
(PictBridge Connecting) indicator appears
on the screen.
To print other images
After step 3, select [Select] and the desired
image with v/V, then perform from step 1.
To print images on the index screen
Perform “Stage 1: Preparing the camera”
(page 83) and “Stage 2: Connecting the
camera to the printer” (page 84), then
proceed with the following.
When you connect the camera to a printer,
the print menu appears. Select [Cancel] to
turn off the print menu, then proceed as
follows.
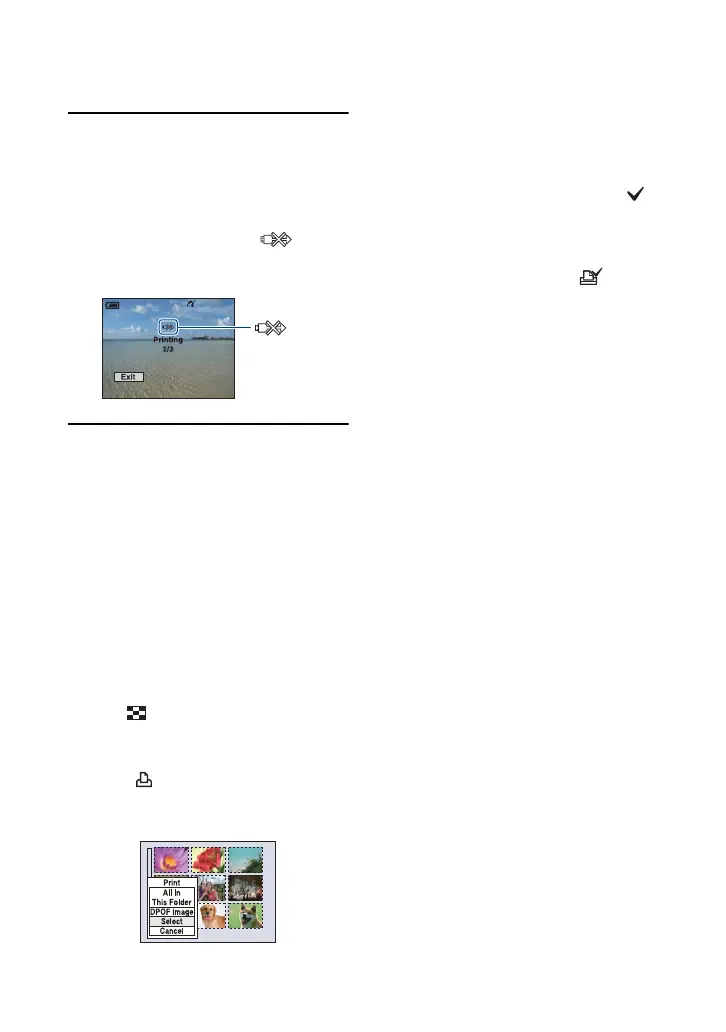
1 Slide (Index) lever.
The index screen appears.
2 Press MENU to display the menu.
3 Select [ ] (Print) with B, then press z.
4 Select the desired printing method with v/
V, then press z.
[Select]
Selects images and prints all the selected
images.
Select the image you want to print with v/
V/b/B, then press z to display the
mark. (Repeat this procedure to select
other images.) Then, press MENU.
[DPOF image]
Prints all the images with a (Print
order) mark regardless of the displayed
image.
[All In This Folder]
Prints all the images in the folder.
5 Perform steps 2 and 3 of “Stage 3:
Printing” (page 85).
indicator