REMOVAL OF ORIGINAL HEAD UNIT
STREET GLIDE
To prevent accidental vehicle start-up, which could cause death or serious injury,
remove main fuse/battery cables before proceeding.
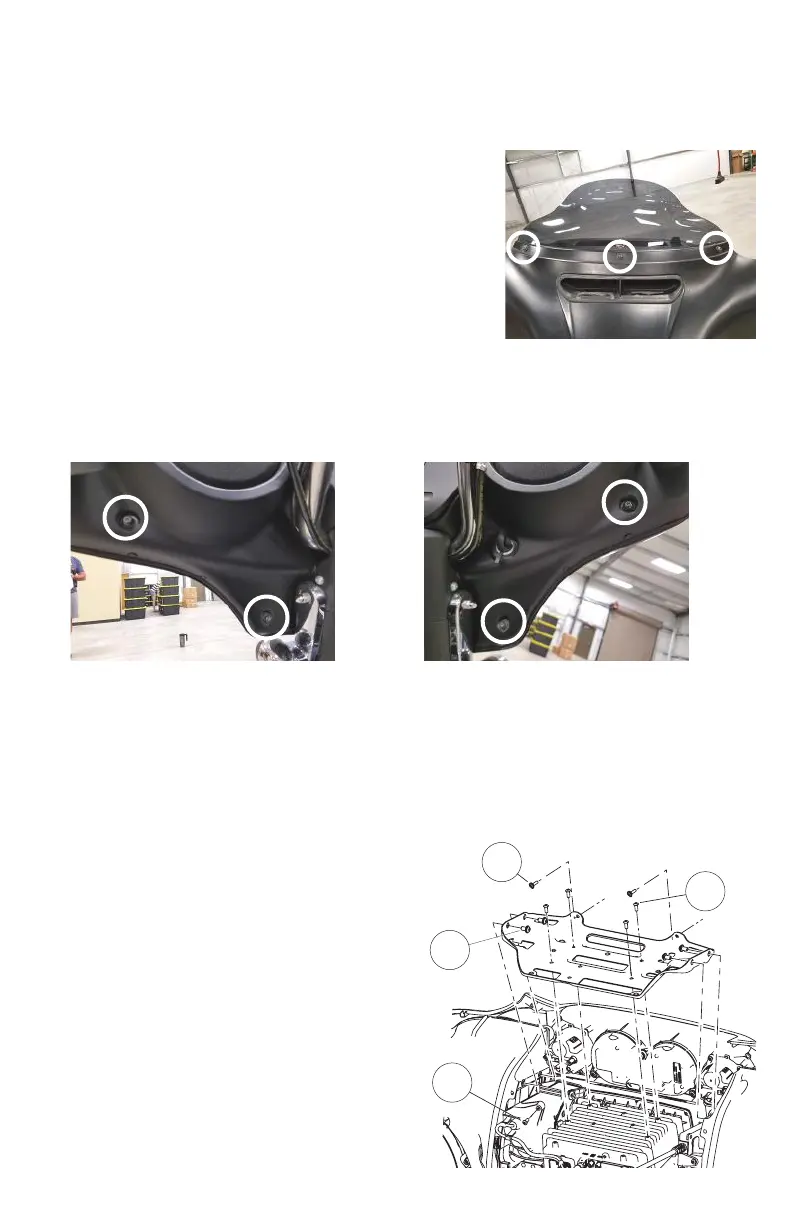
1. Remove three outer fairing bolts using a T27 Torx screw driver.
The three outer fairing bolts are located below the windshield.
Remove the windshield, store it and the screws removed in a
safe place for re-installation later.
TIP: Reinstalling the center screw after removing the windshield
will prevent the outer fairing from falling during the next step. A
few turns by hand will be sucient.
2. Remove four inner fairing bolts using a T27 Torx screw driver. The four inner fairing bolts are located
adjacent to each turn indicator mounting bracket and below/adjacent to each speaker. Store these
screws in a safe place for re-installation later.
3. While straddling the front wheel fender, grasp the outer fairing, remove the center outer fairing bolt
from the previous step, then gently pull the fairing apart from the bike. With the fairing slightly pulled
away from the bike, disconnect wire harness for the headlamp and any other accessories. Lay the
fairing on a protected at surface to prevent damage.
4. Remove upper support bracket. Removal of the
upper support bracket requires removing 11 screws:
4.1) remove two screws attaching the
bracket to each speaker enclosure (1)
4.2) remove two screws attaching the
bracket to the inner fairing adjacent to
the gauge cluster (2)
4.3) remove four screws attaching the
bracket to the head unit chassis (3)
4.4) Remove one screw attaching the
bracket to the media compartment (6)
3
1
4
2