Ambulatory Blood Pressure Monitor 90217 Service Manual
2-8
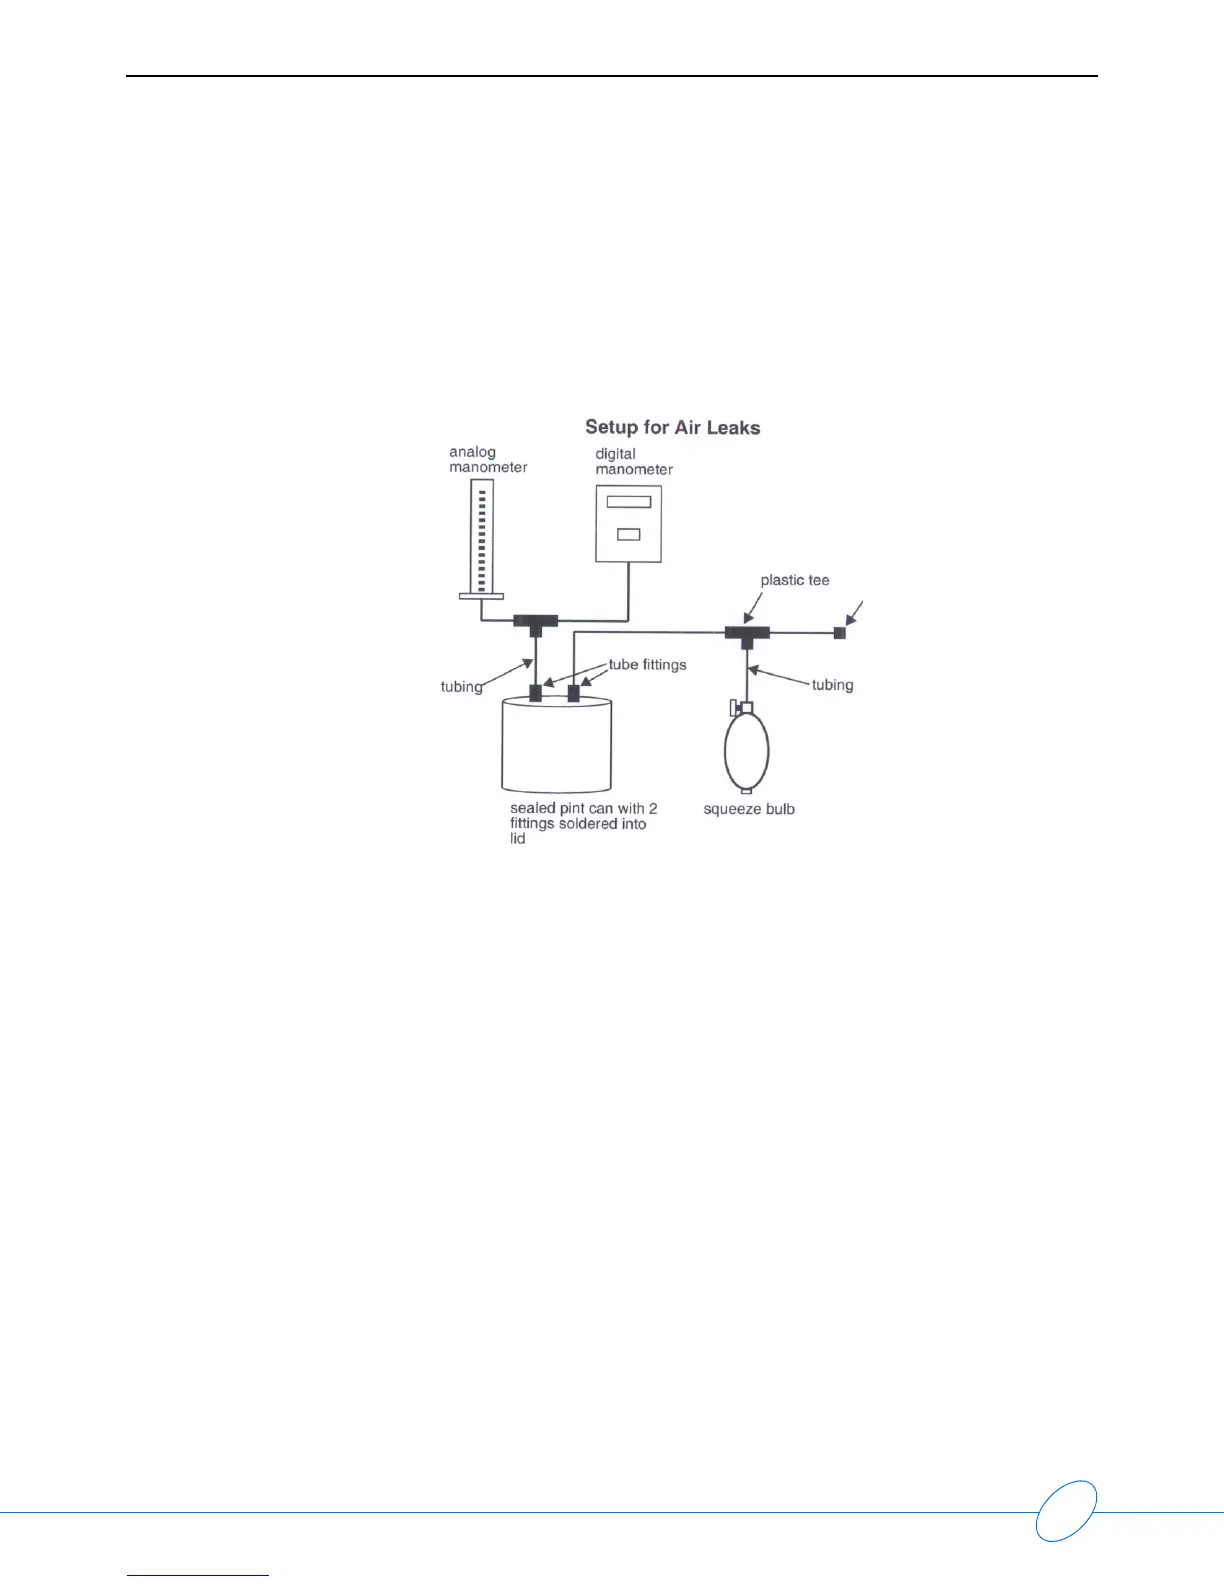
Air Leak Test
1 Connect the test setup illustrated below.
Note:
This figure shows the use of both an analog and digital manometer. Both or either can
be used in these tests. If only one manometer is used, block off the unused hose.
2 Close the squeeze bulb valve.
3 Turn ON the 90217 and press the START/STOP button.
4 Verify the following monitor response:
• Two beeps are sounded.
• The display counts down: 5555, 4444, 3333, 2222, 1111.
• Pumping begins and “_ _ _ _” is displayed (could display the pump pressure, depending
upon how the monitor was initialized).
5 Verify that the system pumps up to 165 mmHg, ±8 mmHg, before the pressure begins to drop
in 7 to 9 mmHg steps. Ensure that the pressure does not drift down.
Note:
It may take 3 or 4 steps before the cuff size is learned by the monitor and the steps fall
within this range.
6 Verify that the display reads EC18.
7 Open the bulb valve and remove the monitor from the manometer setup.
fitting