Page 12 Seaich Corporation, LLC. All rights reserved. www.seaich.com
|
Spacerails, LLC. www.spacerails.com
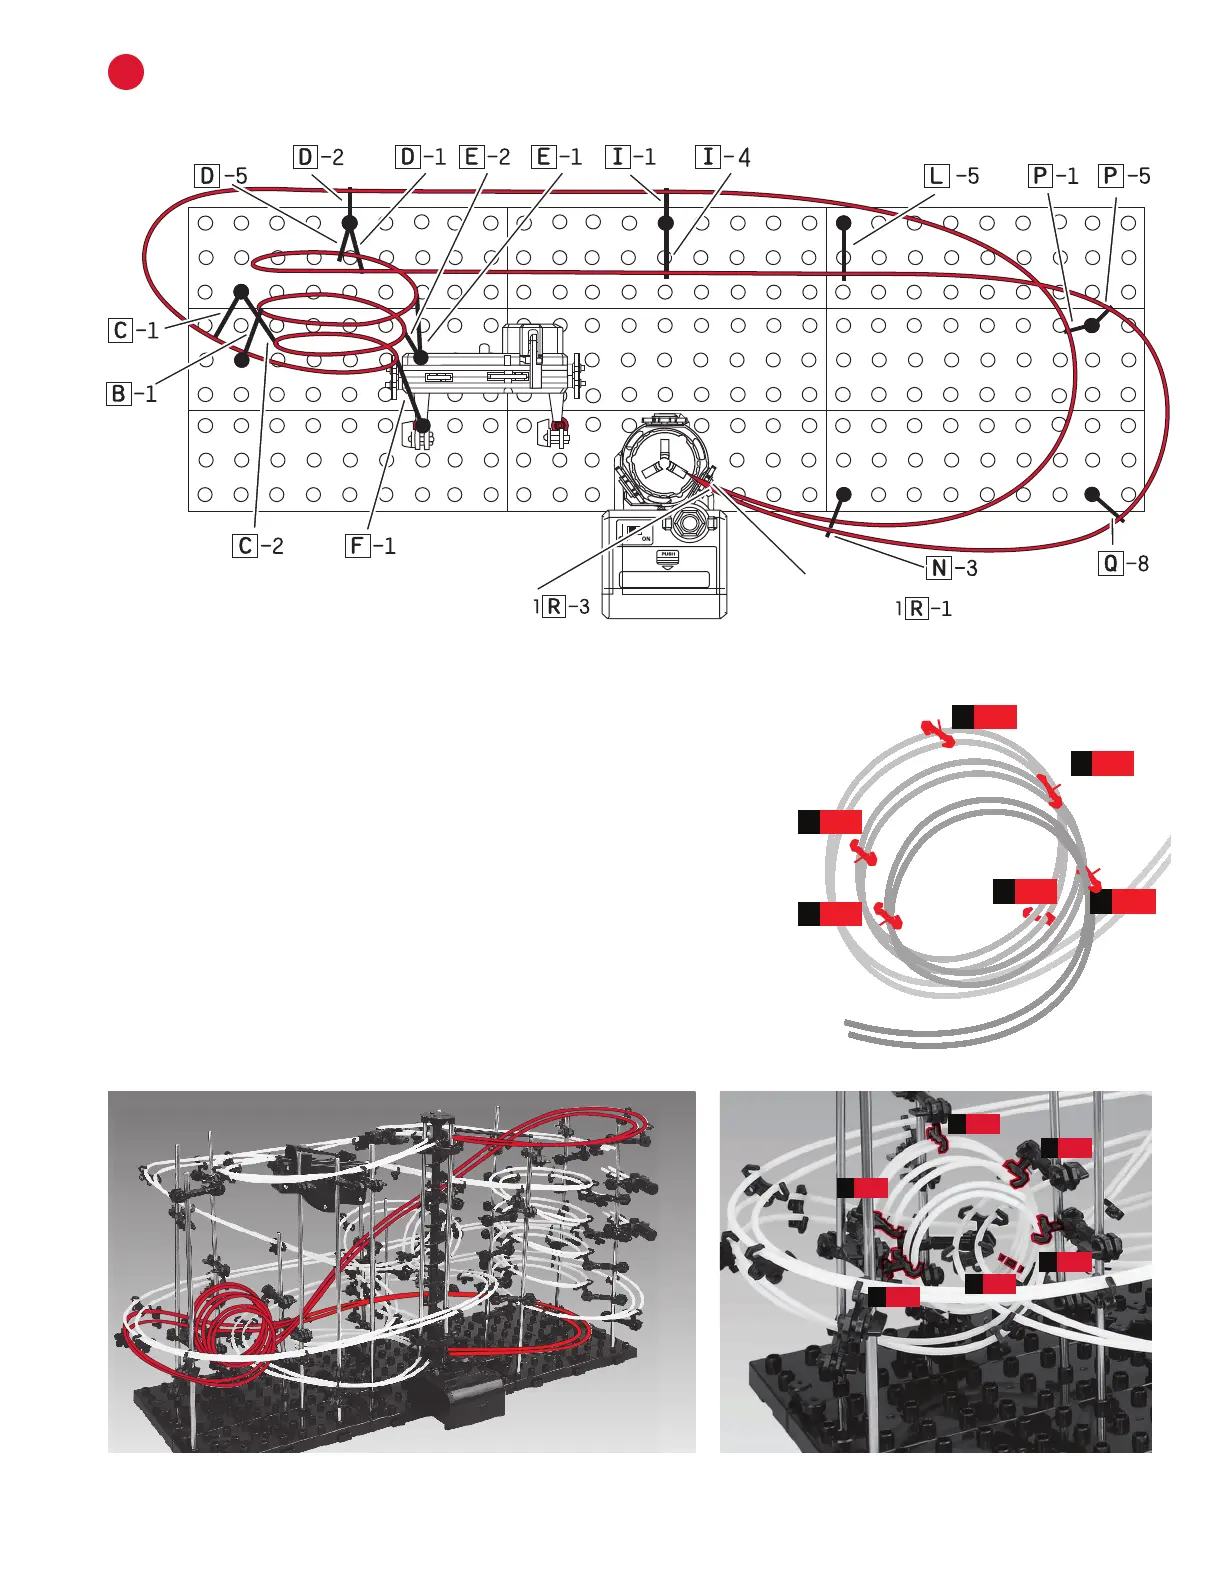
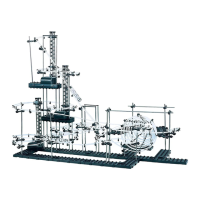
Use the following illustrations and pictures as references for attaching the rails to the structure:
INSTALL RAIL A
A
Step 1: Install one side of a rail at a time. Starting at the top right Elevator
Ring (1R-1) connect Rail A (300 cm) to Rail Clip. Curving rail, connect to
Arm P-1. Continue the curve and connect to Arm I-1 then, keeping rail
tight, connect to Arm D-1. Curve rail and connect to C-1. Attach Rail Clips
every 8-10 cm along rail to maintain stability and keep rails parallel.
Step 2: Begin the Loop. You will need to angle arms and Arm Clips to
create loop as shown below. Starting at Arm F-1 loop rail and attach at
C-2 then E-2 to create a circular shape. Continue with B-1, E-1, D-5, then
D-2. You should now have 3 complete loops.
Step 3: Keeping rail tight, connect to I-4, then L-5. Curve rail and attach
to P-5, Q-8, N-3, and then nish at Elevator Exit (R-3).
Fine Tune: Once each rail Section is completed run a Marble down your
course and make sure it travels well. Make any adjustments as needed.
The Loop will need to be adjusted and the rail angles tweaked.
D-56
F-1
1
C-2
2
E-1
5
B-1
4
E-2
3
D-5
B-1
F-1
E-1
E-2
C-2
6
1
3
2
5
4
Rail A Loop
Elevator Exit
Elevator Entry