Seaich Corporation, LLC. All rights reserved. www.seaich.com
|
Spacerails, LLC. www.spacerails.com Page 13
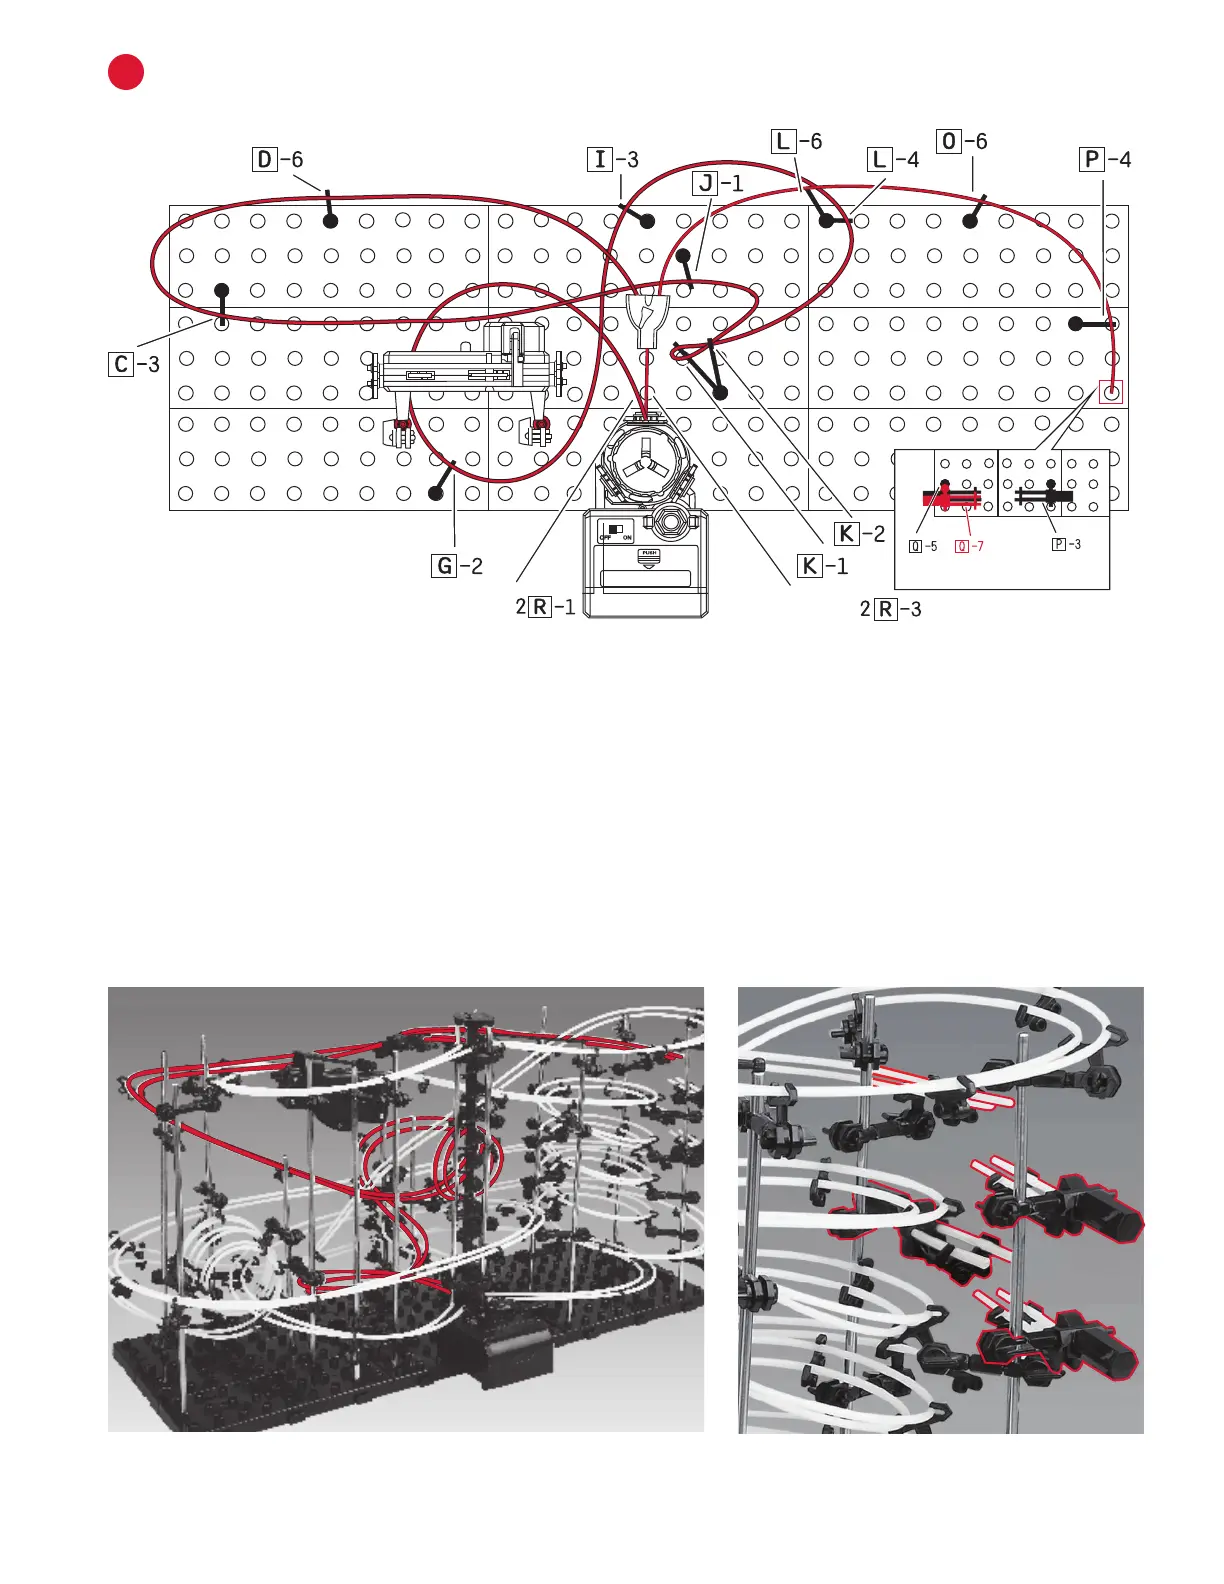
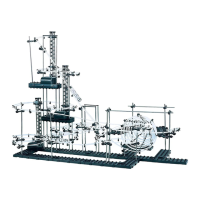
INSTALL RAILS B, C, AND DB
Step1: Starting at the top center Elevator Ring (2R-1) connect Rail B (5 cm) to Rail Clip. Connect the other
end to the Rail Splitter. The Rail Splitter will not be held up by a shaft.
Step2: Connect Rail C (45 cm) to the right side of the Rail Splitter. Curve the rail and Connect to L-6, then
O-6, then P-4. Rail will end above the two See-Saws. You can use a Marble to adjust the See-Saws. The
Marble should fall onto each See-Saw Arm and tip the See-Saw forward, falling onto the one beneath it.
Step 3: Connect Rail D (200 cm) to the left part of the Rail Splitter. Continue rail to D-6 and curve around
to connect to C-3. Continue in a downward slope to J-1, then loop rail and attach to K-2 then K-1.
Step 4: Continue rail in a curve and attach to L-4, then I-3. Curve rail the opposite way and connect to
G-2, under the Start Block, and nish at Elevator Exit R-3.
Rail B, C, and D See-Saws
Seesaw
Elevator Exit
Elevator Entry