The structure of this directory is critical – it should look something like
“Arduino/hardware/[manufacturer]/[architecture]”, in this case
[manufacturer] is “sparkfun”, and [architecture] is “avr.”
There’s a lot going on in that addon, but one of the most important files is
‘boards.txt’, which will add a few new entries to your ‘Tools > Board’ menu.
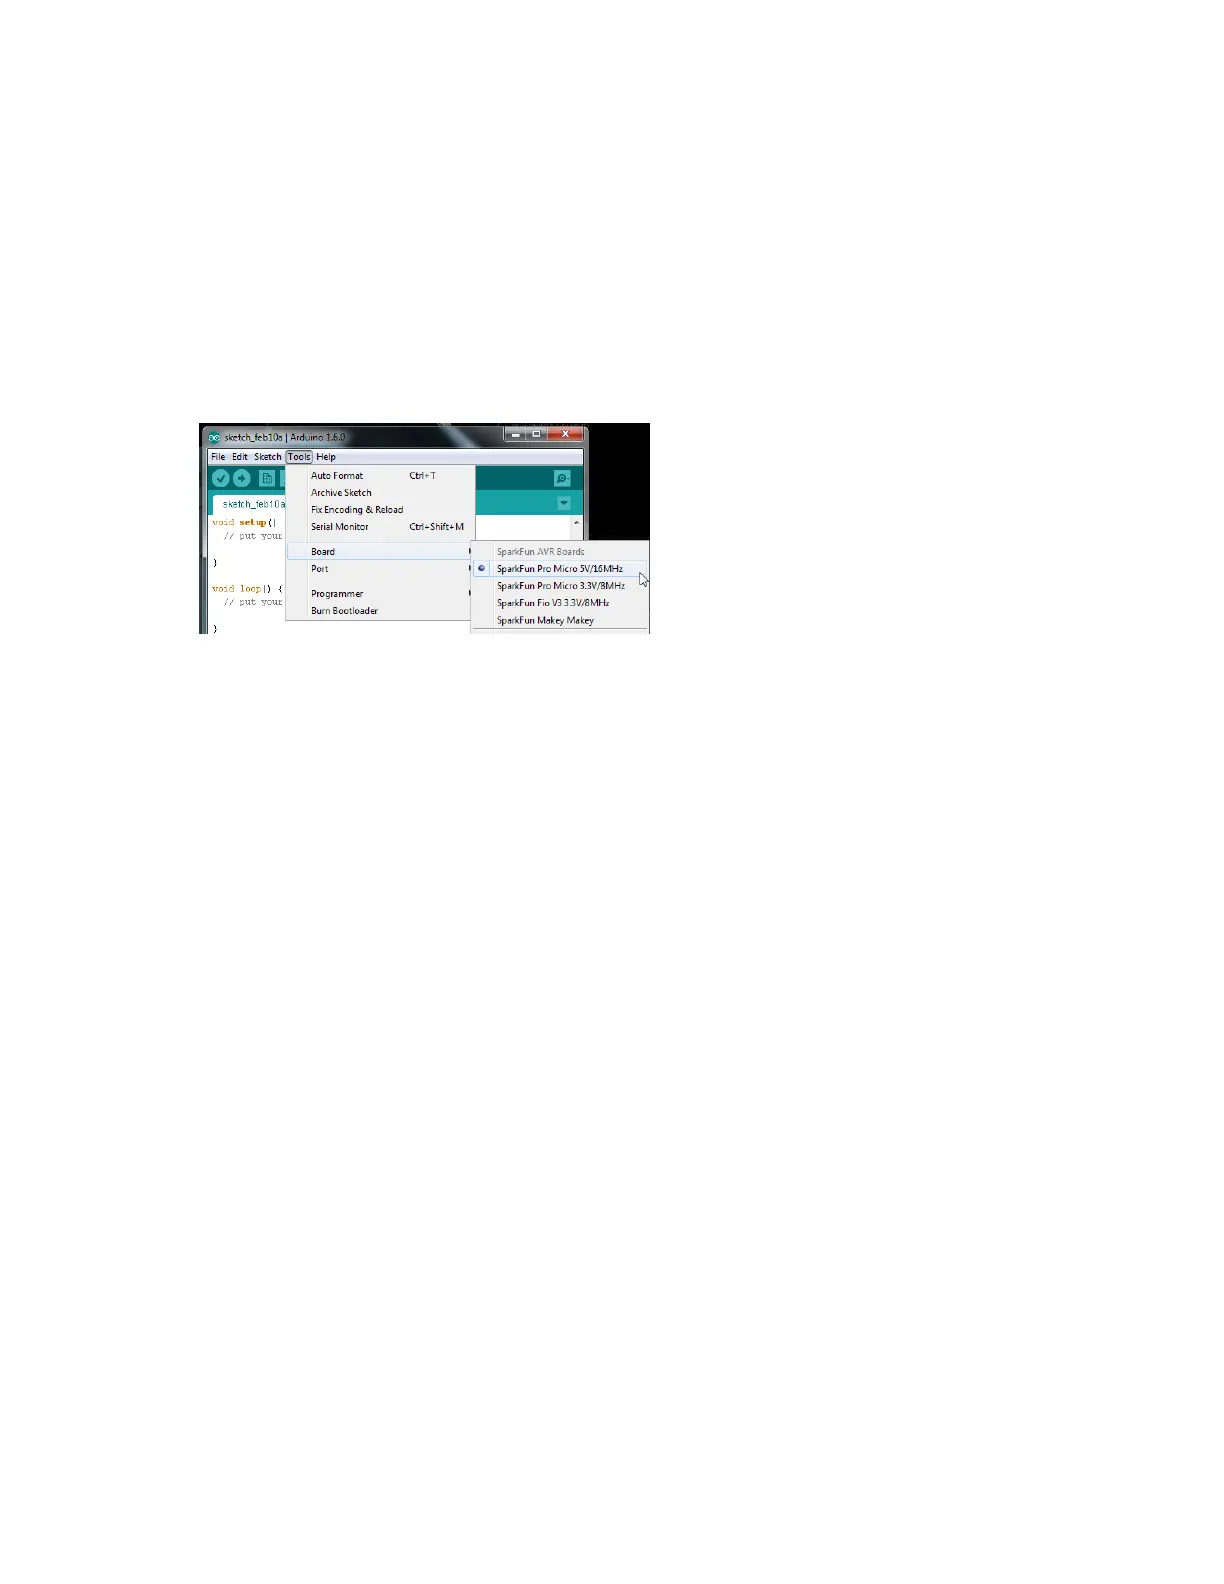
To double-check that the board definitions have been added to Arduino,
open up Arduino, and check under the ‘Tools > Board’ menu. There
should be some new entires for ‘SparkFun Pro Micro 8MHz/3.3V’,
‘SparkFun Pro Micro 16MHz/5V’, and other 32U4 boards.
Notice there are two options for Pro Micro - 8MHz and 16MHz. It’s very
important that you select the Pro Micro option that matches your
board’s voltage and speed. Don’t know which board you have? Check the
bottom of the board, where you should find either a ‘5V’ or ‘3.3V’ box
checked.
You should also see your Pro Micro’s COM port under the ‘Tools > Serial
Port’ menu. Select it, and head over to the Example 1 page where we’ll
upload our first piece of code.
Installing: Mac & Linux
If you’re using Mac or Linux, follow the steps below to get your Pro Micro
(or Fio v3) ready to go on your computer. We’re not going to name names
here, but installing the Pro Micro on Mac OS X and Linux is a lot easier
than on other OS’s…
Following these directions is critical to getting your Pro Micro supported
within your Arduino environment!
Board Installation
When you initially plug your Pro Micro into a Mac, it’ll pop up a “Keyboard
Setup Assistant” window. This stems from the Pro Micro’s ability to emulate
an HID USB device (e.g. keyboards and mice) – the Mac thinks your Pro
Micro is a human input device (which it could be! but isn’t yet).
Page 1
of 2