SpectraPure
®
Inc
. Fax 480.894.6109 Fax us toll-free 1.877.527.7873
sales@spectrapure.com www.spectrapure.com
13
SpectraPure
®
5. If you are replacing the tubing assembly, remove the tubing from
the pump head as shown in Fig. B-4. Replace the tubing assembly
with a new tubing assembly. Reinstall by firmly inserting the tubing
into the outlet port of the pump head as far as possible. (Fig. B-5)
6. Pinch the other end of the tubing and insert it through the slot at
the inlet port of the pump body. Manipulate the tubing so that it
conforms to the inside diameter of the pump body. Be sure that the
tubing is completely pushed down into the output port so the tie-
wrap is within 1/16" of the pump body and the plastic “wear strip”
is positioned to the inside so the rollers will contact the wear strip
evenly. (Fig. B-6)
7. Place two of the three rollers into the pump body, pushing them
against the tubing. (Fig. B-7) Hold them in position with your left
thumb and then push the third roller into place. (Fig. B-8)
8. Carefully line up the locator pin with the slot in the inlet port. (Fig.
B-9)
9. Press the pump head firmly against the pump plate and check for
proper alignment. (Figs. B-10 and B-11) Use the 3/32" Allen Hex Key
to reinstall the three pump head bolts. (Fig. B-12)
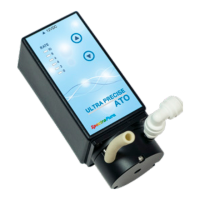
10. Replace the union connector on the output port stud. The final
assembly should look like Fig. B-1.
11. Run the pump dry for 20 minutes. Be sure to observe the rollers
revolving around the rotating motor shaft through the hole in the
end
of the pump head.
SERVICING THE PUMP MODULE: (continued)
(continued on next page)