1. After installing the viewfinder onto the OTA,
the viewfinder and OTA are not yet aligned.
You may not see the same object through the
eyepiece and the viewfinder. Aligning the OTA
with the viewfinder is a necessary step before
using the telescope.
2. Point your telescope at a stationary object at
distance. A STOP sign, a light pole are some
objects that often used for alignment purposes.
Use the eyepiece with the lowest power and
look through the eyepiece. Center the object
in the eyepiece and focus image.
3. Turn on the red dot viewfinder by turning the
knob in the front of the viewfinder (shown in
Fig.15).
4. By turning the knob on the right side of the
viewfinder, the red dot can be moved left and
right. By turning the knob of the back of the
viewfinder, the red dot can be moved up and
down.
5. Move the red dot so that the red dot overlaps
the object you have centered in the eyepiece.
6. You may need to repeat the same object at
night to furthermore align the OTA and
viewfinder by pointing the telescope at a bright
star or the Moon.
SETTING UP
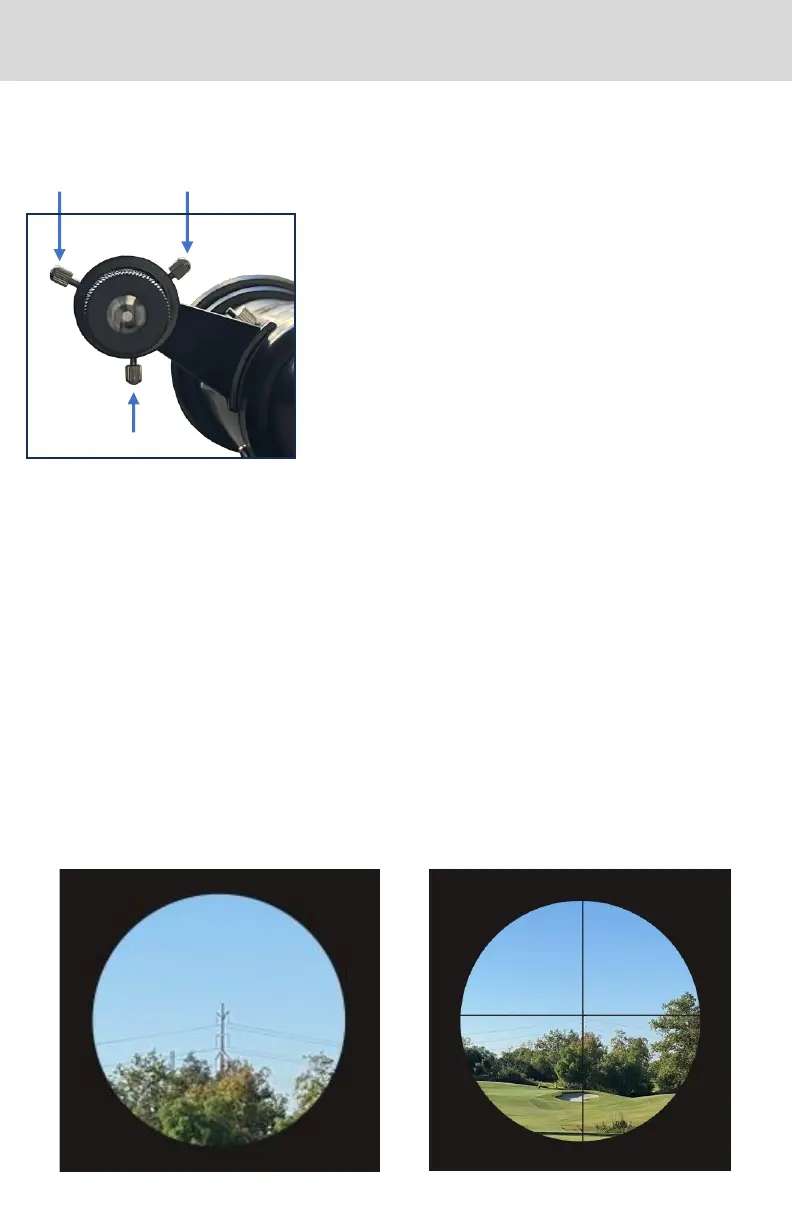
FIG.13
FIG.14 view through eyepiece FIG.15 View Through Viewfinder
Aligning Viewfinder
1. After instal ling t he view finder onto t he OTA, t he view finder and OTA are not y et
2. Point your telescope at a stationary object at distance. A S TOP sign, a light pole
3. The viewfinder can be moved around by adjusting the three adjustment screws.
(See Fig.13)
4. To move the viewfinder up and down, loosen the two upper screws slightly to
allow up-movement. Then tighten/loosen the lower screw slightly to move the
viewfinder down/up. Retighten the upper screws to a firm feel.
5. To move the viewfinder left and right, loosen one of the two upper screws and
tighten the other one. Loosen the upper right/upper left screw and tighten the
upper left/ upper right to move the viewfinder left/right.
6. The same object should be centered in the viewfinder and eyepiece when
alignment done correctly. (See Fig. 14 & Fig.15)
9
ASTROLITE TELESCOPE
 Loading...