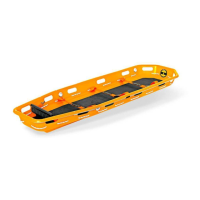
13
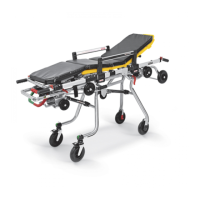
• Engage the right red lever (letter E par.10) to unlock movement of the front legs while continuing to push the stretcher inside the vehicle
until the rear legs are brought to a stop.
• Only after making sure that the rear legs are in contact with the bumper of the vehicle, engage the green lever to release the rear legs,
continuing to push towards the inside of the vehicle compartment.
During these operations, a part of the weight of the assembly will rest on the operator, who must therefore be able to support and
accompany all device movements.
• Lock the stretcher on the medical vehicle using the Spencer fixing system installed on the vehicle.
Warning: DURING NORMAL STRETCHER MOVEMENTS, NEVER ENGAGE THE LEG LOCKING LEVERS, AS DOING SO COULD CAUSE THE
STRETCHER TO FALL TO THE GROUND. THESE LEVERS MUST ONLY BE ENGAGED TO LOAD THE STRETCHER ON THE AMBULANCE OR TO
REACH THE INTERMEDIATE HEIGHT AS DESCRIBED ABOVE.
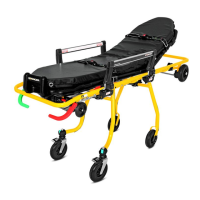
To unload the stretcher from the medical vehicle:
• If the stretcher is used with the Sensor Lock fixing system, release the stretcher by engaging the rear leg unlocking lever on the stretcher -
Image P32.
• If the stretcher is used with the S-MAX or R-Max fixing system, the release must be made manually by pushing the unlocking lever on the
fixing system.
• If the stretcher is equipped with a mechanical Sharp system, push the stretcher forward slightly and engage the corresponding control.
• Pull the stretcher towards the outside of the vehicle, gripping the rear part of the frame near the footrest. Support the weight of the
stretcher until you feel the rear leg locking system engage. As with the loading phase, the operator must be able to support the weight
of the device.
Do not grab the footrest or any other area not intended for handling as this may cause damage to the operator, the patient or the device.
• Pull the stretcher outwards until the front legs are fully open. Do not lower the loading trolley from the loading surface until you have
checked that the front leg locking system is properly engaged.
• Finish extracting the stretcher from the vehicle.
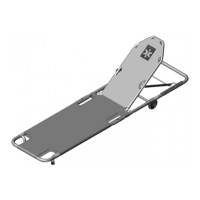
11.9 Trendelenburg Board – Image P33
If your stretcher has a Trendelenburg position, lift the patient board by grasping the footrest and pull the selection lever shown in the
illustration outwards into one of the grooves. There are 3 different possible inclinations in addition to the horizontal one.
Cross Chair Trendelenburg position – Image P34 and P35
The device is equipped with a mechanism that allows the patient bed to be placed in the Trendelenburg position if the device is used in a
stretcher configuration. To reach this position, lift the end of the board by grasping the two rings at its end.
Ensure that the set screw is properly seated in its socket before releasing the rings.
To change from the Trendelenburg position to the standard position, lift the patient bed slightly by grasping the end of the frame, check that
the set screw is out of its socket, and then support the frame as it goes back down to the horizontal position.
11.10 Trendelenburg/Fowler Board – Image P36
If present, the Trendelenburg/Fowler movement allows the stretcher board to be raised in different positions, thus raising the patient's
lower limbs.
Changing the board inclination from horizontal to Fowler position:
If the stretcher allows board positioning in the Fowler position, lift the intermediate part near the patient's knees so that the pins on the
sides of the patient bed are positioned in the slot of the metal rod closest to the sidebars. Make sure that the pins are properly inserted and
attached to it, thus guaranteeing the stability of the bed in this position.
Changing the board inclination from horizontal to Trendelenburg position:
With one hand, support and raise the board by gripping the footrest, select the Trendelenburg position by placing the screw in the board in
the slot of the metal rod closest to the control handle. Make sure that the screw inserts into the correct housing and is attached to it.
11.11 Backrest adjustment – Image P37
Always inform the patient before making adjustments.
Changing the backrest inclination from a horizontal to vertical position:
Lift the backrest until the first position is reached, where the backrest will automatically lock. Follow the same procedure to reach the next
positions, always checking the correct engagement of the locking system.
Changing the backrest inclination from a vertical to horizontal position:
Support the backrest with one hand (to prevent unexpected movements) and take away the weight from the backrest by moving it upward.
At the same time, pull the knob on the backrest piston upward until the safety mechanism unlocks. Then, supporting it with the other hand,
lower the backrest toward the horizontal position until you reach the desired height and then release the knob to the rest position.
To reach subsequent positions, lift and support the backrest. Always lift the weight of the backrest before pulling the knob. Incorrect
procedure could permanently damage the backrest piston.
In Cross Chair, when in chair mode, it is always necessary to bring the backrest into a position parallel to the frame.
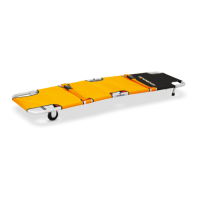
11.12 Changing the stretcher length (Cross and Crossover only) – Image P38 and P39
The maximum length of the stretcher can be reduced as follows to facilitate bringing the Spencer Cross stretcher in especially confined
spaces (i.e. lifts):