IM-P713-01 CTLS Issue 1
21
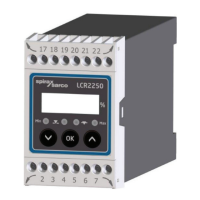
AEL7 Series Electric actuator
4.2 Removing the Actuator Cover
Remove cover retaining nut (and gasket when fitted) (16 mm A/F socket). For 1-6 kN actuators, hold both of
the actuator pillars at the top. Using your thumbs gently ease the lid off.
For 8kN+ actuators, the cover will require a gentle anti-clockwise movement at the same time as a linear
force to raise the cover from the actuator.
Note: When replacing the cover ensure that location thread and cover are correctly aligned.
Gently lower the actuator cover until it meets the ingress seal. Firmly press down the actuator
cover with a small clockwise movement of the cover to ensure correct engagement. Refit
gasket and top nut and tighten.
4.3 Making the Electrical Connection
A terminal diagram for the actuator can be found inside the actuator cover and this issue of the Installation
and Maintenance Instructions. The operator is responsible for ensuring that safe systems of operation and
practice are implemented and maintained and the installation and maintenance instructions should form part
of the standard operating procedures for maintenance and must therefore be kept in an accessible location
and in a legible condition.
With the actuator coupled to a valve as described in Section 3, the actuator spindle in the fully extended
position, the power supply safely isolated and the actuator cover removed
-
Fit the correct cable gland for the location and remove the blanking plate (the AEL7 Series actuator is
supplied with metallic cable glands that conform to IP65 enclosure ingress protection assuming that the
correct diameter of cable is installed. If these are removed and replaced for any reason, these must be
recycled responsibly).
-
Feed the electrical power supply cable through the cable gland until enough length exists within the
actuator to make all of the necessary connections easily.
-
Mark the power supply cable approximately 10 mm above the actuator base plate, remove from the gland
and carefully strip the outer casing and wrapping. Dispose of the waste responsibly.
-
Strip the individual cores at a length of approximately 5mm from the end, and once the correct lengths
of the individual cores has been established, the ends should be crimped with the correctly sized and
insulated crimp terminals (flat or pin type).
-
Guide the cores of the power supply cable through the gland sleeve and gland, and connect the cores
to the actuator terminals as identified in the terminal diagrams below (or in the hood of the actuator)
taking care to ensure that the routing of the cores protects them from damage of moving parts or from
damage when replacing or removing the actuator cover.
 Loading...