IM-S24-15 CH Issue 4
15
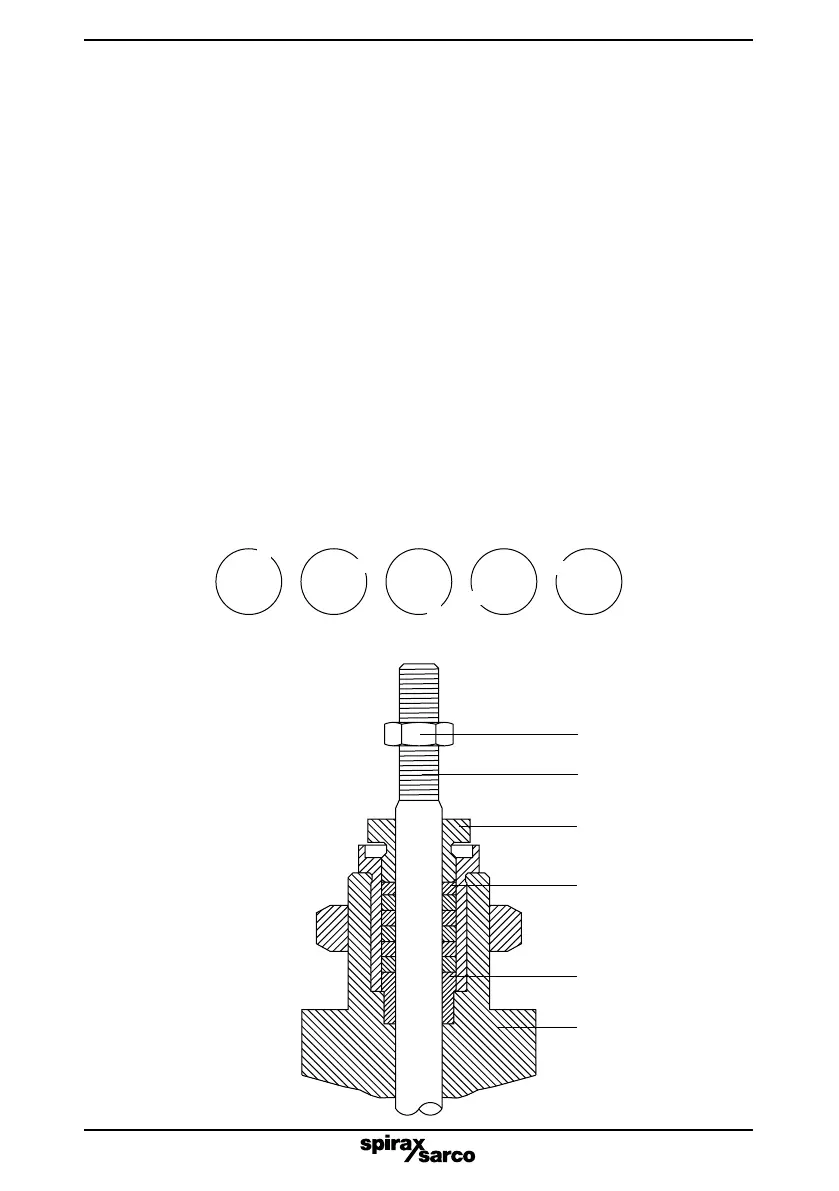
4.3 Procedure for renewing graphite gland seals
- Isolate the valve on both sides.
- Remove the actuator from the valve. Refer to the Installation and Maintenance Instructions
covering Spirax Sarco actuators.
Caution: Care should be taken in removing the bonnet since fluid under pressure may be
trapped between the isolating valves.
- Remove the lock-nut (7).
- Unscrew the bonnet nuts securing the bonnet to the body and remove the bonnet (2)
complete with the plug /stem assembly.
- Unscrew the gland nut (8). Withdraw the plug / stem assembly, remove and discard the
gland seal set (10 + 15), and gasket from the bonnet.
- Examine the parts for signs of damage or deterioration. Note that score marks or scaly
deposits on the valve stem (5) will lead to early failure of the seals.
- Clean the parts taking care to avoid scratching the stem or bore of the gland nut.
- The replacement graphite gland seal should now be fitted. Note that the gland seal set
contains a top and bottom support ring and a graphite pack. The order of the graphite pack
should be maintained as supplied during the fitting procedure. Place the bottom support
ring into the bonnet. One by one add the graphite rings and each time use the gland nut (8)
to drive the ring down into the bonnet. Ensuring the junction of the ring ends are rotated by
90°. Leave the gland nut loosely assembled so that the seals are not compressed.
7
5
8
10
15
2
Ring 1 Ring 2 Ring 3 Ring 4 Ring 5
Fig. 3
 Loading...