IM-S24-15 CH Issue 4
20
Valve size
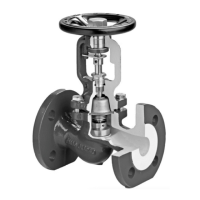
Seat (4) Bellows housing Bellows lock-nut
KE LE
nuts (13) (8)
DN15 ½" 205 (150) 40 (55) 16 (25) 25 (35)
DN20 ¾" 205 (150) 53 (72) 20 (30) 25 (35)
DN25 1" 180 (245) 90 (122) 25 (35) 25 (35)
DN32 1¼" 180 (245) 130 (176) 40 (55) 25 (35)
DN40 1½" 180 (245) 220 (300) 40 (55) 25 (35)
DN50 2" 180 (245) 180 (244) 60 (80) 25 (35)
DN65 2½" 220 (300) 300 (405) 47 (65) 40 (55)
DN80 3" 220 (300) 400 (545) 55 (75) 40 (55)
DN100 4" 220 (300) 600 (815) 45 (60) 40 (55)
DN150 6" 500 (678) - - -
DN200 8" 500 (678) - - -
Table 2 Recommended tightening torques N m (lbf ft)
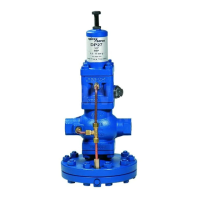
4.7 Procedure for renewing the valve plug, seat and bellows
assembly (Figure 7)
Note: Due to the delicate nature of the bellows assembly, it is highly recommended that for
renewal of the stem / bellows assembly, valve plug and /or seats, the complete valve is returned
to Spirax Sarco service department.
- Isolate and remove the valve from the pipeline.
Caution: Care should be taken in removing the valve since fluid under pressure may be
trapped between the isolating valves.
- Remove the actuator from the valve.
Note: take care not to rotate the valve stem when removing the actuator from the valve,
since this will destroy the bellows. Refer to the Installation and Maintenance Instructions
covering Spirax Sarco actuators.
- Remove the lock-nut (7).
- Unscrew the nuts (13) securing the bonnet.
- Withdraw the bonnet (2) together with the plug stem / bellows assembly (5). Remove the
gland nut (8), gland nut gasket (6) and the stem seal set (10 + 15) see Figure 7. Unscrew
the plug / stem / bellows assembly lock-nut (25) and anti-rotation screw (22) withdraw the
assembly from the bonnet.
- Unscrew and remove the valve seat (4).
Note: To remove and replace seat (4) a special tool is required which can be obtained
from Spirax Sarco by quoting the valve size and type.
- Replace seat gasket (16) and insert the new seat (4) into the body. Tighten to the
recommended torque (see Table 2, below).
- Insert the new stem / bellows assembly into the bore of the new plug and secure with the
cross pin (24). The pin should be centralised within the plug and should be retained by
deforming the metal around the pin hole by peening. Care should be taken to ensure that no
metal is raised on the surface of the plug diameter - any raised metal should be removed.
- Insert the replacement plug / stem / bellows assembly (5) with new bellows flange
gasket (21) and bonnet gasket (12) into the bonnet (2) taking care not to damage the bellows.
Replace the bellows assembly anti-rotation washer (20) and lock-nut (25) and tighten to
the recommended torque (see Table 2, below).
 Loading...