26
Fig. 35
Fig. 34
INSTALLATION CHECK LIST
1. Check all items from packaging are removed
from ovens and the shelves are properly fitted.
2. Check that electrical wiring is correct.
3. Check that the boiler and heating system is full
of water and purged of air.
4. Check that the boiler plate transport screws
have been removed and that the plates are in
their correct positions. (See section removal of
transport screw and Fig. 41)
5. Time switches and room thermostats must be
on.
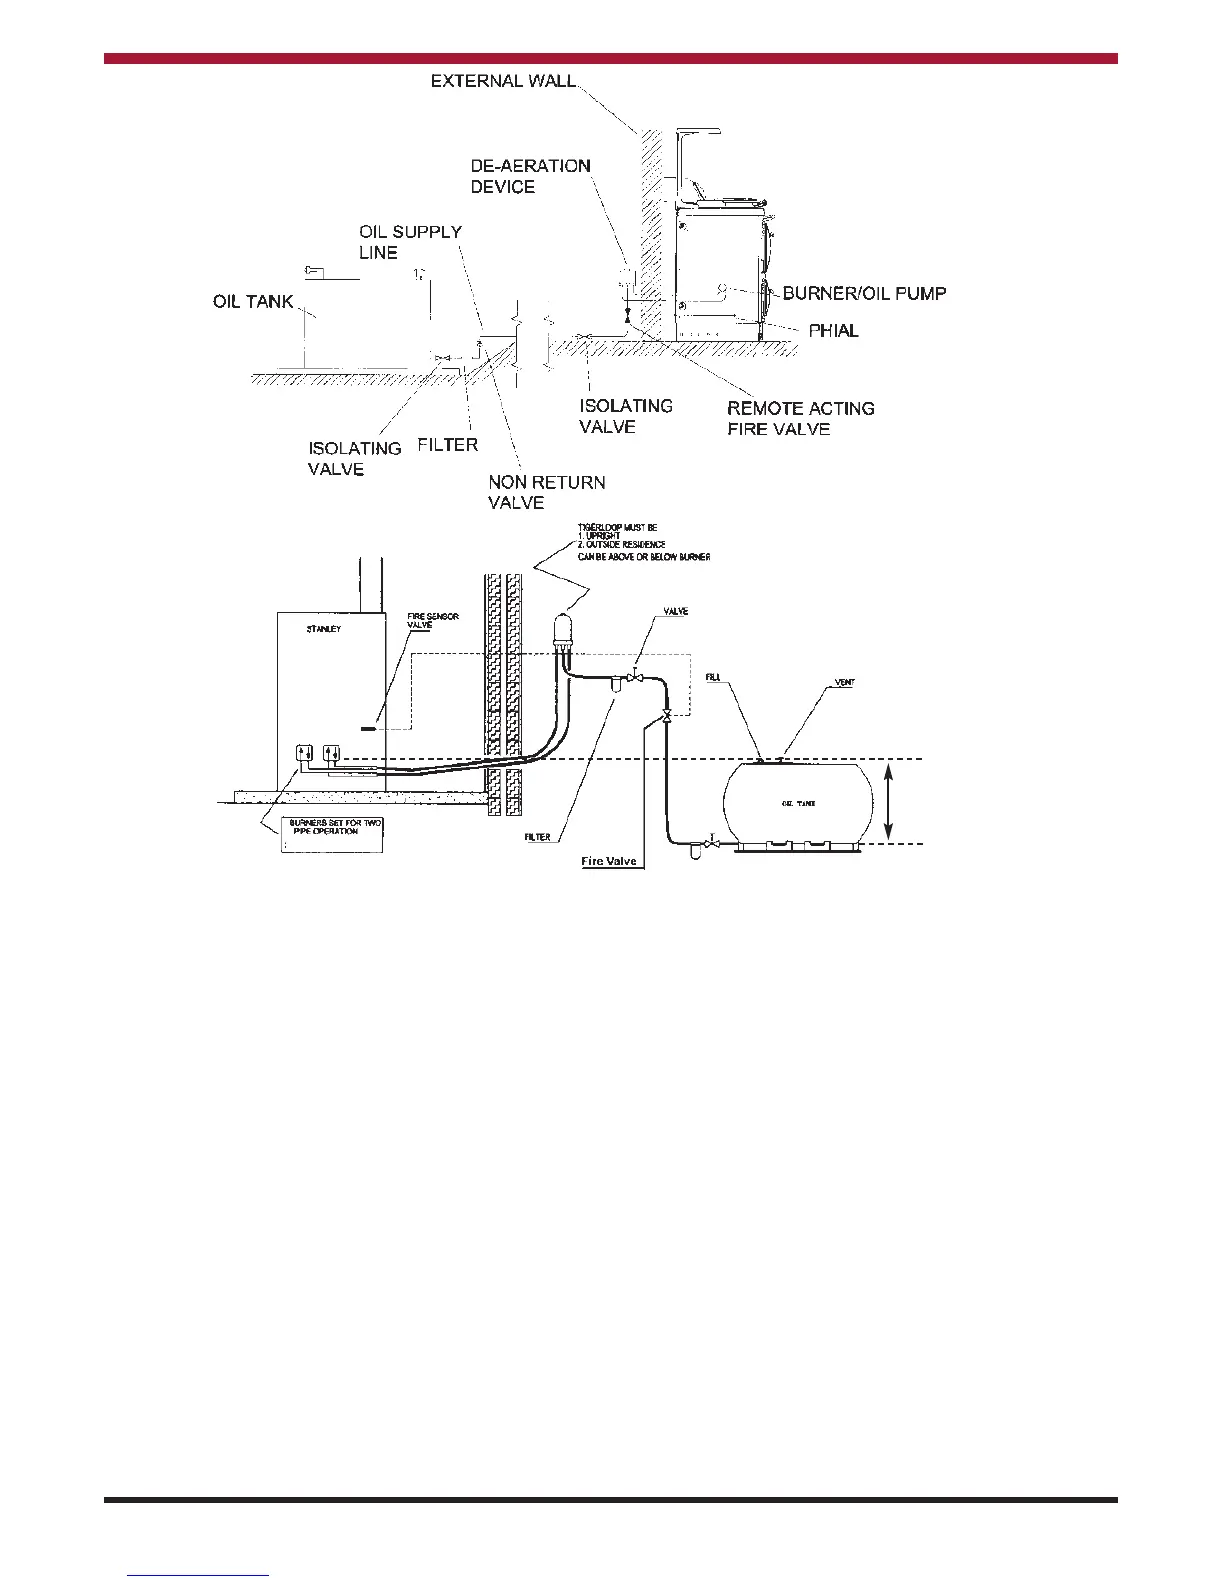
6. Check that all valves in the oil line are open and
that the filter is purged of air. Check that the fire
valve is open.
7. Turn on the electrical supply and check that any
time switches are on and room thermostats
associated with the cooker are on and calling for
heat. Burners should now fire.
8. Check that the interstat connection has been
wired directly to a motorised valve. This is done
by turning off room thermostats, time switches
and temporarily linking terminals 6 & 9. This
should bring on a motorised valve which will
then call the boiler.
Note: When the interstat calls; normally the
motorised valve will open, but the burner will not
operate as the supply to No.6 will be disabled.
9. Check temperature differential between flow
and return 11°C (20°F) and adjust pump or by-
pass accordingly.
10. Check heating circuit and balance if necessary.
11. With fuel supply off, switch on the burners.
12. Complete the start sequence to lockout (8
seconds) for both burners observing the correct
operating functions.
13. Ensure both pumps are purged of air. Check
pump pressure with a calibrated pressure gauge
and adjust it as necessary. (See Figs. 36 & 37)
For further information refer to 100K and 80K
specification on page 5.
4 Meters Max.
 Loading...