Installation Instructions for Stanley Omnilock 45HOM Mortise Locks
Stanley Omnilock
a Product Group of Stanley Security Solutions, Inc.
10
Finishing the installation
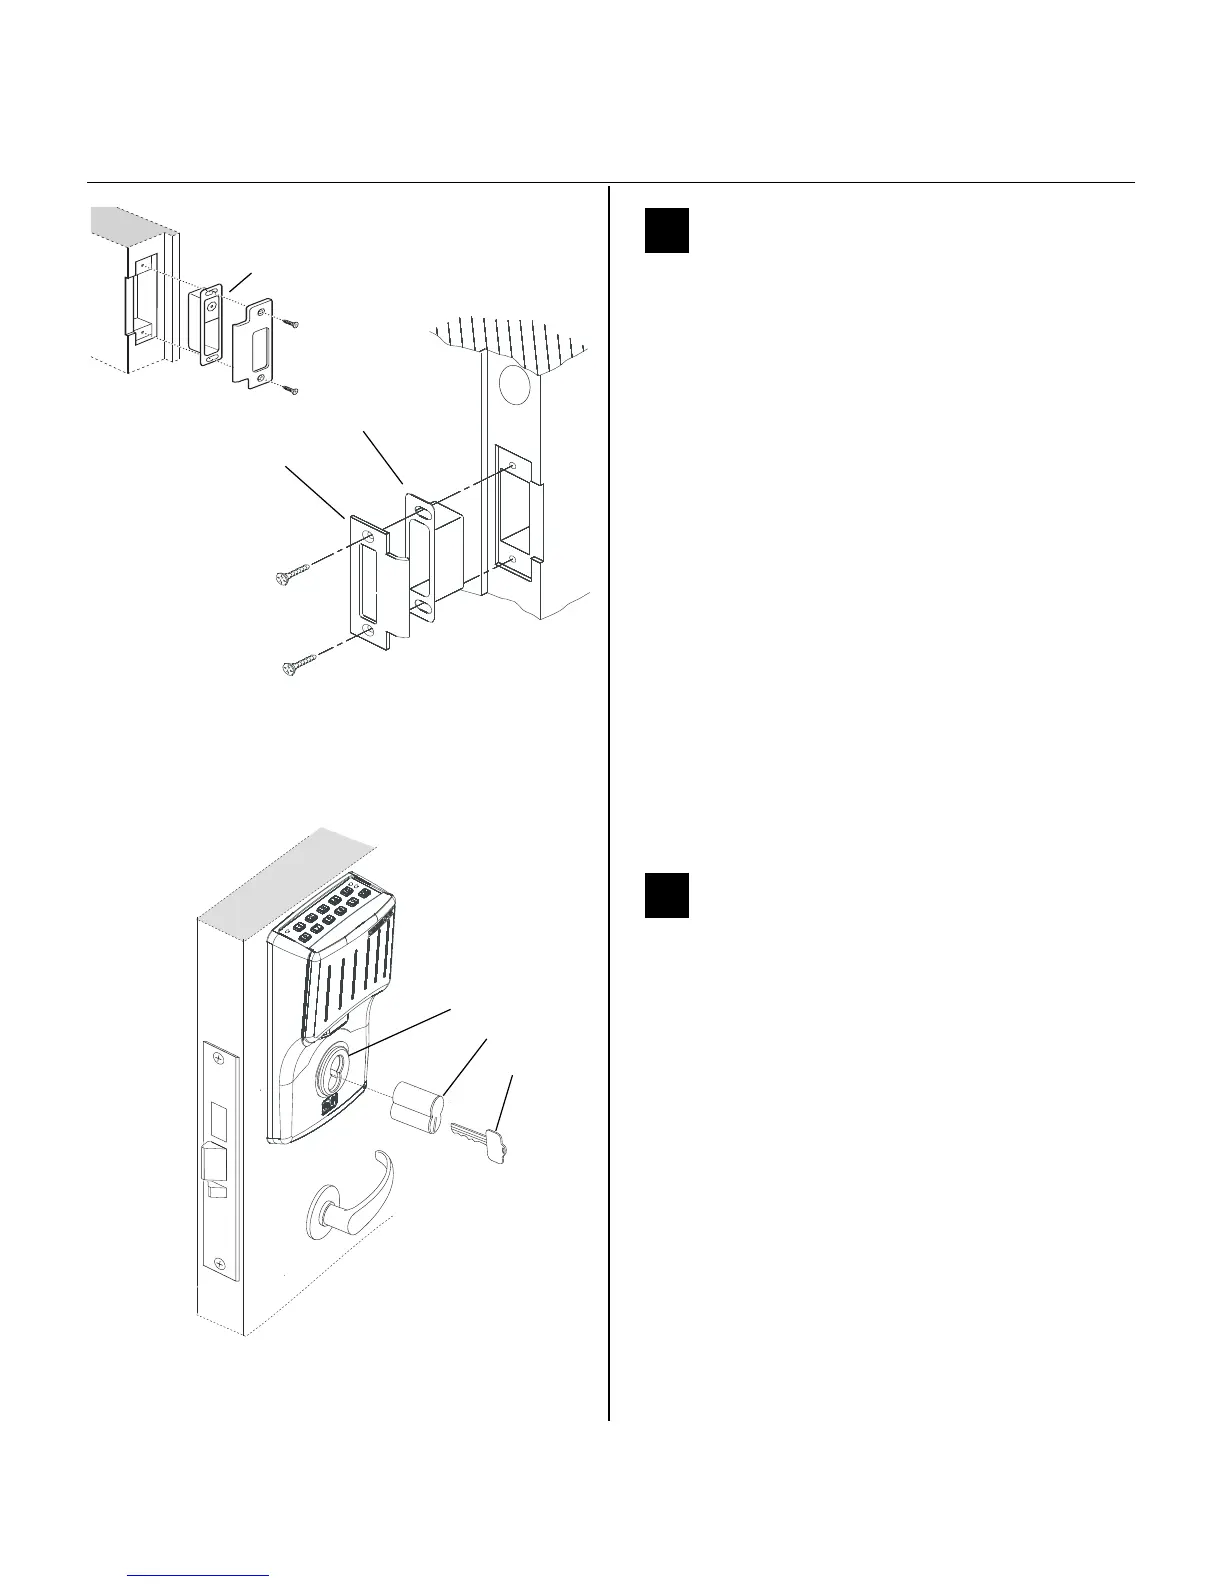
16 Install strike box and strike plate
1 If the door jamb has not been mortised for the strike
box and strike plate, perform these steps:
a On the door jamb, locate the horizontal
centerline of the strike (3/8” (10mm) above the
centerline of the lock), as well as the vertical
centerline of the strike.
b Mortise the door jamb to fit the strike box and
strike plate.
c Drill the holes for the screws used to install the
strike box and strike plate.
2 Insert the strike box into the mortise in the door
jamb. Place the strike plate over the strike box
and secure the strike with the screws provided.
Note: If installing a DV wireless model with a Door
Status Switch, ensure that the magnet is located at
thetop of the strike box. See Figure 19.
3 Check the position of the auxiliary bolt against the
strike plate (or the filled area of the strike box).
Note: The recommended gap between the door
and jamb is 1/8” (3 mm).
17 Install core
1 Insert the control key into the core and rotate the
key 15 degrees (midway between the 12 o'clock
and 1 o'clock positions) to the right.
2 With the control key in the core, insert the core
into the cylinder.
3 Return the control key to the 12 o’clock position
and withdraw the key.
Caution: The control key can be used to
remove cores and to access doors. Provide
adequate security for the control key.
Figure 19 Installing the strike box and strike plate
Strike box
Strike plate
Strike box with DSS magnet
Figure 20 Installing the core
Control key
Core
Cylinder
 Loading...