Installation Instructions for Stanley Omnilock 45HOM Mortise Locks
Stanley Omnilock
a Product Group of Stanley Security Solutions, Inc.
4
Configuring & installing the mortise
bit is close to the top edge of the hole. Then drill a
3/8” (10mm) channel at approximately a 35°
angle from the door status switch hole into the
mortise cavity as shown in Figure 4.
Caution: Make sure the wires are not routed
across any sharp edges or over any surface
that could damage the sleeving.
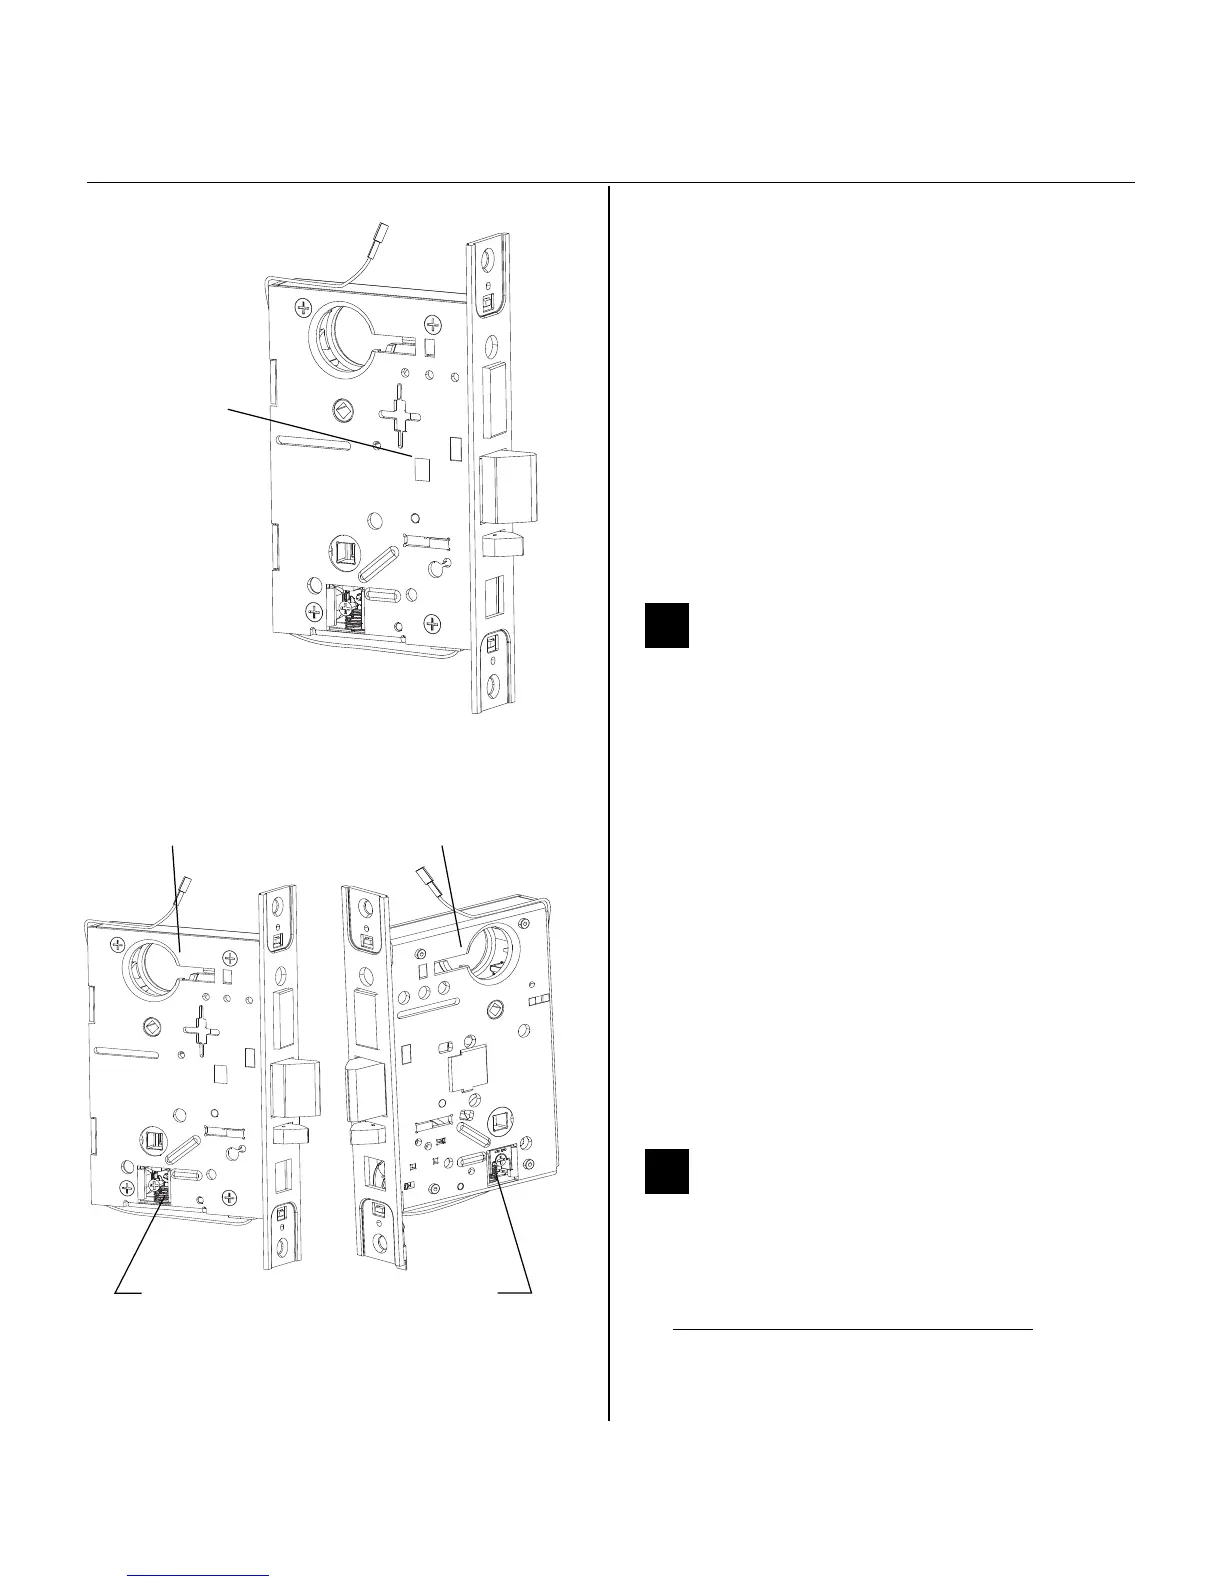
4 Press fit the door status switch assembly into the
door status switch hole.
5 On the door jamb, drill a corresponding hole for
the door status switch sensor. Use the door switch
centerline as a guide. Press fit the sensor into the
jamb.
5 Rotate latchbolt (if necessary)
Note: If a function specific mortise case was
ordered, some steps for configuring the case have
already been performed at the factory.
1 Determine whether you need to rotate the
latchbolt to match the handing of the door.
Note: The angled surface of the latchbolt must
contact the strike when the door closes.
2 If you need to rotate the latchbolt, insert a flat
blade screwdriver into the latch access point
approximately 1/2” (13 mm) into the case and
press to extend the latch out of the case. See
Figure 5.
3 Rotate the latchbolt past 180 degrees, keeping
constant pressure on the latch access point. Then
allow the latch to rotate back slightly and retract
into the case.
6 Position hub toggles (if necessary)
1 Check whether the hub toggles are in the proper
position for the lock. See the table below.
Hub toggle positions
Inside down (always unlocked)
Outside up (lockable)
Figure 5 Rotating the latchbolt
Latch access point
Hub toggle
Hub toggle
Figure 6 Positioning hub toggles
Cover side
Case (back) side
 Loading...