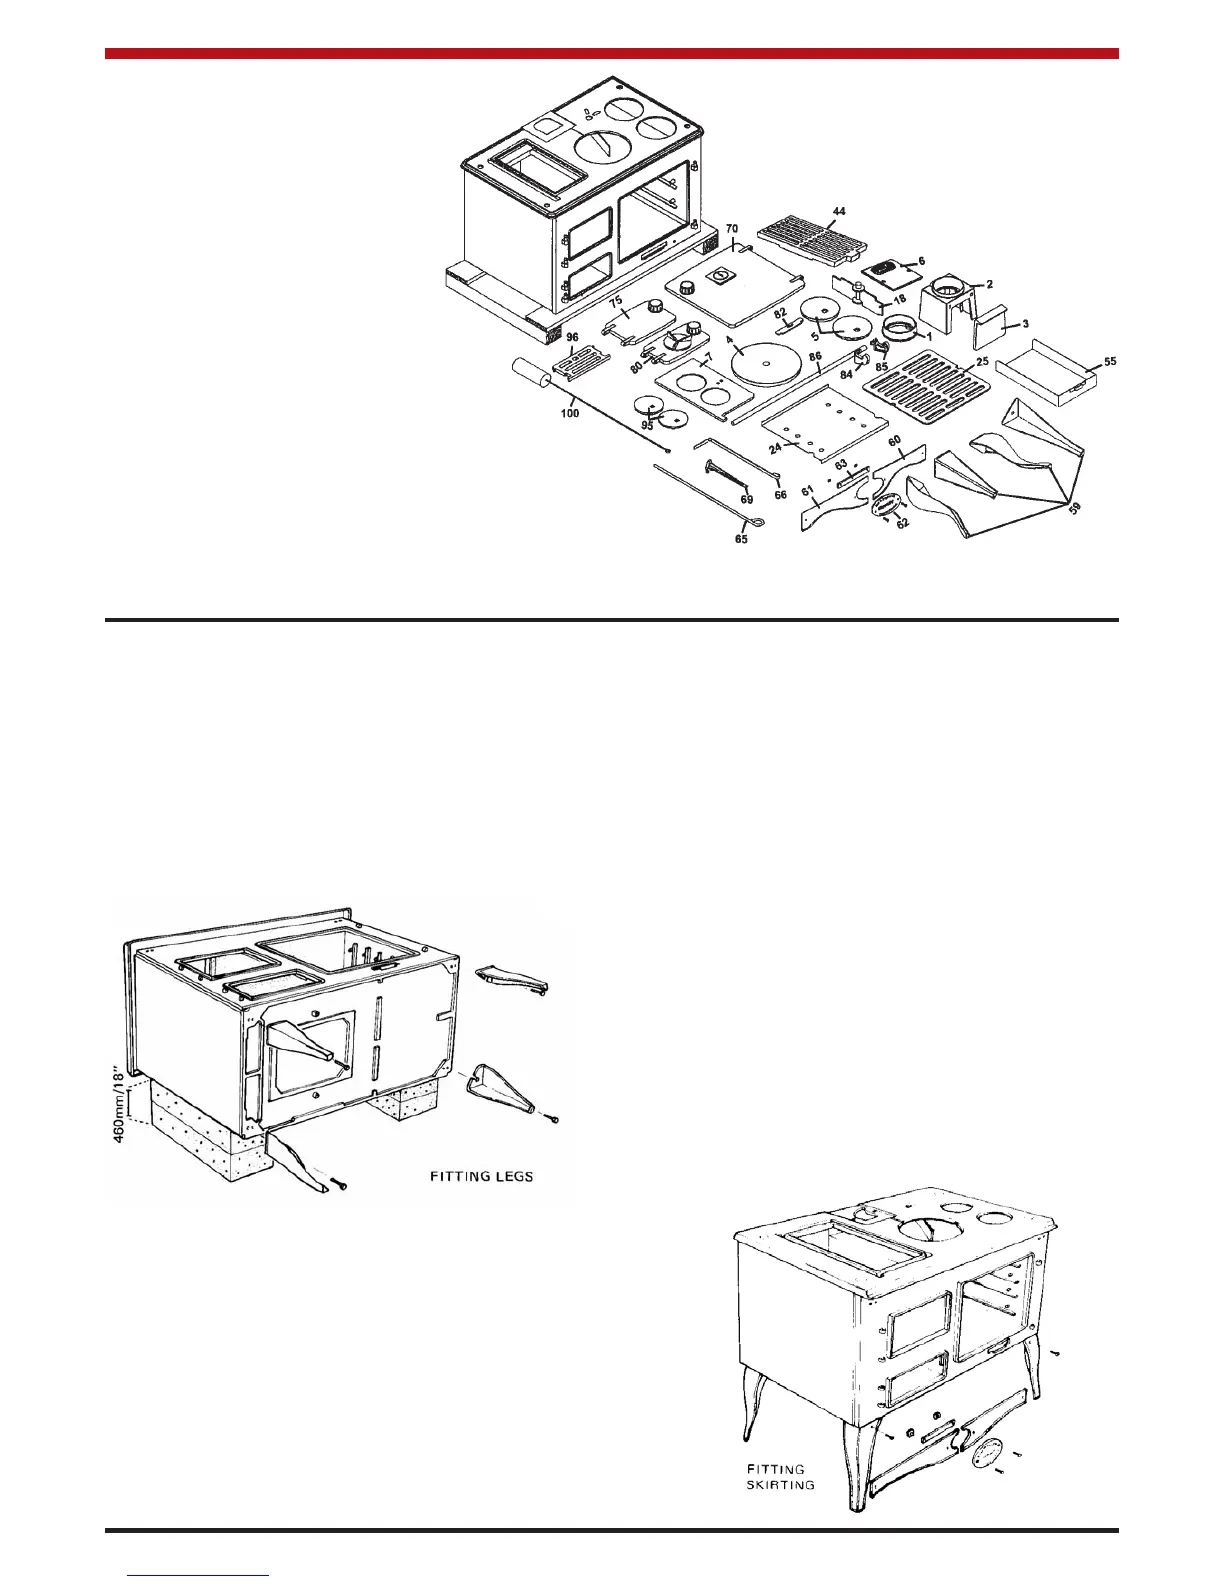
1. Remove packing strip from the top of
the range. Place the sheet steel back
plate to one side. Remove all loose
components from the top of the range
and firebox and the oven. Remove the
oven door. Spread the components on
the floor so you can identify them easily.
2. Place strong supports about 458mm (13”)
high behind the range. Space the supports
behind it and lay the cooker on its back.
(See Fig.4)
3. Fit the four legs (Part no. 59) to the four base
corners (Part no. 58) using the hexagon-head
bolts and washers. Note that each of the front
legs has a screw hole in the front.
4. Lift the range off the supports. Stand it upright
without putting any strain on the legs.
5. Join the two sections of the front plinth togeth-
er (Part Nos. 60 and 61) by screwing the name
plate (Part No. 62) and the plinth joining clip
(Part No. 63) into position between the two
sections and secure the two sections tightly to
the name plate.
6. Fit the complete plinth under the front of the
range inside the front legs using a screw and nut
to secure it to each leg. (See Fig.5)
7. Move the range into position for installation.
CAREFUL: Do not break a leg! Consult the
Chimney & Location Sections before finalising
the position for the range.
4
ASSEMBLY
Fig.3
Fig.4
Fig.5
PRE-INSTALLATION ASSEMBLY
1. Bonnet Ring
2. Bonnet
3. Bonnet Door
4. Simmering Plate
5. Cleaning Cup (2)
6. Hob Sealing Plate
7. Hot Plate
18. Oven Damper
24. Oven Shelf (Sheet Iron)
25. Oven Shelf (Cast Iron)
44. Riddling Grate
55. Ash Pan
59. Leg (4)
60. Plinth RHS
61. Plinth LHS
62. Nameplate
63. Plinth Joining Clip
65. Poker
66. Scraper
69. Riddling/Operating Tool
70. Oven Door
75. Fire Door
80. Ashpit Door
82. Base Cleaning Door
84. Towel Rail Bracket RH
85. Towel Rail Bracket LH
86. Towel Rail
95. Hotplate Cleaning Cups
96. Fire Fence
100. Cleaning Brush