9
5. Assembly
WARNING! The machine must be fully
assembled before operation! Do not use a
machine that is only partly assembled or
assembled with damaged parts.
Always use gloves during assembly.
Disconnect the spark plug connector from the
spark plug.
INTENDED USE
1. This machine is designated with a maximum power
output of max. 0.75 kW.
2. With attached trimming guard and fitted trimmer
head, the grass trimmer is intended to be used to cut
small weeds, grass or similar soft vegetation.
3. With attached trimming guard and fitted cutting
blade, the brush cutter is intended to be used to cut
weed, brush, small trees and similar vegetation with a
thickness of up to 20mm.
4. It may not be used to work on unusual thick, dry or
wet grass, e. g. pasture grass, or to shredder leaf.
5. For safety reasons it is essential to read the entire
instruction manual before first operation and observe all
instructions.
6. This machine is for private use only, not for any
commercial applications.
It may not be used for any purposes other than
described.
ASSEMBLY HANDLE
Assembly auxiliary handle
1. Loosen the outer pre-assembled screws on the
handle.
2. Place the handle onto the shaft from the top, secure it
with the retainer and the screws.
NOTE: Pay attention to the screws and nuts. Avoid loss.
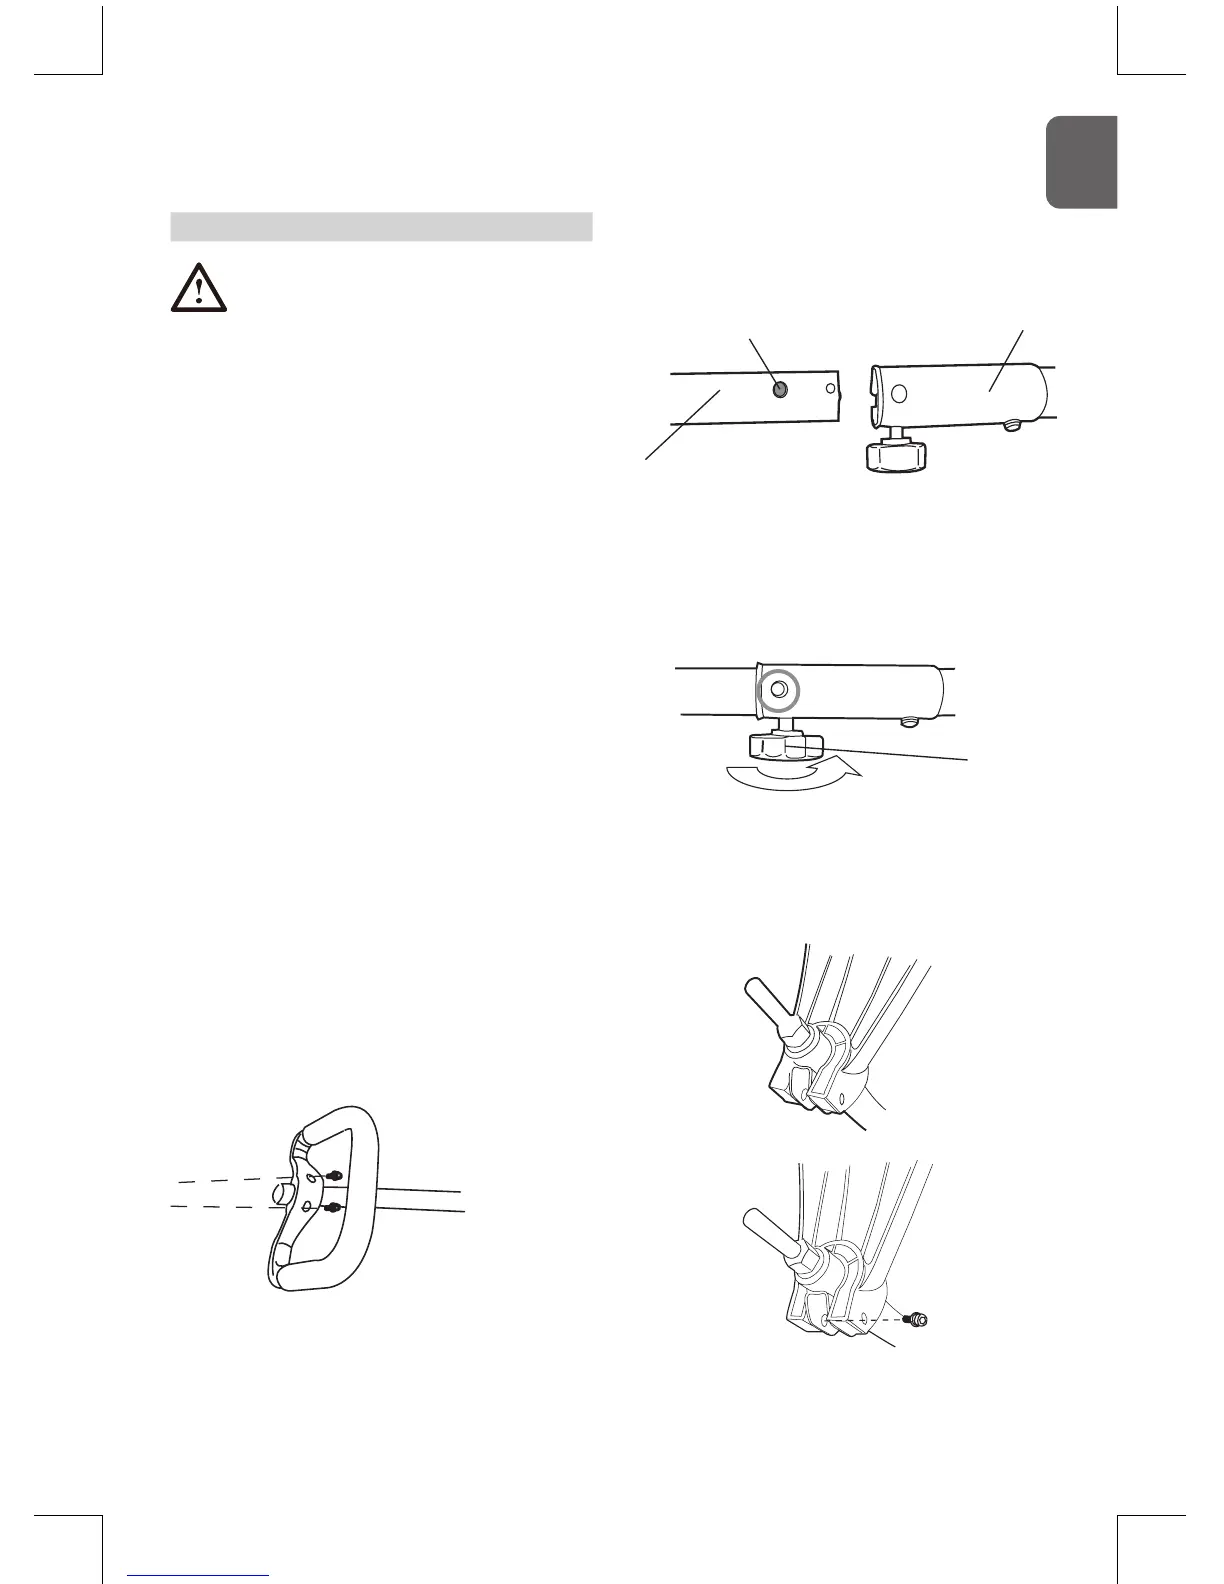
ASSEMBLY SHAFT
1. Align the lower shaft(19) with the clamp(16) so that
the lock pin(18) is orientated to the centre hole in the
clamp.
19
18
16
2. Press the lock pin down and insert the lower shaft
into the upper shaft.
The lock pin must engage in the centre hole of upper
shaft.
3. Secure the connection by tightening the locking
knob(17).
17
ASSEMBLY SAFETY GUARD
1. Remove the bolt and washer on the guard.
2. Place the guard over the end of the spindle and align
the holes in the front of the guard with the slots in the
brackets on the shaft.
3. Insert and secure the guard by the bolt with washer.
NOTE: Local regulations might restrict the size of
the cutting guard so that it might be necessary to
G
B

 Loading...