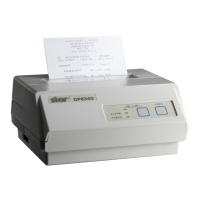
CHAPTER 2
PARTS REPLACEMENT
is chapter explains disassembly and reassembly of the printer. Note the following precautions during
disassembly and reassembly.
1. Disconnect the printer power cord plug from the wall outlet before servicing it.
2. Assembly is the reverse of disassembly unless otherwise specied.
3. Aer reassembly, coat the screw heads with locking sealant.
4. Lubrication information is not provided in this chapter. Refer to item 2 of chapter 3.
1. Rear Cover Unit . . . . . . . . . . . . . . . . . . . . . . . . . . . . . . . . . . . . . . . . . . . . . . . . .10
2. Front Cover and Case Unit . . . . . . . . . . . . . . . . . . . . . . . . . . . . . . . . . . . . . . .10
3. Tear Bar . . . . . . . . . . . . . . . . . . . . . . . . . . . . . . . . . . . . . . . . . . . . . . . . . . . . . . . .12
4. Ribbon Base . . . . . . . . . . . . . . . . . . . . . . . . . . . . . . . . . . . . . . . . . . . . . . . . . . .12
5. Printer Mechanism . . . . . . . . . . . . . . . . . . . . . . . . . . . . . . . . . . . . . . . . . . . . .13
6. Print Head . . . . . . . . . . . . . . . . . . . . . . . . . . . . . . . . . . . . . . . . . . . . . . . . . . . . .13
7. Platen Arm Unit . . . . . . . . . . . . . . . . . . . . . . . . . . . . . . . . . . . . . . . . . . . . . . . .14
8. CR Motor. . . . . . . . . . . . . . . . . . . . . . . . . . . . . . . . . . . . . . . . . . . . . . . . . . . . . . .14
9. PF Moter . . . . . . . . . . . . . . . . . . . . . . . . . . . . . . . . . . . . . . . . . . . . . . . . . . . . . . .15
10. Power Unit . . . . . . . . . . . . . . . . . . . . . . . . . . . . . . . . . . . . . . . . . . . . . . . . . . . .15
11. Main Logic Board . . . . . . . . . . . . . . . . . . . . . . . . . . . . . . . . . . . . . . . . . . . . . .16
2

 Loading...