Do you have a question about the Steelcase Leap and is the answer not in the manual?
Remove black and gold screws using T20 drive bit for disassembly.
Remove arm support parts, shoulder bolts, wave washers, and swing arm links.
Replace pivot plate bearing, install new swing arm links, and new hardware.
Snap plastic cover and secure plastic bearings into place.
Install lower arm cap support, springs, washers, and the foam arm cap.
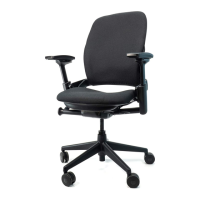
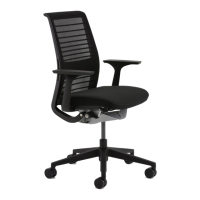
This document outlines the repair procedure for the pivot arm cap of Steelcase Leap®, Amia™, and Think® chairs, providing a comprehensive guide for users to address common issues and restore the functionality of their chair's armrests. The repair kit, as detailed in the manual, includes essential components such as new shoulder screws with pre-applied Loctite, new wave washers, new plastic flat washers, a new swing arm link, and a new pivot plate bearing. Additionally, the kit provides the necessary T20 and T25 drive bits, ensuring that users have all the tools required to complete the repair process efficiently.
The primary function of this repair kit is to replace worn or damaged components within the pivot arm cap assembly, which are crucial for the smooth and stable movement of the armrests. Over time, the original parts can degrade due to regular use, leading to looseness, instability, or difficulty in adjusting the armrests. By replacing these specific components, the kit aims to restore the armrest's original performance, ensuring that it can pivot and adjust securely and comfortably. This repair is particularly important for maintaining the ergonomic integrity of the chair, as properly functioning armrests contribute significantly to user comfort and support, reducing strain on the shoulders and arms during prolonged periods of sitting.
The usage features of the repair process are designed to be straightforward, allowing individuals with basic mechanical aptitude to perform the repair without specialized training. The manual employs a step-by-step approach, with clear illustrations accompanying each instruction, making it easy to follow along. For instance, the initial steps involve the removal of existing screws—black screws using a T20 drive bit and gold screws also with a T20 drive bit—to detach the arm cap and expose the underlying mechanisms. These steps emphasize the importance of keeping all removed parts for reassembly, highlighting a methodical approach to prevent loss or confusion.
Further usage features include the removal of specific old components that are slated for replacement. Users are guided to remove three distinct parts, followed by two shoulder bolts and two wave washers using a T25 drive bit. A key aspect of the repair is the instruction to discard these old shoulder bolts and wave washers, as they are directly replaced by the new components provided in the kit. This distinction between parts to keep and parts to discard simplifies the process and prevents accidental reuse of worn components. Similarly, old swing arm links 'A' and 'B' are to be removed and discarded, making way for their new counterparts.
The core of the repair involves replacing the old pivot plate bearing with a new one. This step is clearly illustrated, showing the removal of the old bearing (labeled 6a) and its replacement with the new pivot plate bearing (labeled 6b). Following this, the new swing arm links 'A' and 'B' are placed into position as indicated. The manual then guides the user to install new plastic washers into the counterbore holes, followed by new wave washers placed on top of the plastic washers. These washers are critical for providing proper spacing and reducing friction within the pivot mechanism.
A crucial usage feature is the installation of the new shoulder bolts, which come with pre-applied Loctite. This pre-application of Loctite is a significant detail, as it ensures that the screws remain securely fastened over time, preventing them from loosening due to vibrations or repeated adjustments. Users are instructed to install these bolts using a T25 drive bit and to torque them to a specific range of 50 ±5 in/lbs. This torque specification is vital for ensuring the correct tension and stability of the armrest assembly, preventing both overtightening, which could damage components, and undertightening, which could lead to a loose armrest. The inclusion of the T25 drive bit in the kit ensures that users have the precise tool needed for this critical step.
The reassembly process continues with snapping the plastic cover back into place, followed by positioning the plastic bearings. These steps are designed to be intuitive, allowing the components to fit snugly into their designated locations. The final stages of the repair involve placing the lower arm cap support, plastic washer (flat side down), compression spring, and metal washer into their respective positions. Gold screws are then installed using a T20 drive bit, with a specified torque of 37 ±5 in/lbs. This torque value is slightly different from that of the shoulder bolts, emphasizing the importance of adhering to specific instructions for each type of fastener. The plastic glider bracket is then placed, and another gold screw is installed with the same torque specification.
Finally, the foam arm cap is placed into position, and four black screws are used to secure it, again with a T20 drive bit. This systematic reassembly ensures that all components are correctly aligned and fastened, restoring the armrest to its optimal functional state.
Maintenance features, while not explicitly detailed as a separate section, are implicitly integrated into the repair process itself. The use of new, high-quality components, such as the shoulder screws with pre-applied Loctite, is a preventative maintenance measure designed to extend the lifespan of the armrest assembly and reduce the frequency of future repairs. By replacing all critical wear components—including the pivot plate bearing, wave washers, and swing arm links—the repair kit addresses the root causes of armrest degradation, rather than just providing a temporary fix. This comprehensive replacement strategy ensures that the repaired armrest will perform reliably for an extended period.
Furthermore, the detailed instructions and clear illustrations serve as a valuable maintenance tool, empowering users to understand the internal workings of their chair's armrest. This knowledge can be beneficial for future troubleshooting or for identifying potential issues before they escalate into major problems. The provision of specific torque values for different screws is another maintenance-oriented feature, as it ensures that fasteners are neither too tight nor too loose, both of which can lead to premature wear or component failure. Proper torque application is fundamental to the longevity and safety of mechanical assemblies.
The availability of customer support, as indicated by the contact information for Steelcase Line 1 and their website, is an important aspect of the overall maintenance ecosystem. Should users encounter any difficulties during the repair process or have questions about the components, they have direct access to assistance. This support network ensures that even less experienced users can successfully complete the repair, thereby extending the life of their Steelcase chair and maximizing their investment. The global contact information also highlights Steelcase's commitment to supporting its customers worldwide, making the repair kit accessible and manageable for a broad user base.
In summary, this repair kit and its accompanying manual offer a practical and effective solution for restoring the functionality of Steelcase Leap®, Amia™, and Think® chair pivot arm caps. The detailed, step-by-step instructions, coupled with the provision of all necessary replacement parts and tools, make the repair process accessible to a wide range of users. The inherent maintenance features, such as the use of Loctite and precise torque specifications, contribute to the long-term durability and reliability of the repaired armrest, ensuring continued ergonomic support and comfort for the user.
| Chair Type | Office Chair |
|---|---|
| Adjustable Seat Height | Yes |
| Adjustable Armrests | Yes |
| Lumbar Support | Yes |
| Weight Capacity | 400 lbs |
| Recline | Yes |
| Swivel | Yes |
| Casters | Yes |
| Warranty | 12 years |
| Material | Fabric |
| Base Material | Metal |