9
061013_v1909
EN
Figure 1
Jet drive feature
Figure 2
You will fi nd 2 adjustable control nozzles on the front and back of the
cleaner
to control its movement in the water. The dirty water
sucked up by the device is fi rst cleaned via the fi lter bag and then expelled
via the control nozzles to propel the cleaner.
The nozzles are adjustable to achieve the best cleaning results depending
on the size and type of the pool.
Control nozzles
The control nozzles can be set to angles between 0 – 40°. The cleaner will
move in a straight or curved line depending on
the settings. The 0°/30° setting can be used for most pools. Figure 3
We recommend the 20°/20° setting for round pools.
The above-mentioned settings are recommendations. However, the control
nozzle
settings should be selected by the user based on the above
operating rules and the current condition of the pool.
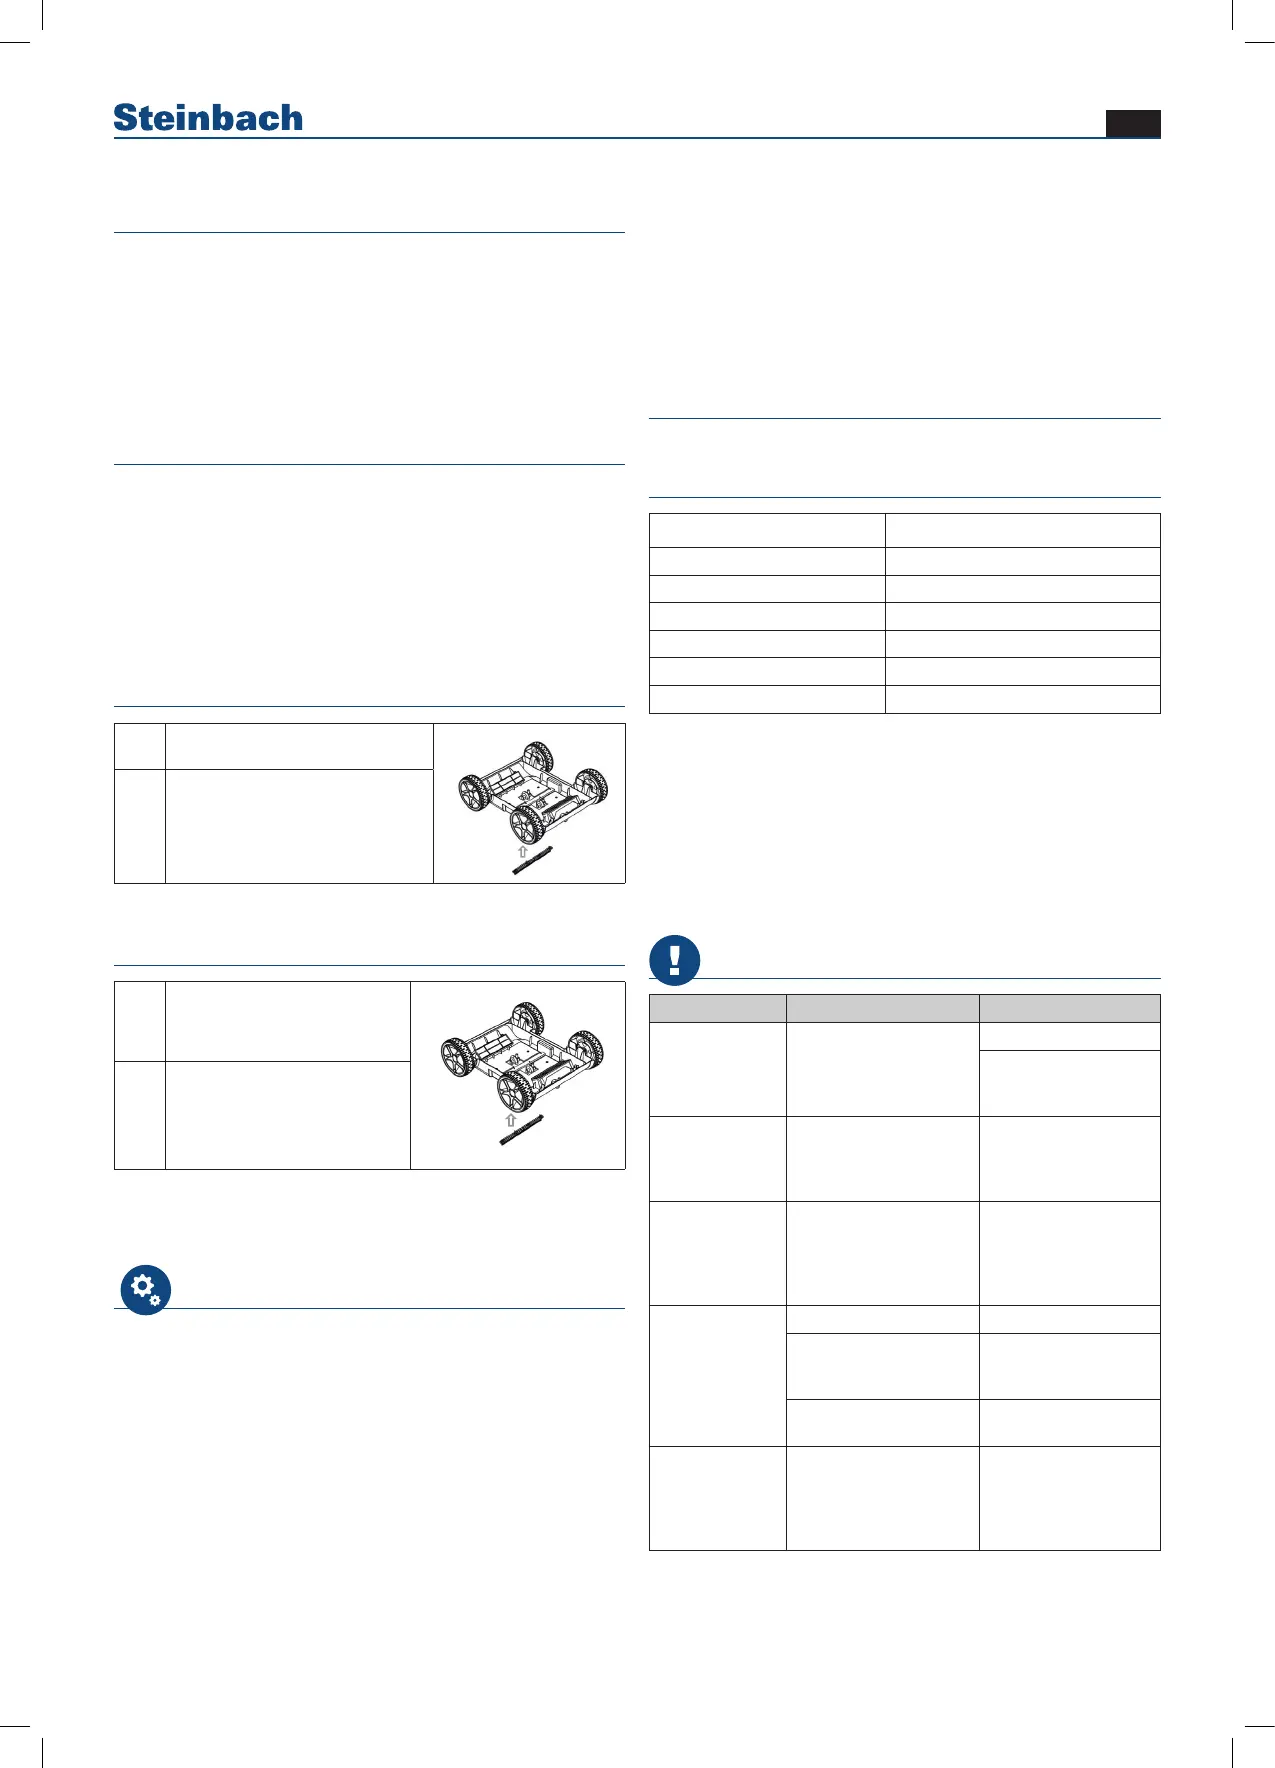
Installing the brush
1
Press the brush into the notch
provided
b. Install the brush before use to avoid possible dirt leaks.
c. Please ensure that top cover of the cleaner is tightly assembled with its chassis.
d. Power off the cleaner after use.
e. Do not touch the wall to avoid scratching the wall or damaging the cleaner when putting
into or lift out from pool.
f. It is necessary to stay on the water surface for 10-15 seconds until water flows out from
the cleaner to the pool before being placed on the ground.
g. Lift the handle or clips of the cleaner out from the pool.
2
Make sure that the brush is proper-
ly held in place.
Removing the brush
1
Push the brush strip out from
inside the robot
b. Install the brush before use to avoid possible dirt leaks.
c. Please ensure that top cover of the cleaner is tightly assembled with its chassis.
d. Power off the cleaner after use.
e. Do not touch the wall to avoid scratching the wall or damaging the cleaner when putting
into or lift out from pool.
f. It is necessary to stay on the water surface for 10-15 seconds until water flows out from
the cleaner to the pool before being placed on the ground.
g. Lift the handle or clips of the cleaner out from the pool.
2 Remove the brush
Tip:
We recommend that you do not use the brush if it is not helpful in cleaning
the pool (for example, if the fl oor slopes or has a lot of protection)
Using the pool cleaner for the fi rst time
Turn the switch to OFF before charging.
In order to charge the battery, connect the robot to the mains power supply
via the adapter and the charging cable.
The red light indicates that the battery is charging.
The green light indicates that charging is complete.
Never run the device out of the water, as this will quickly destroy it. After you
have adjusted the settings, immerse the cleaner gently and slowly in the
pool. The cleaner must be completely free of air, otherwise its operation will
be affected. The cleaner should sink to the bottom on its own. Please note:
For optimal performance, ensure that the cleaner is completely free of air
(air bubbles stop coming out of the cleaner, and it remains fully on the pool
fl oor). Please observe the following fi gures on how to immerse the cleaner
into the pool. Figures 4, 5
The cleaner must always be immersed into or removed from the pool with
the underside facing the pool wall to prevent it from scratching the pool
surface.
Once the device is immersed in the water, turn the switch to ON. The
cleaner activates automatically as soon as it is completely immersed in the
water, and the indicator light will remain illuminated in blue. Approximately
15 seconds later, fl oor suction will begin and the blue light will fl ash.
The robot will automatically change direction as soon as it touches the pool
wall (in pools with curved fl oors it will rise and falls backwards), and the blue
light will continue to fl ash.
Switching the robot off:
Turn the switch in the direction of the red light until the robot switches off.
Always clean the fi lter compartment after use.
Care and maintenance
Cleaning the fi lter bag, fi gures 6, 7, 8, 9, 10, 11, 12
Hints and tips
Status Indicator
Switching on Blue light is steady on
Switching off Red light fl ashes once then powers off
Cleaner is working in the pool Blue light fl ashes
Cleaner is out of water Blue light fl ashes rapidly
Working cycle fi nished Red light stays steady on
Faults Red light fl ashes
■ Every time the cleaner is taken out of the water, the fi lter element must
be cleaned.
■ The pH level of the water in the pool must be between 7.0 and 7.4.
■ The water temperature must be between 10°C and 32°C.
■ We recommend keeping the cleaner between 5°C and 40°C in a well
ventilated place out of direct sunlight. The mains cable should be coiled
around the cable holder for storage. Avoid direct sunlight at all times.
■ Before use, please read the instructions relating to troubleshooting thor-
oughly.
Troubleshooting
Fault Cause Solution
The cleaner is
not working and
the indicator light
is not fl ashing
Battery protection
feature
Charge the robot
Please contact our
customer service
department
The indicator
light on the
adapter is not
working.
The adapter is
damaged.
Please contact our
customer service
department
The cleaner is
not working and
the red indicator
light is fl ashing
slowly.
Cleaner malfunction
Please contact our
service centre.
The cleaner
cannot reach all
areas.
Unsuitable nozzle angle Set nozzle angle
Special pool shape
Adjust the nozzle to
increase the cleaning
angle
Your pool’s water
circulation system is on.
Switch off the
fi lter pump.
The cleaner
is not working
and the blue
indicator light is
fl ashing.
Pump protection feature Restart the robot.