Functions
Once you have connected
the unit to the mains power
supply, closed the housing
and fitted the lens, you are
ready to put the system into
operation. Two setting
controls are concealed
behind the front cover 쪨.
Important: Only carry out
time and light threshold
settings with the lens fitted.
Switch-off delay
(time setting)
The chosen light ON time
can be varied continuously
from approx. 10 sec. to a
maximum of 15 min.
Turning the adjustment
screw fully anti-clockwise
selects the shortest time of
approx. 10 sec., turning the
adjustment screw fully
clockwise the longest time
of approx. 15 min. The
shortest time setting is
recommended for setting
the detection zone and
performing the walk test.
Twilight setting
(response threshold)
The chosen detector
response threshold can be
adjusted continuously from
approx. 2 lux to 2000 lux.
Turning the adjustment
screw fully anti-clockwise
selects daylight operation
at approx. 2000 lux. Turning
the adjustment screw fully
clockwise selects
twilight
operation at approx. 2 lux.
The adjustment screw must
be turned fully anti-clock-
wise for setting the de-
tection zone and perform-
ing the walk test in daylight.
10 sec.-15. min.
2 - 2000 lux
15
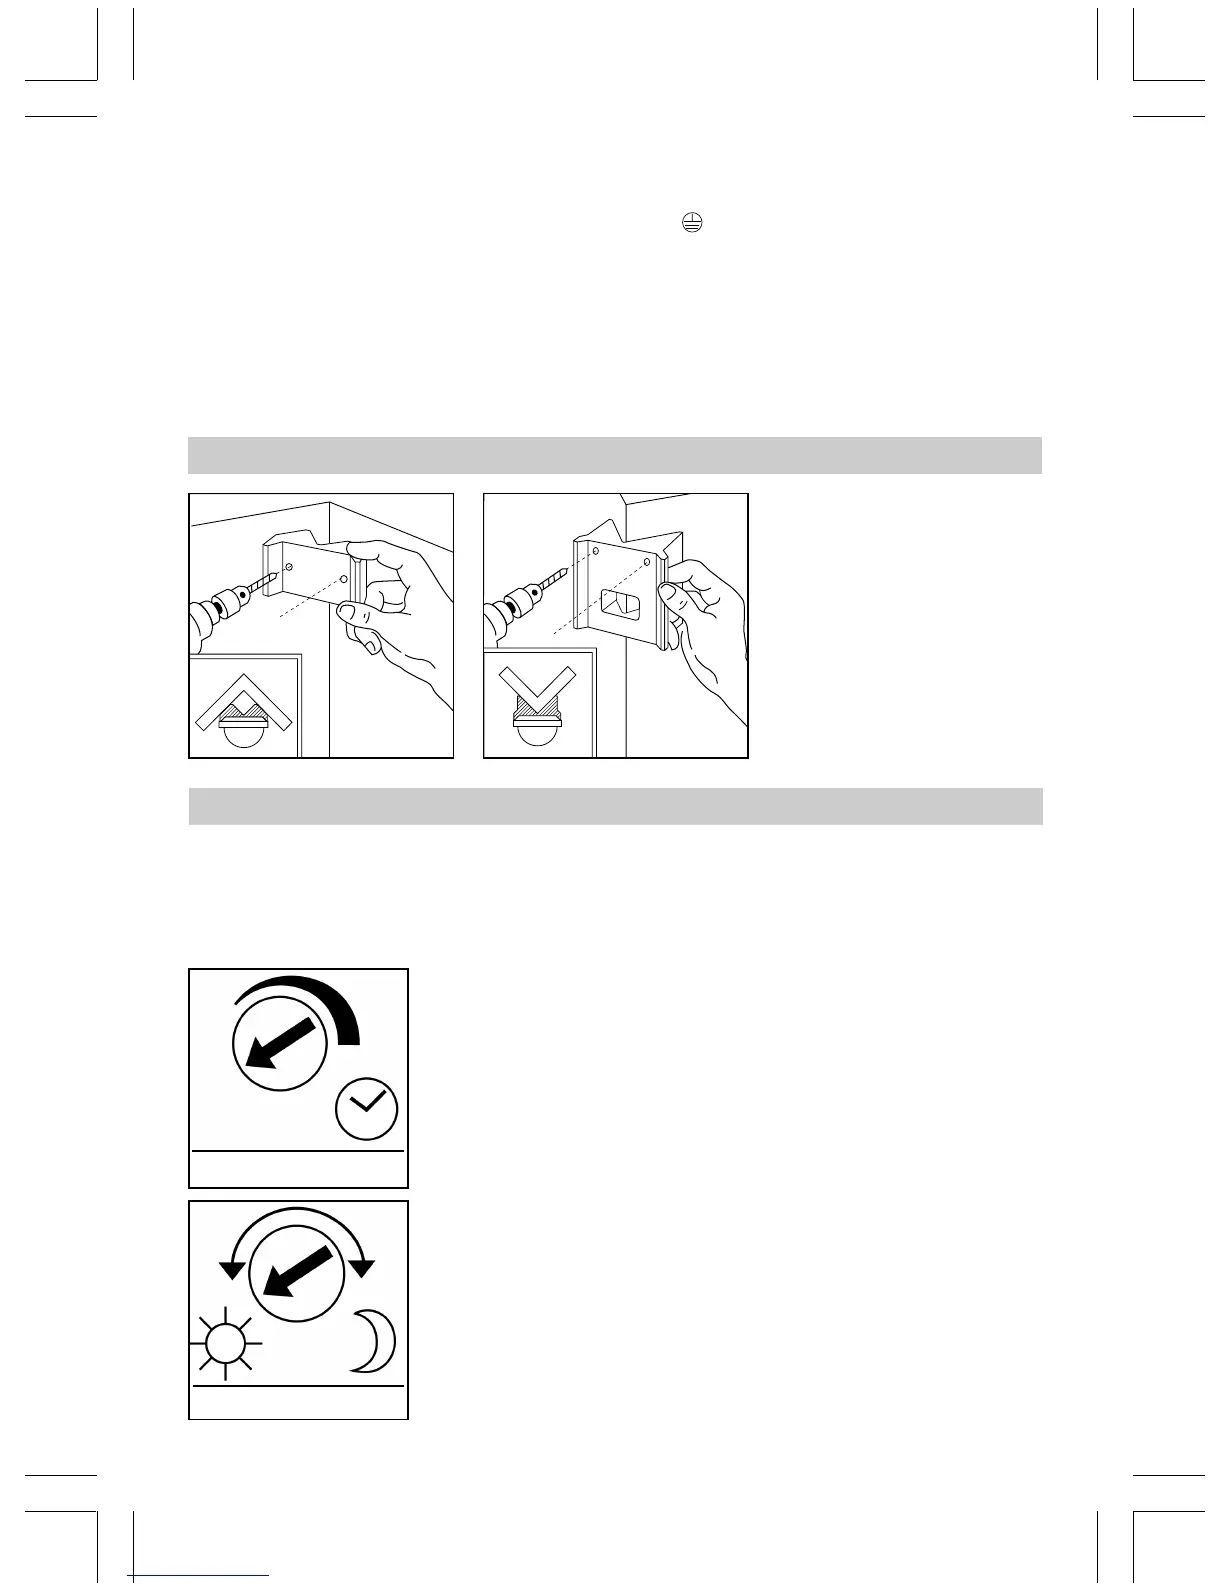
The corner wall mount en-
closed with the unit pro-
vides a convenient means
of in-stalling the IS 2180-2
to internal and external
corners. Use the corner
wall holder as a template
for drilling the hole. This
way, you will drill the hole
at the right angle, allowing
you to fit the wall mount
with ease.
Installation using corner wall mount
b) Connect service lead
The service supply lead to
the light is also a 2 to 3-
core cable. Connect the
light’s current-carrying
conductor to the terminal
marked L’. The service
lead neutral conductor
must be connected to the
terminal marked N together
with the mains lead neutral
conductor. Connect the
protective-earth conductor
to the earth contact ( ).
7. Screw on housing
and close again.
8. Fit lens (set reach to
either 5 m or 12 m max),
see ‘Reach setting’ section.
9. Select time 쪫 and light
threshold setting 쪪 (see
‘Functions’ section).
10. Locate front cover 쪨
and fit security screw 쪧 to
protect cover from
unauthorised removal.
Important: Reversing the
connections may result in
damage to the unit.


 To Next Page