Getting Started2
This section is a step-by-step guide to getting the AlphaCom XE system
up and running.
1. Sketch a network overview
2. Unpack and install hardware
3. Perform cold start
4. Connect to AlphaWeb
5. Congure IP Settings
6. Change default user name and password
7. Enter the license key
8. Modify default settings (optional)
9. Perform a system backup
The AlphaCom XE servers are shipped with a default factory setting and
the system will work straight out of the box. If no changes to the default
factory settings are required, it is enough to perform steps 1 to 6 to set
up a working system.
Some changes to the default factory settings are often required, for
instance if the default numbering plan and naming in the directory shall
be updated to reect the oors in a building, then the optional steps
should also be performed.
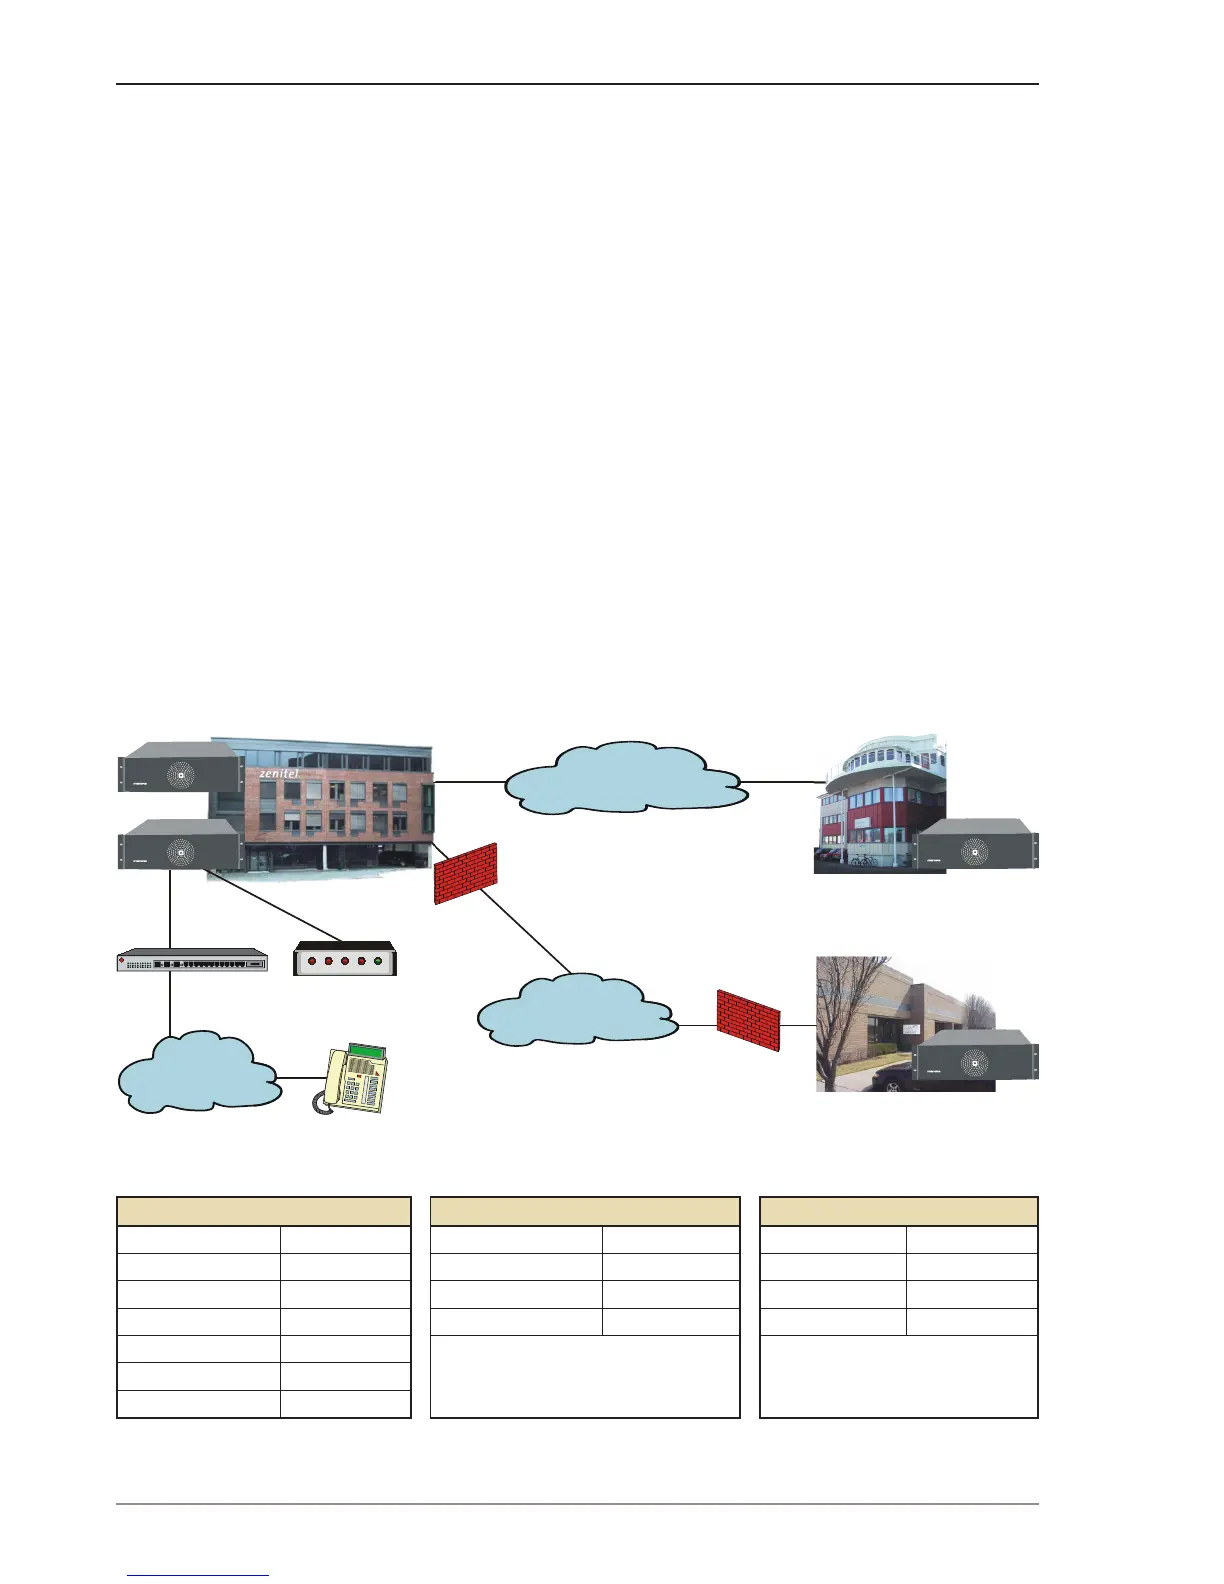
Making a Network Plan2.1
Make a plan of the network topology as shown in the example below.
LAN Oslo LAN Horten LAN USA
Network IP 10.0.1.0 Network IP 10.0.5.0 Network IP 10.0.10.0
Mask 255.255.255.0 Mask 255.255.255.0 Mask 255.255.255.0
Router Oslo 10.0.1.1 Router Horten 10.0.5.1 Router USA 10.0.10.1
AlphaCom Oslo 1 10.0.1.10 AlphaCom Horten 1 10.0.5.10 AlphaCom USA 1 10.0.10.10
AlphaCom Oslo 2 10.0.1.11
iPBX 10.0.1.20
SIP ISDN Gateway 10.0.1.21
 Loading...