Tech Support: consumer.steppir.com/support | 425.453.1910 | support@steppir.com
33
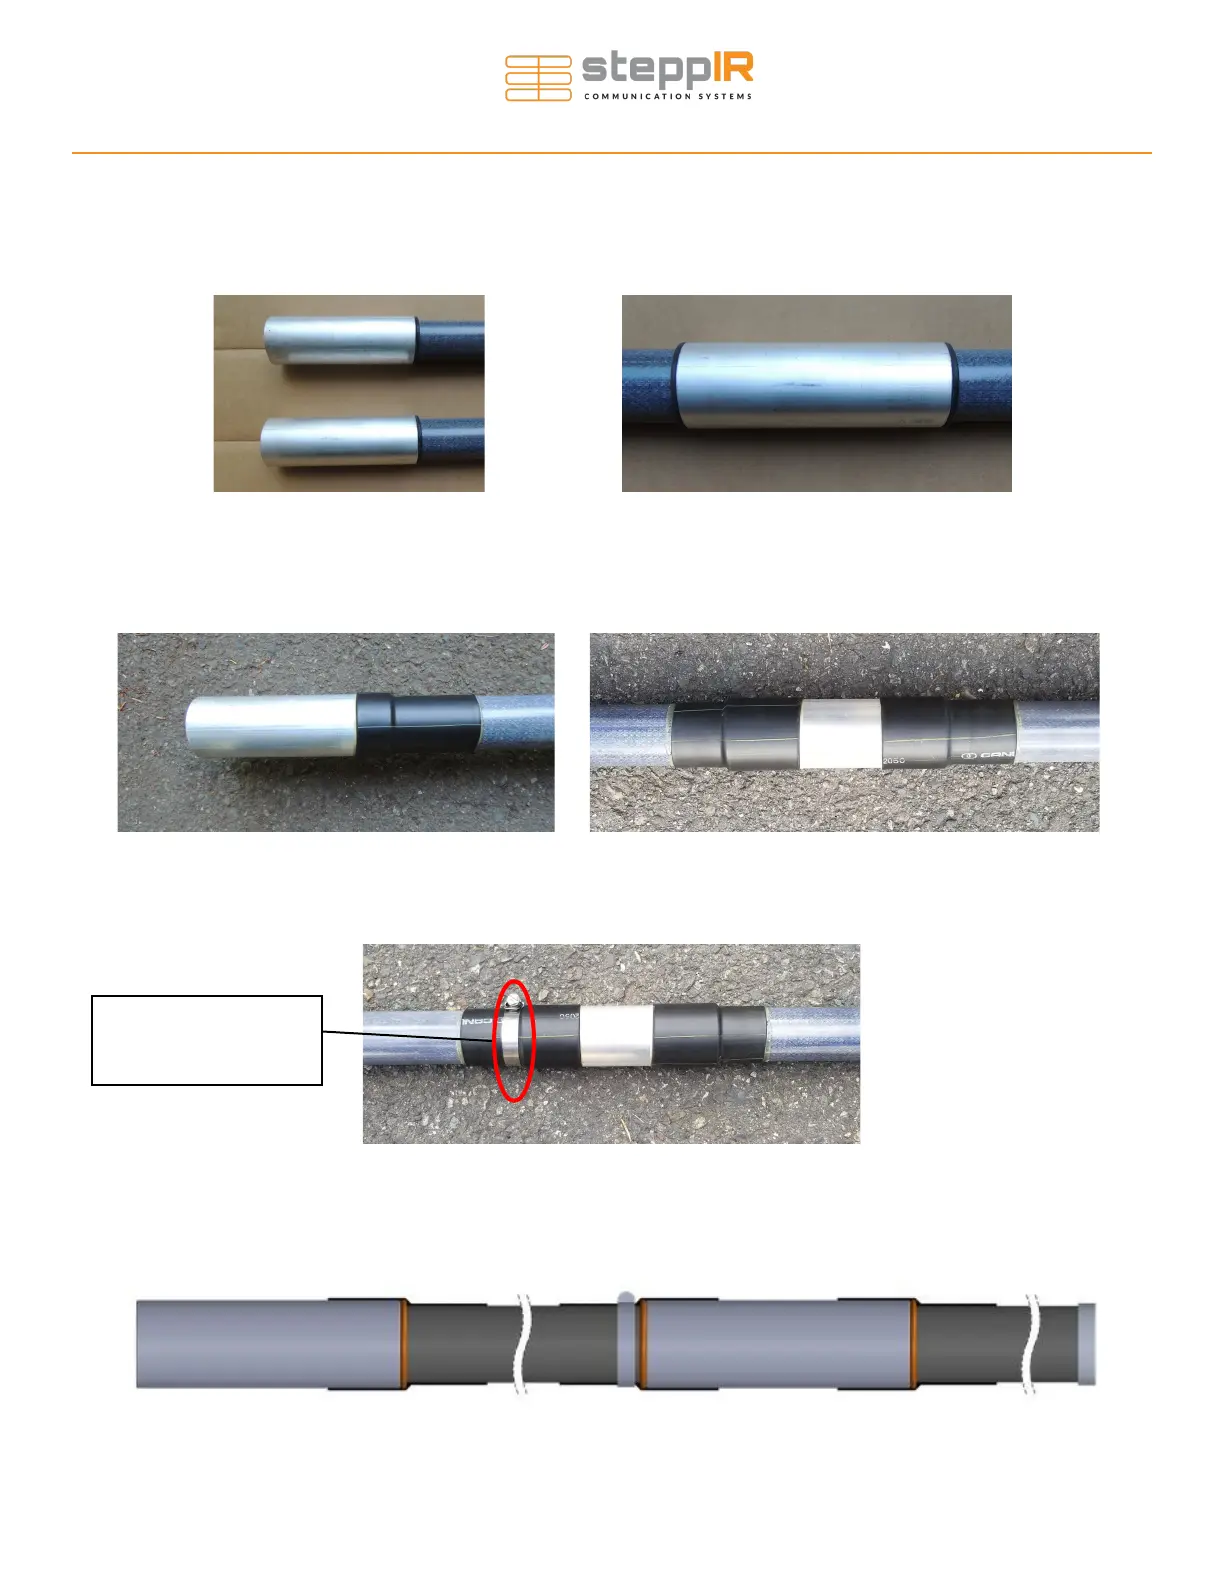
Section 5.2: Assembling the EST Extensions
• Begin by butting the O-rings against joint of each EST into the aluminum coupler. Then, insert the lower
EST into the upper EST, and slide the remaining O-ring up to the butt of that joint as well.
Figure 5.2 Figure 5.3
• Now the polyolefin heat shrink tubing can be slid over the joints and heated in order to make a firm seal
on the joints.
Figure 5.4 Figure 5.5
• The hose clamp (PN 60-6000-20) can now be slid into position (shown circled in red in figure 5.6) and
tightened to further support the EST extension assembly.
Figure 5.6
• The completed assembly should look like figure 5.7 below:
Figure 5.7
PREPARE THE EST EXTENSION ASSEMBLY
Note: press the hose
clamp firmly to be butted
against the O-ring/coupler.