24 | LWZ304-404 SOL www.stiebel-eltron.com
INSTALLATION
Installation
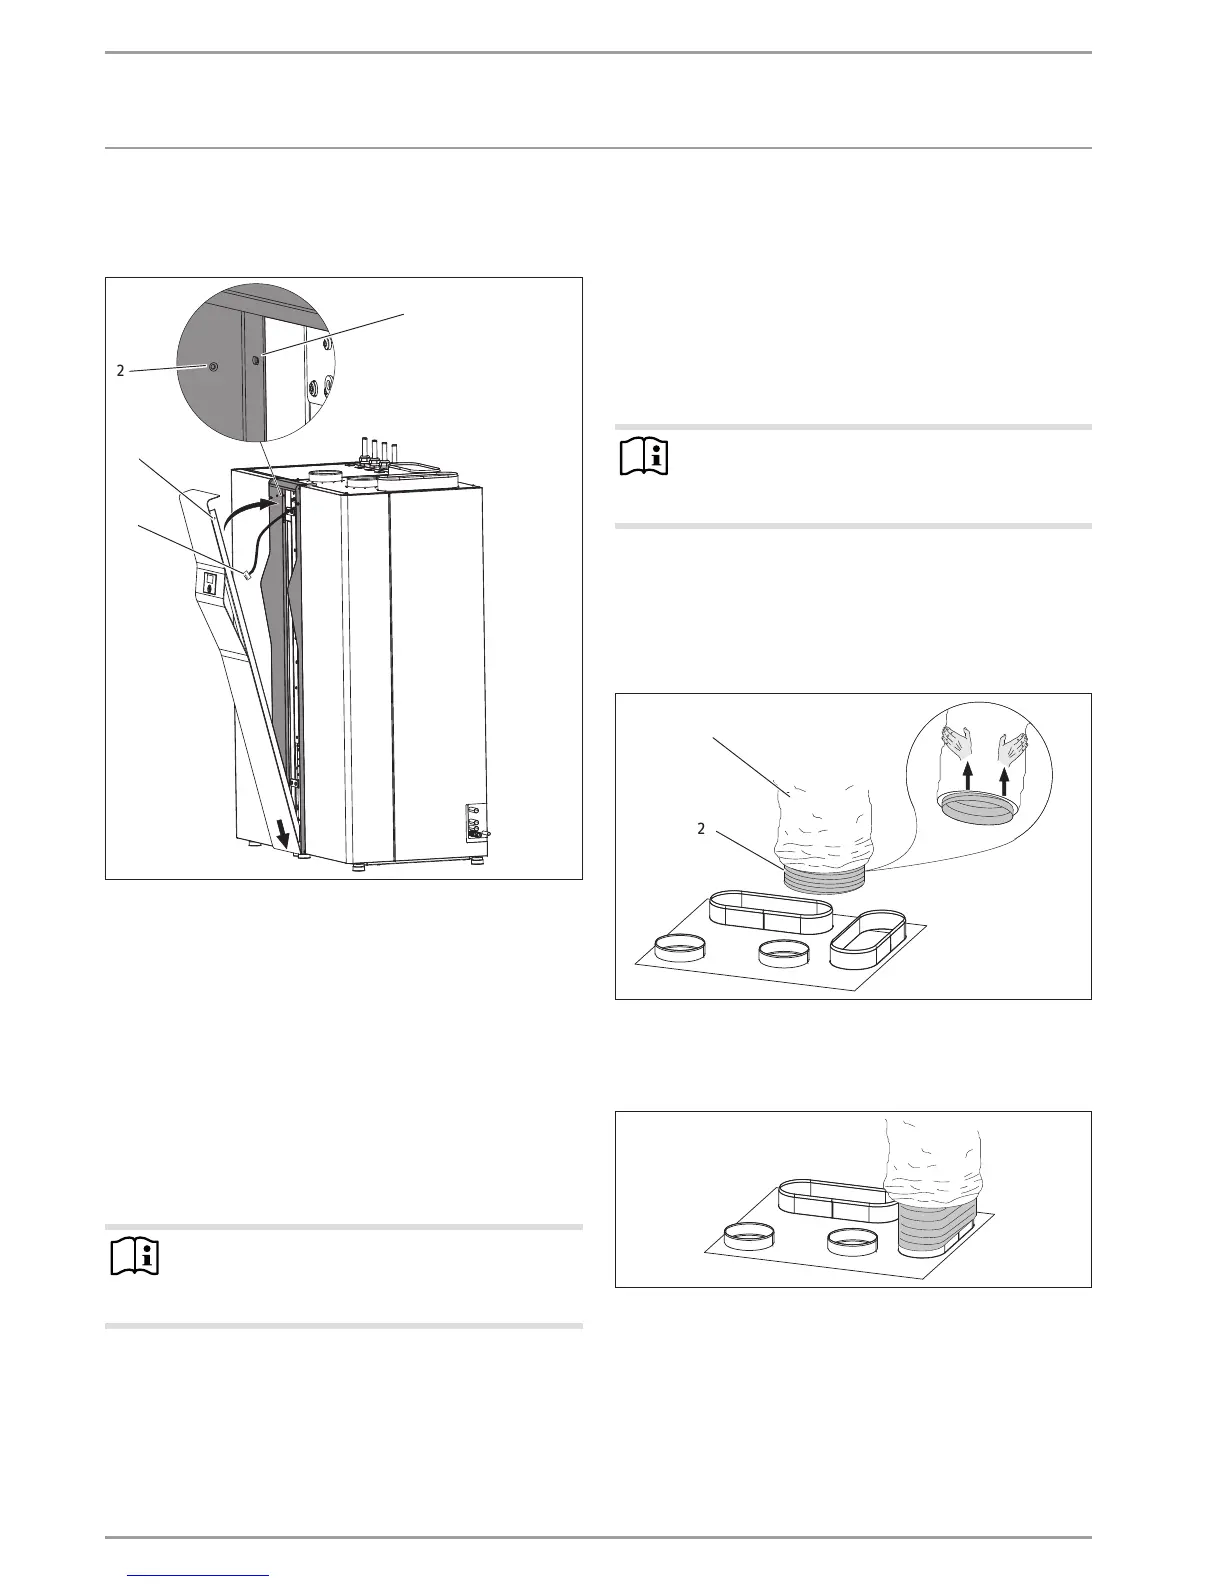
5.10.4 Fitting the fascia
Hook the rear fascia frame into the hooks provided on the
appliance front.
1
4
3
26_04_01_0554
2
1 Slot for securing the fascia frame
2 Hole in the fascia frame for securing the front panel of the
cylinder module
3 BUS cable
4 Screw for securing the fascia on the fascia frame
Secure the fascia frame with one screw in the slot on the
appliance.
Connect the bus cable to the programming unit. The BUS
cable must run upwards with the jumper in the l.h. side.
Insert the fascia from the top into the fascia frame.
The fascia has one screw each on the l.h. and r.h. side.
Tighten these screws to secure the fascia to the fascia frame.
5.11 Outdoor air and exhaust air hose installation
Note
If connecting a geothermal heat exchanger, convert the
appliance as described in chapter "Outdoor air domestic
ventilation connection option" before fitting the air hoses.
Air hoses guide the intake air (outdoor air) from the outside to
the heat pump, and route the discharge air (exhaust air) to the
outdoors (see chapter "Required accessories"). These are highly
flexible, thermally insulated and self-extinguishing in case of fire
in accordance with ASTMD 1692-67 T.
5.11.1 Information on routing the air hoses
Use a sharp knife to trim the hose to the required length. Cut
the Bowden core using wire cutters.
If you need to extend the air hose, push the core of two hoses
together. There should be approx. 30cm overlap.
The total length of hoses on the air intake and discharge sides
must not exceed 8m.
Never incorporate more than four 90° bends. The radius of the
bends must be at least 365mm, relative to the centre of the hose.
Note
When installing an outdoor air connection maintain
Δp<20Pa. In other words, the outdoor air duct run
should be as short as possible.
The air hose tends to sag because of its flexibility. Secure it at
intervals of approx. 1m.
5.11.2 Fitting air hoses
Adapt the shape of the air hose to match the oval connection
panel of the function module.
26_04_01_0681
1
2
1 External hose
2 Internal hose
Push the external hose and the thermal insulation slightly up
so that the internal hose of the air hose protrudes slightly.
26_04_01_0682
Invert the internal hose halfway down the connector.
 Loading...