OPERATION
Operation
ENGLISH
www.stiebel-eltron.com LWZ 304-404 SOL | 13
f Scroll with the scroll wheel to select another day or group of
days.
f Confirm your selection with OK.
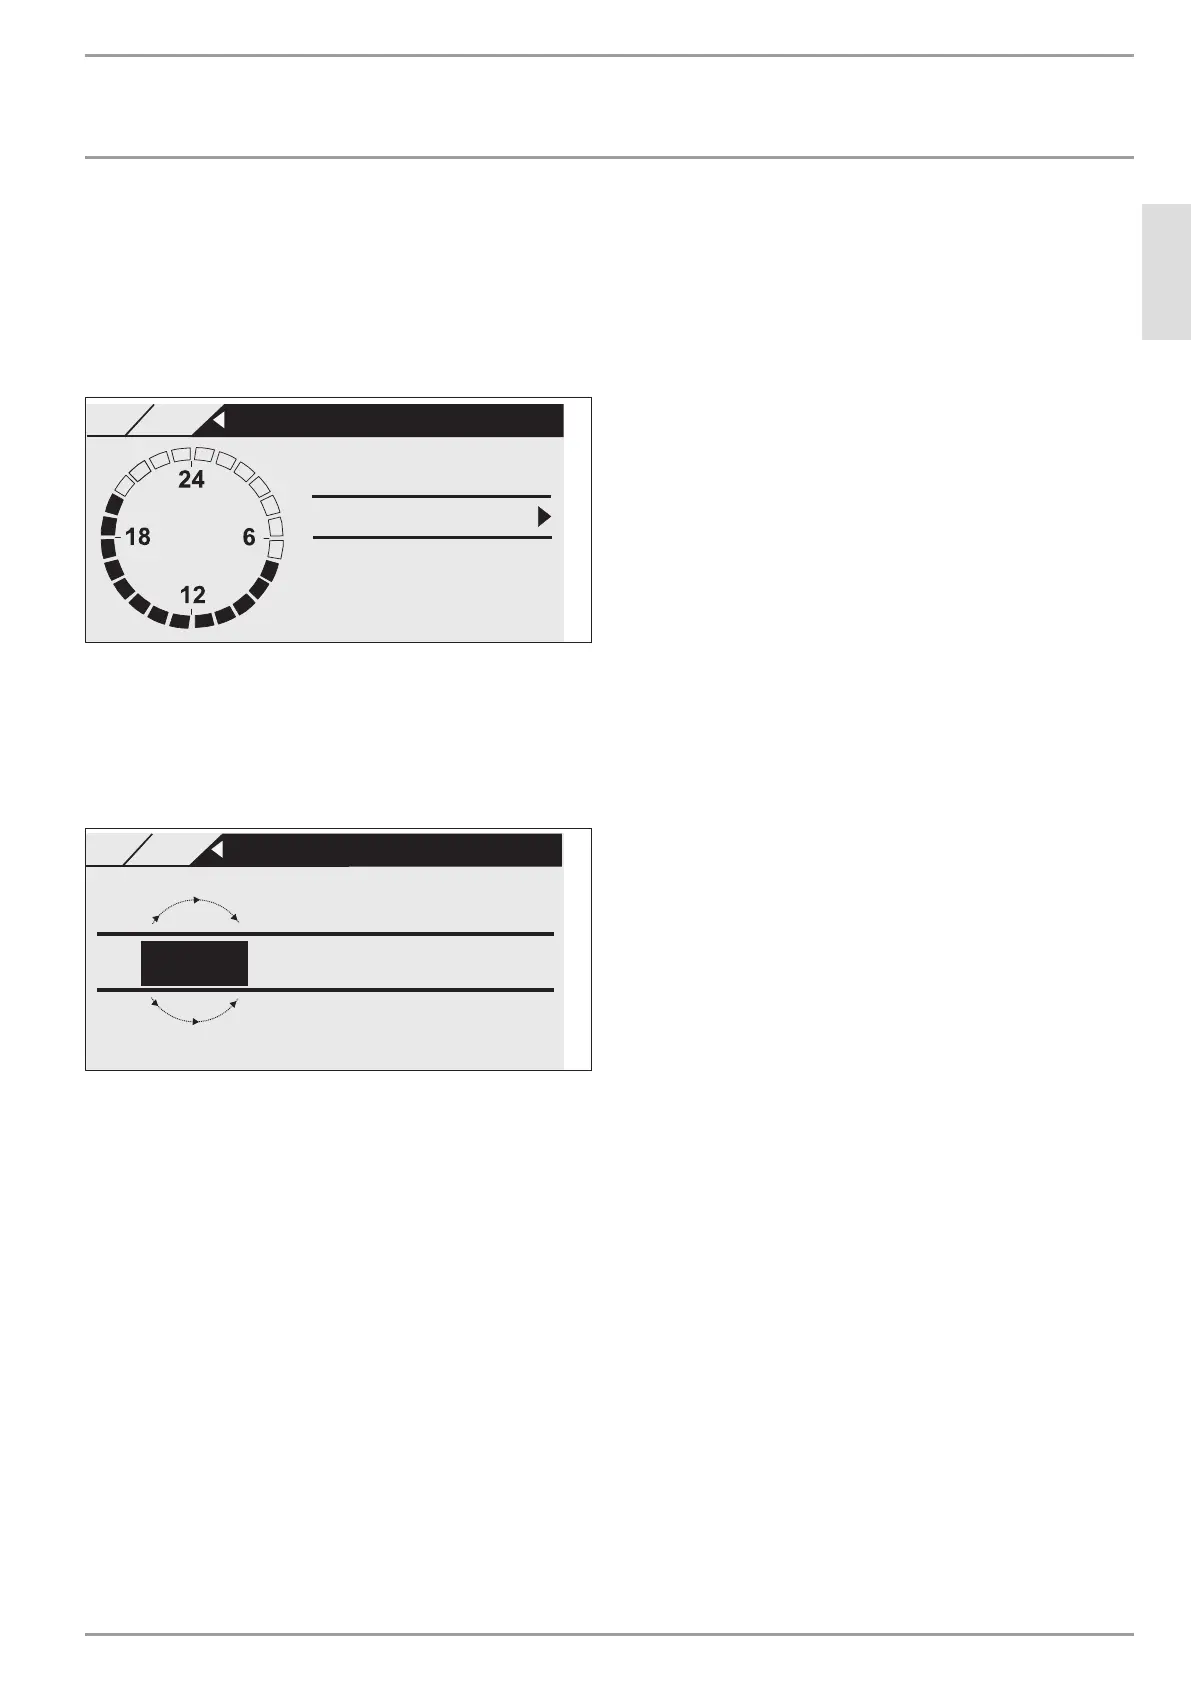
You can now set three switching time pairs. The three switching
time pairs are shown on the display, to the right of the clock. A
switching time pair comprises the start time and end point, at
which the appliance returns to its previous state.
07:00 - 20:00
- -:- - - - -:- -
- -:- - - - -:- -
26�04�01�0299
MONDAY
SETTINGS
PROGRAMS
HEATING PROGRAM HC1
In this example, only one switching time pair has so far been
programmed. For switching time pairs 2 and 3, short dashes are
displayed instead of times. These switching time pairs are still
empty. If you select one of the free switching times pairs with
OK,
you reach the area where you can set the associated start and end
times. Press
OK and the display shown below appears. Set the
required time with the scroll wheel.
End
- -:- -
SETTINGS
PROGRAMS
SETTINGS
- -:- -
TIME TIME
Start
26�04�01�0302
Times can be entered in intervals of 15 minutes. You can set 16:30
or 16:45 h, but not 16:37 h. Confirm your entry with OK.
Periods around midnight
Assume, for example, you want heating mode to be enabled from
22:00 h for four hours every Wednesday evening. This means the
period does not expire until the next day, Thursday, at 02:00 h.
However, since the day ends at 00:00h, two switching time pairs
are necessary for the required program. First, program the period
22:00 to 00:00 h for Wednesday, then 00:00 to 02:00 h for Thursday.
Deleting a switching times pair
Select the pair of switching times you want to delete. Go to the
start time change. Turn the scroll wheel to reduce the time. If you
reach 00:00 and continue to make a rotation, the pair of switch-
ing times is removed. The previously shown display appears, i.e.
dashes instead of numbers. Confirm again with OK.
DHW PROGRAM [MENU/PROGRAMS]: Here, you can set the pe-
riods when DHW is heated with reference to the set day tempera-
tures. In the other phases, the set night temperatures are followed.
The times are set as for the heating programs. You can select the
set values for day and night mode as described in the DHW chapter.
Example: You want to heat up DHW daily at two different times,
i.e. from 22:00 h until 05:00 h the following day, and then again
from 08:00 h until 11:00 h. Since the day begins at 00:00 h, begin
programming at 00:00 h. The first pair of switching times runs
from 00:00 until 05:00 h. The second pair of switching times starts
at 08:00 and ends at 11:00 h. The third switching time pair runs
from 22:00h until 24:00h.
The pairs of switching times should be selected so that the DHW
cylinder can be completely heated up between the start and stop
times (at least 3 hours).
FAN PROGRAM [MENU/PROGRAMS]: The setting is made as for
the central heating and DHW programs. Select the set fan val-
ues in accordance with chapter "Operation / Appliance functions
/ Ventilation".
4.7.12 Contractor login
Under [MENU/CONTRACTOR LOGIN], the contractor can enter and
change the numerical code. If the blocked parameters have been
enabled by entering the code, they can be blocked again under
RES. FOR CONTRACTOR.
4.7.13 Contractor level
Under [MENU/
CONTRACTOR], only the display of runtimes and
some measures for troubleshooting are enabled for you as user.
The remaining parameters have a great influence on the appliance
control properties, and are therefore protected with a password
to prevent incorrect settings. As an appliance user, you can see
these parameters, but if you jump to the next menu level, you
meet the code check.
The submenu
PROCESS VALUES includes actual values that
assist the qualified contractor in troubleshooting.
4.7.14 Commissioning
The majority of settings for commissioning must be carried out
by the contractor. As a user, you can make the following settings:
-
LANGUAGE: Here you can select the language in which the
display texts are shown.
-
TERMINAL ADDRESS: Every programming unit, either in-
tegrated in the appliance or fitted externally inside the build-
ing, requires a terminal address to facilitate communication.
-
CONTR A ST: Here you can set the display contrast.
-
BOOSTER T ACTIVATE: With this parameter you determine
from what outside temperature onwards the electric emer-
gency/booster heater should be started.
-
ROOM TEMP CORRECTION
- ROOM TEMP CORRECTION 2
- DHW PASTEURISATION TEMP.
- DRY HEATING PROGRAM: The dry heating program is not
necessary for daily requirements. The explanation can be
found in the installation instructions for qualified contractors.
-
DELIVERED CONDITION: If you set this parameter to ON,
then all parameters will be reset to their factory settings.
296066-38500-9030_LWZ_304-404_SOL_Bedienung_en.indb 13 21.07.2015 12:03:51
 Loading...