30 BT 130
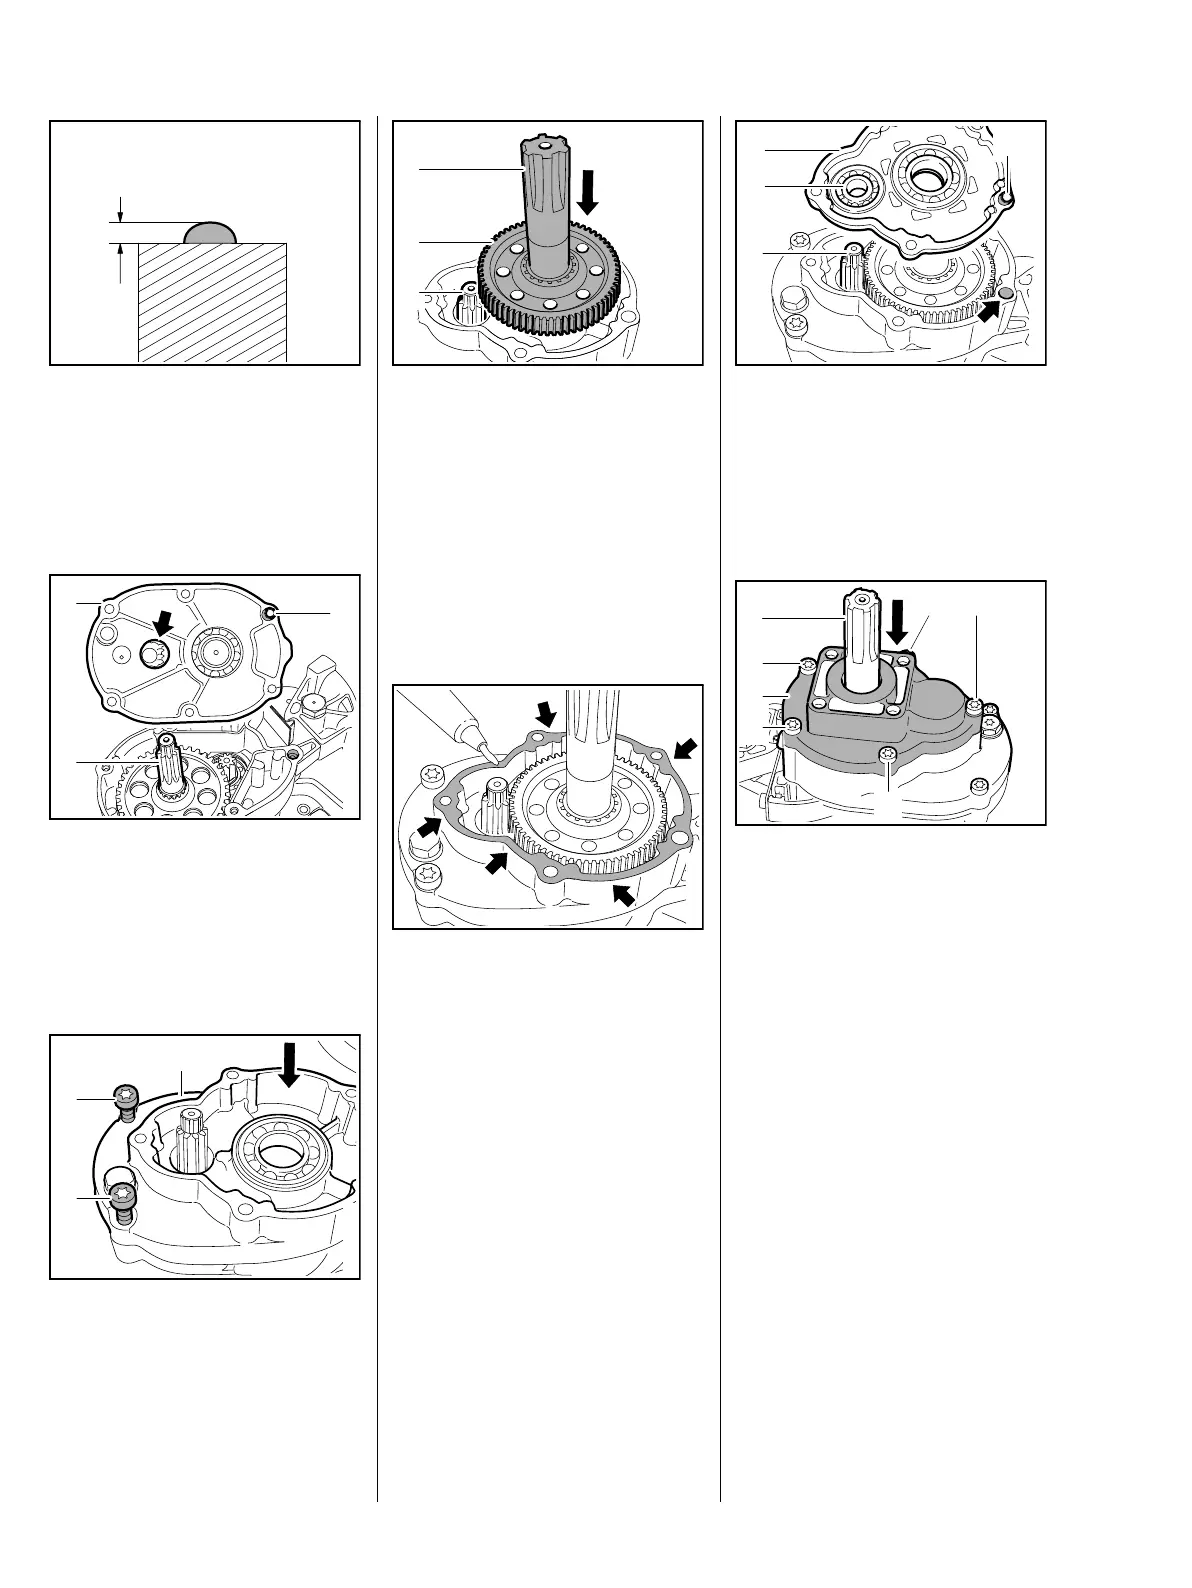
The bead of sealant should be
about 1 mm high (a).
Make sure the sealant does not
project into the clutch housing or
gearbox housing.
: Position the gearbox housing (1)
so that the guide sleeve (2) is in
line with the clutch housing bore
and the pinion shaft (3) engages
the spur gear through the hole
(arrow).
: Push on the gearbox housing (1)
and insert two screws (2) to hold
it in place.
a
7022RA094 TG
1
2
9912RA018 TG
3
1
2
9912RA069 TG
2
– Coat teeth and ball bearing with
STIHL gear lubricant, b 13
: Push the output shaft (1) into the
spur gear (2) as far as stop.
: Push the output shaft (1) with
spur gear (2) into the ball bearing
so that the spur gear meshes with
the pinion shaft (3).
– Distribute the specified amount of
STIHL gear lubricant evenly in
the gearbox housing
– the sealing faces must be free
from grease, b 2.4, b 13
: Apply sealant to gearbox housing
sealing face (arrows), b 13
1
2
9912RA068 TG
3
9912RA070 TG
: Position the gearbox cover (1) so
that the guide sleeve (2) lines up
with the hole (arrow) in the
gearbox housing and the pinion
shaft (3) engages the ball
bearing (4).
: Carefully push the gearbox
cover (1) over the output shaft (2)
and insert the screws (3) – take
care not to damage the lip of the
oil seal.
: Tighten down the screws firmly in
a crosswise pattern.
– Install the clutch housing with
gearbox, b 4.1
– Reassemble all other parts in the
reverse sequence.
1
9912RA071 TG
3
2
4
2
3
3
3
3
3
9912RA072 TG
1
 Loading...