Thedriveshaftiscontainedinan
insulatingtubeinsidetheprotec-
tivetube.Theendsoftheprotec-
tivetubearesealedbyplugs.
-Removebearinghousing/gear-
box,see11.1,11.2and11.3.
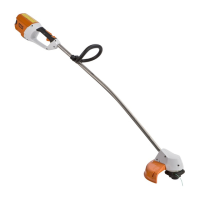
Driveshaft
FS85
•
Pullrigiddriveshaftoutof
protectivetube.
FS75,80,FC75
•
Pullflexibledriveshaftoutof
protectivetube.
Allseries
Note:Theshaftmustbereplaced
ifithasturnedblue.
-CoatthedriveshaftwithSTIHL
multi-purposegrease-see13.2-
beforeinsertingitintheprotec-
tivetube.
Important!Thegreasemustbe
appliedtothedriveshaftuniform-
ly.Itmustneverbeforceddirectly
intotheprotectivetube.
-Pushdriveshaftintoprotective
tube.
•
Pushdriveshaftintoprotective
tubeuntilitprotrudes20mm
(FS85)or17mm(FS75,80,
FC75)(value"A")attheend
oftheprotectivetube.Ifneces-
sary,rotatetheshaftslowlywhile
applyinggentlepressureuntilit
canbepushedintotheextent
necessary.
-Installbearinghousing/gear-
box,see11.1,11.2and11.3.
Insulatingtube
-Removedriveshaft.
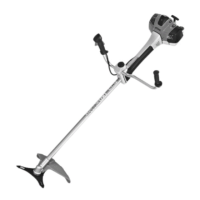
•
Removeplugwithassembly
hook(1)59108902800.
•
Pulloutinsulatingtube.
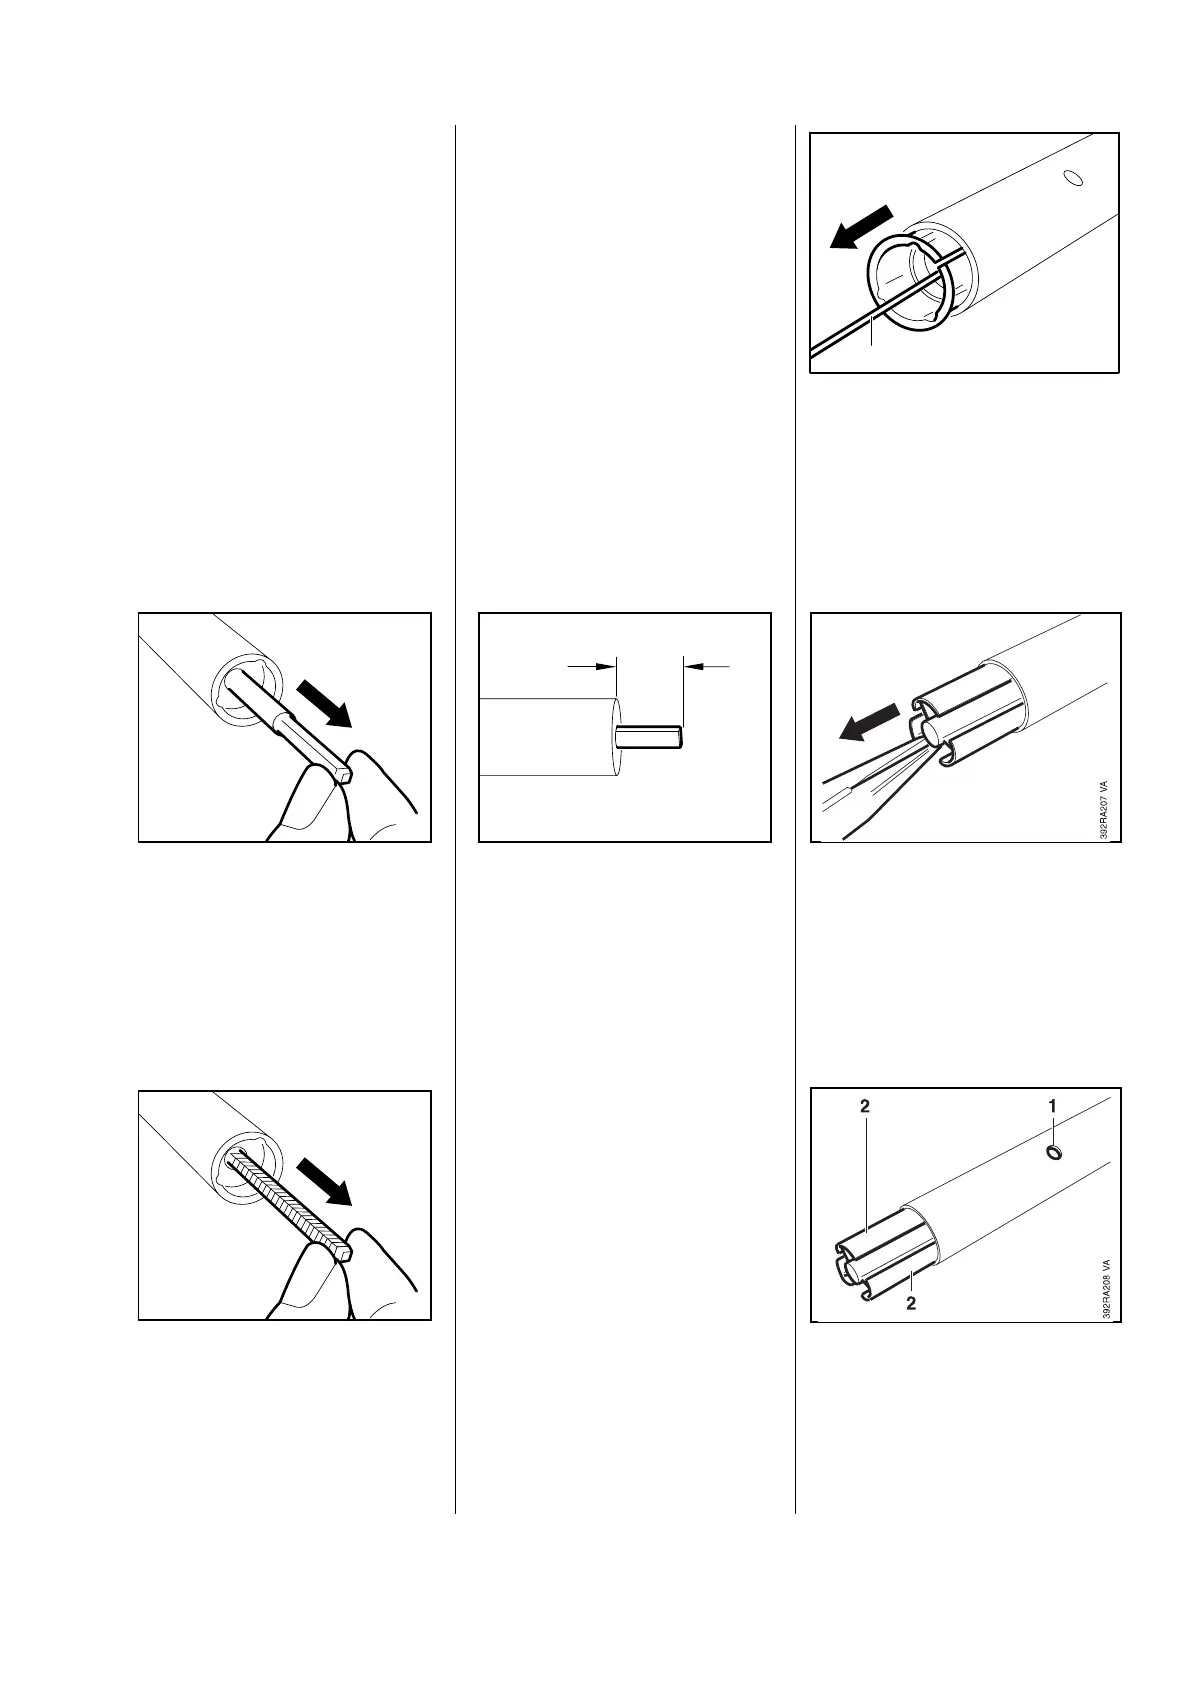
•
Thehole(1)mustbelocated
betweenthewebs(2).
-Fitplugandinstalldriveshaft.
10.3 Driveshaft/insulatingtube
362RA177
A
VA
392RA155
VA
392RA154
VA
392RA209
1
ST
45

 Loading...