EasyManua.ls Logo

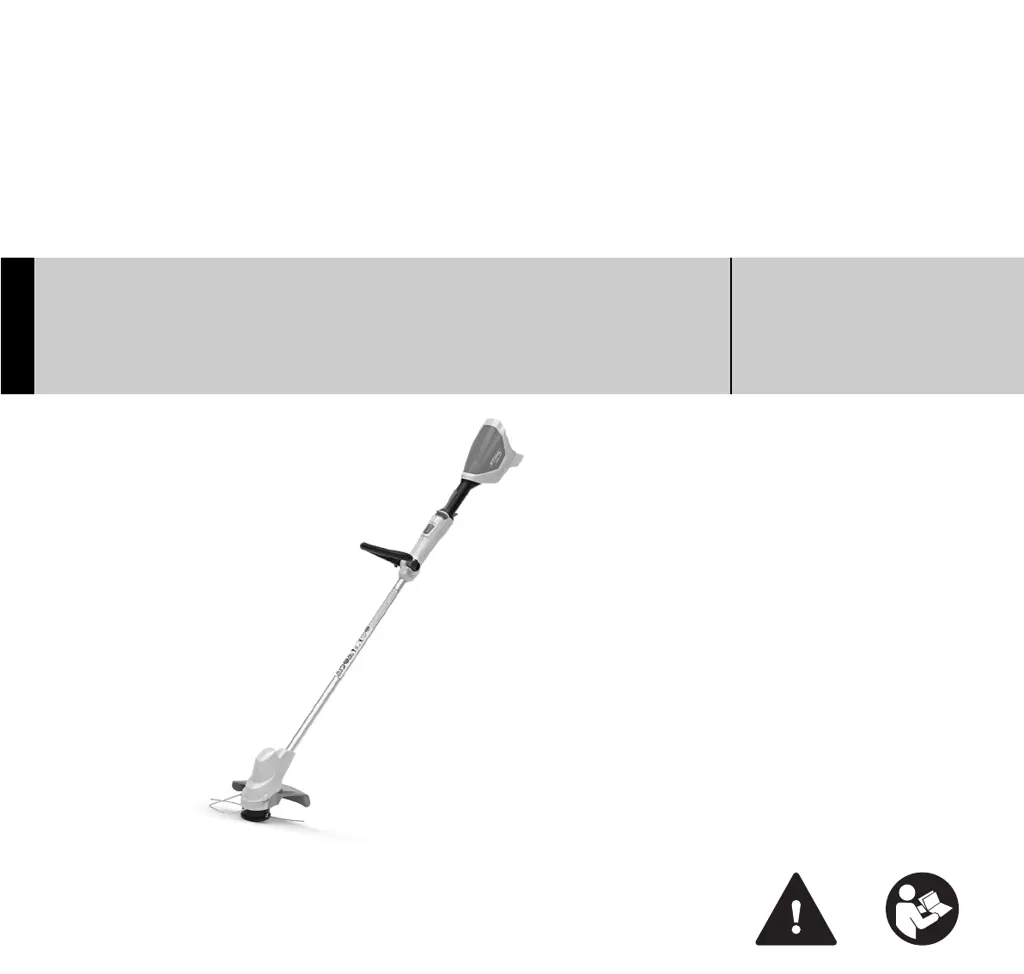
Stihl FSA 56 - User Manual

Stihl FSA 56
76 pages
Print Icon
To Next Page IconTo Next Page
Loading...
{
STIHL FSA 56
Instruction Manual
Notice d’emploi

Table of Contents

Questions and Answers

  • G
    George CarterSep 12, 2025
    What to do if the charging process doesn't start when I insert the battery in the charger for my Stihl FSA 56 Trimmer?
    • D
      Donna BellSep 12, 2025
      If the charge process doesn't start when you insert the battery into the charger for your Stihl Trimmer, it could be because the battery is too hot or too cold. Leave the battery in the charger; the charging process will start automatically once the permissible temperature range is reached.
  • N
    nlongSep 12, 2025
    Why is my Stihl Trimmer battery not charging?
    • T
      Travis CastilloSep 12, 2025
      If the battery is not being charged on your Stihl Trimmer, it might be due to: * No electrical contact between the charger and the battery. Remove the battery, clean the contacts on the charger, and then fit the battery. * A malfunction in the charger. Do not use the charger and contact your STIHL servicing dealer.
  • J
    Jane JohnsonAug 23, 2025
    Why Stihl FSA 56 does not start when switched on?
    • S
      Steve JonesAug 25, 2025
      Your Stihl Trimmer might not start due to several reasons: a low battery charge, a battery that's too hot or cold, a malfunction in the trimmer itself, the trimmer overheating, a battery malfunction, lack of electrical contact between the trimmer and battery, or dampness in either the trimmer or the battery.
  • D
    Danielle HernandezSep 9, 2025
    What to do if the charge process doesn't start on my Stihl FSA 56?
    • K
      Kristin VanceSep 9, 2025
      If the charge process does not start when you insert the battery into the charger, it might be because the battery is too hot or too cold. Leave the battery in the charger; the charging process will start automatically once the battery reaches the permissible temperature range.
  • D
    David WhiteSep 7, 2025
    Why is the battery on my Stihl Trimmer not being charged?
    • P
      Paige PerezSep 8, 2025
      If the battery is not being charged when inserted in the charger, remove the battery and clean the contacts on the charger, then refit the battery. If this doesn't work, there may be a malfunction in the charger, and you should contact your STIHL servicing dealer.
  • L
    Lucas WadeSep 6, 2025
    Why is the Stihl Trimmer battery not being charged?
    • R
      Rachel JohnsonSep 6, 2025
      If the battery is not being charged in your Stihl Trimmer, there may be no electrical contact between the charger and the battery. Remove the battery and clean the contacts on the charger before refitting the battery. If this doesn't work, there could be a malfunction in the charger. In this case, do not use the charger and contact your STIHL servicing dealer.
  • L
    Lisa PalmerSep 5, 2025
    Why is the runtime too short on my Stihl FSA 56?
    • M
      mjohnsonSep 5, 2025
      If the runtime of your Stihl Trimmer is too short, it could be due to a battery that isn't fully charged. Make sure to fully charge the battery. Alternatively, the battery may have reached or exceeded its useful life, in which case you should have it checked by an authorized STIHL servicing dealer.
  • M
    Matthew JonesSep 4, 2025
    Why is the Stihl Trimmer runtime too short?
    • S
      Susan SpencerSep 4, 2025
      If your Stihl Trimmer's runtime is too short, it could be due to a battery issue. Ensure the battery is fully charged. If the battery's normal life has been exceeded, consider replacing it.
  • V
    victor41Sep 2, 2025
    How to fix a Stihl FSA 56 Trimmer that does not start?
    • B
      Brianna MooreSep 3, 2025
      To fix a Stihl Trimmer that won't start, try these steps: * Charge the battery if it's low. * If the battery is too hot or cold, remove it and let it reach a moderate temperature. * For a possible trimmer malfunction, remove the battery, clean the battery compartment contacts, and reinsert the battery. If the problem persists (3 LEDs flash red), contact a STIHL dealer. * If the trimmer is too hot, remove the battery and let the trimmer cool down. * For a potential battery malfunction, remove and reinsert the battery. If the issue continues (4 LEDs flash red), contact a STIHL dealer. * Ensure good electrical contact by removing the battery and cleaning the compartment contacts before reinserting it. * Allow the trimmer and battery to dry if they are damp.
  • D
    David SteeleSep 1, 2025
    Why does my Stihl FSA 56 Trimmer cut out during operation?
    • W
      williamschristopherSep 1, 2025
      If your Stihl Trimmer cuts out during operation, it might be because the battery is either too hot or too cold. To resolve this, remove the battery and allow both the trimmer and battery to gradually cool down to an ambient temperature between 50 °F to 68 °F (10 °C to 20 °C).

Summary

1 Introduction

2 Guide to Using this Manual

Explains how to navigate and understand the manual's structure and symbols.

2.1 Signal Words

Defines signal words (DANGER, WARNING, NOTICE) used for safety information.

3 Main Parts

3.1 Trimmer, Battery and Charger

Details the physical parts of the trimmer, battery, and charger with numbered labels.

3.2 Mowing Head, Cutting Attachments and Deflector

Describes the mowing head, cutting attachments, and deflector components.

4 Safety Symbols on Products

4.1 Trimmer and Charger Symbols

Details safety symbols specifically found on the trimmer and charger units.

5 Important Safety Instructions

5.1 Introduction to Safety

Sets the context for general safety warnings for electric trimmers.

5.2 Intended Use

Defines the proper and intended uses of the trimmer to prevent injury.

5.3 Operator Requirements

Outlines the physical and mental requirements for operating the trimmer safely.

5.4 Personal Protective Equipment

Specifies necessary protective clothing and equipment for safe operation.

5.5 Trimmer Safety

Details specific safety precautions related to the trimmer, including electric shock and cutting hazards.

5.6 Using the Trimmer

Provides instructions and warnings for safely using the trimmer.

5.6.1 Before Operation

Lists critical checks and preparations required before starting trimmer operation.

5.6.2 Holding and Controlling the Trimmer

Explains how to properly hold and control the trimmer for safe operation.

5.6.3 Working Conditions

Defines safe operating conditions, including visibility and bystander safety.

5.6.4 Operating Instructions

Provides step-by-step instructions and critical safety measures during trimmer operation.

6 Battery Safety

6.1 Warnings and Instructions

Details specific warnings and essential instructions for safe battery handling.

7 Charger Safety

7.1 Warnings and Instructions

Outlines critical warnings and instructions for safe charger operation.

8 Maintenance, Repair and Storage

8.1 Warnings and Instructions

Covers essential warnings and instructions for maintenance, repair, and storage.

9 Before Starting Work

9.1 Preparing the Trimmer for Operation

Details the necessary preparations before operating the trimmer.

10 Charging the Battery

10.1 Setting up the Charger

Provides instructions on how to properly set up the battery charger.

10.2 Charging

Details the steps for charging the STIHL battery.

11 LED Diagnostics

11.1 LEDs on the Battery

Describes the LED indicators on the battery and their meanings, covering status, trimmer status, and charge status.

11.2 LED on the Charger

12 Assembling the Trimmer

12.1 Mounting the Deflector

Details how to properly mount the deflector onto the trimmer.

12.2 AutoCut 2-2 Mowing Head

Focuses on the AutoCut 2-2 mowing head assembly.

12.2.1 Mounting the Trimmer Line Spool

Instructions for mounting the trimmer line spool onto the mowing head.

12.2.2 Removing the Trimmer Line Spool

Steps for removing the trimmer line spool from the mowing head.

12.3 Mounting the Loop Handle

Instructions for mounting the loop handle onto the trimmer shaft.

13 Adjusting the Trimmer

13.1 Adjusting the Length of the Drive Tube

Explains how to adjust the trimmer's drive tube length.

13.2 Adjusting the Loop Handle

Details how to adjust the position of the loop handle for ergonomics.

14 Inserting and Removing the Battery

14.1 Inserting the Battery

Step-by-step guide on how to insert the battery into the trimmer.

14.2 Removing the Battery

Instructions on how to safely remove the battery from the trimmer.

15 Switching the Trimmer On and Off

15.1 Switching On

Detailed steps on how to turn the trimmer on.

15.2 Switching Off

Instructions on how to safely turn the trimmer off.

16 Checking the Trimmer

16.1 Testing the Controls

Details the procedure for testing the trimmer's safety controls.

17 During Operation

17.1 Using the Trimmer

Instructions on how to use the trimmer effectively and safely.

17.2 Adjusting the Nylon Line

Explains how to adjust the nylon line length while using the trimmer.

18 After Finishing Work

18.1 Preparing for Transportation or Storage

Steps to prepare the trimmer for transport or storage.

19 Transporting the Trimmer and Battery

19.1 Trimmer Transport

Specific instructions for transporting the trimmer.

19.2 Battery Transport

Safety precautions and guidelines for transporting the battery.

20 Storing the Trimmer, Battery and Charger

20.1 Trimmer Storage

Guidance on storing the trimmer safely.

20.2 Battery Storage

Precautions for storing the battery safely.

20.3 Charger Storage

Instructions for storing the charger safely.

21 Cleaning

21.1 Cleaning the Trimmer, Battery and Charger

Detailed steps for cleaning all components of the trimmer system.

22 Inspection and Maintenance

22.1 Inspecting and Maintaining the Trimmer

Steps for inspecting and maintaining the trimmer for optimal performance.

23 Troubleshooting Guide

23.1 Trimmer and Battery Troubleshooting

Troubleshooting steps for issues with the trimmer and battery.

24 Specifications

24.1 STIHL FSA 56 Specifications

Provides specific technical data for the STIHL FSA 56 trimmer.

24.2 STIHL AK Series Battery Specifications

Lists technical specifications for the STIHL AK Series Battery.

24.3 STIHL AL 101 Specifications

Provides technical specifications for the STIHL AL 101 charger.

24.4 Symbols on Trimmer, Battery and Charger

Explains various symbols used on the trimmer, battery, and charger.

24.5 Engineering Improvements

Details STIHL's continuous product improvement policy.

24.6 EMC Compliance Statement

Provides EMC compliance information for the power tool and charger.

25 Approved Deflector and Cutting Attachment Combinations

25.1 STIHL FSA 56 Combinations

Lists approved combinations for the STIHL FSA 56 model.

26 Replacement Parts and Equipment

26.1 Genuine STIHL Replacement Parts

Recommends using genuine STIHL replacement parts for safety and performance.

27 Disposal

27.1 Disposal of Trimmer and Charger

Guidelines for disposing of the trimmer and charger responsibly.

27.2 Battery Recycling

Provides crucial warnings and instructions for battery recycling.

Stihl FSA 56 Specifications

General IconGeneral
Cutting Width28 cm
Battery Voltage36 V
Power SourceBattery
Cutting Circle Diameter28 cm
Shaft TypeStraight
Battery TypeLithium-Ion
Run TimeUp to 20 minutes
Weight with Battery3.2 kg
Weight without Battery2.5 kg
Vibration Level Left Handle3.5 m/s²
Vibration Level Right Handle3.5 m/s²
Charge TimeApprox. 80 minutes

Related product manuals