7
Installation
1
Mounting and wiring
2
Mounting and wiring (Continued)
Incorrect voltage may cause an electric shock. If you have
any questions, consult with an electrician.
Do not remove the tape until you finish the installation. If the
tape comes off the light, please replace it or hold the light head
to avoid swiveling and damage to the product.
LED lamps are extremely bright. Under no circumstances
should you stare into an LED beam since this may cause
irreparable damage to the eye.
Please make sure the voltage and polarity are correct before
To ensure correct operation of the sensor, mount the light
fixture so that the center of the motion detector faces toward
the area you want to protect.
The recommended mounting height of the unit is between
2m (6.6ft) and 3m (10ft) – 2,5m (8ft) is the best
performance height - Do not mount the unit higher
than 3 meters (10ft) as this will affect the motion
detection function of the unit.
When selecting your installation area it’s important to be
aware of the positioning of the NightWatcher detection
sight line due to possible factors that could cause false
triggering such as direct sunlight, window refection, air
condition units, swimming pool reflection, direct street
lighting or large vegetation in the installation area
To prolong the lifespan of the NightWatcher it is advised
to install the unit in an area that is not directly exposed to
extreme weather conditions and if possible under an eave
(if the recommended mounting height allows)
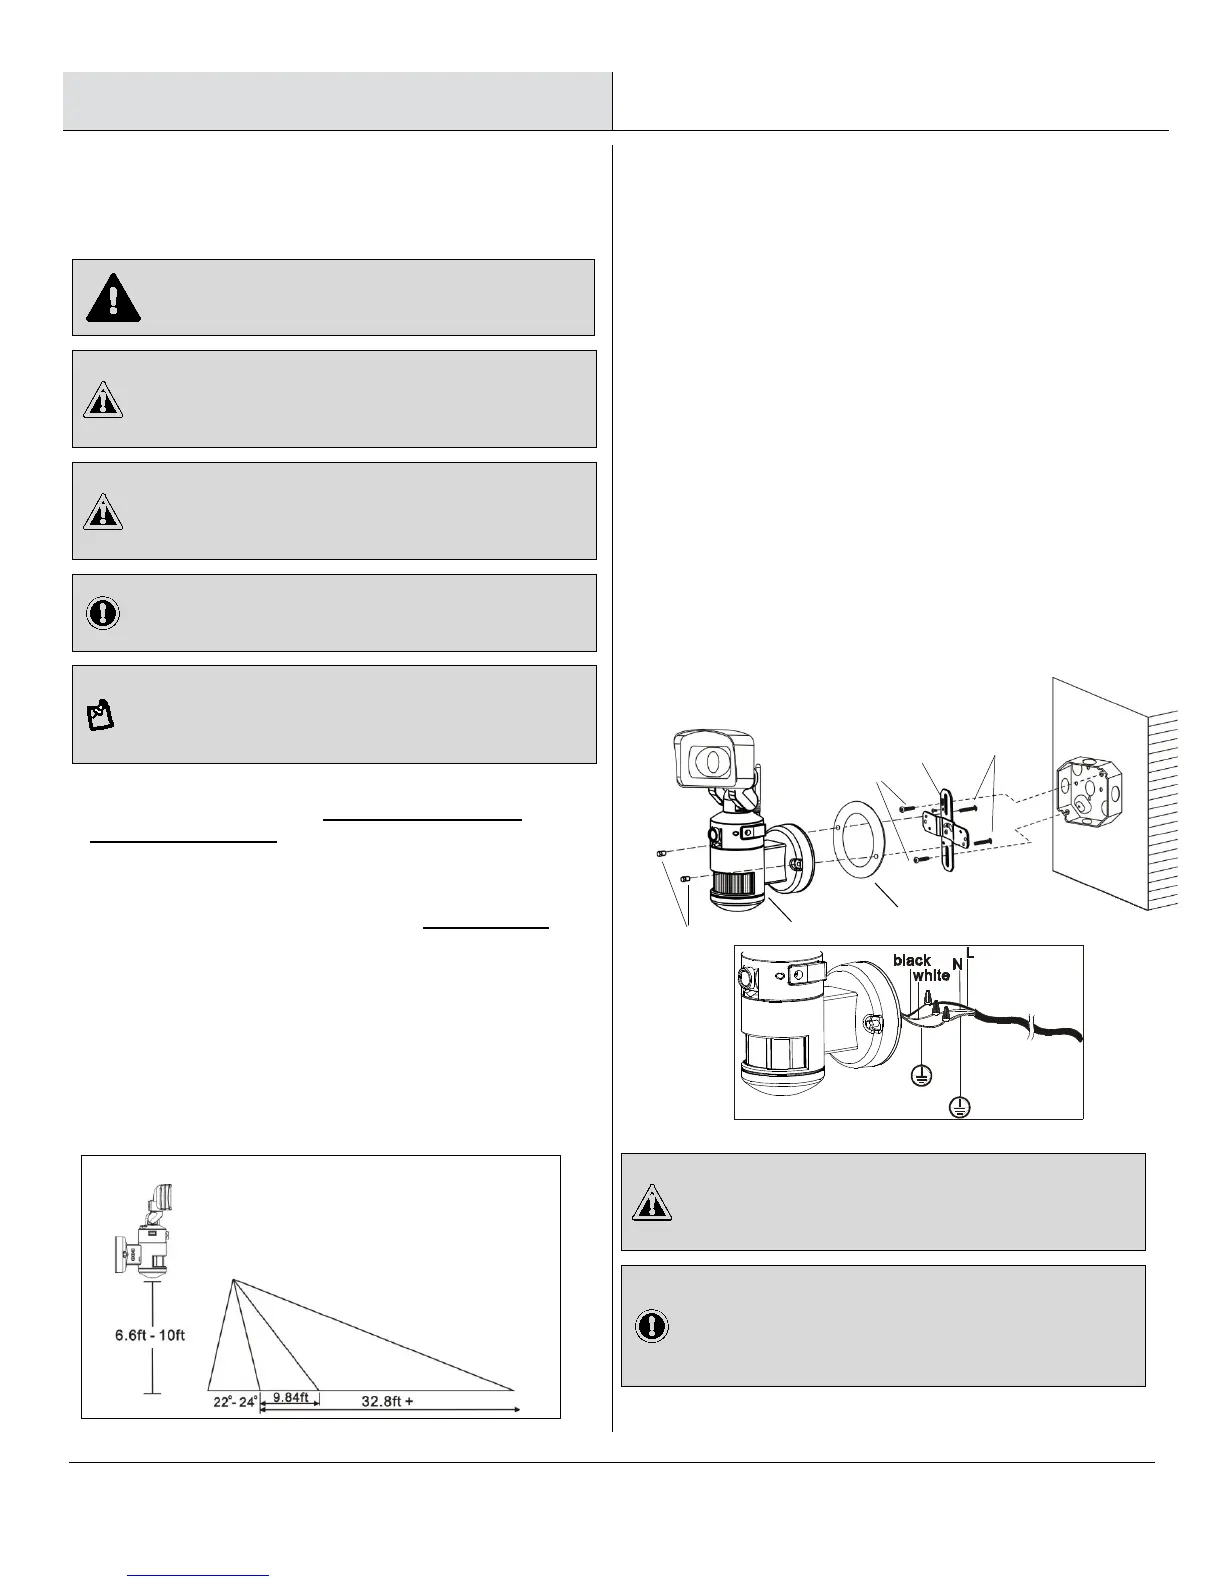
Installing your NightWatcher on a wall or
building surface - use cross bar
□ Attach the crossbar to junction box and secure using
mounting screws (AA).
□ Connect the black wire (live wire) from the AC power
cord to the single black wire coming from unit using
one of the supplied wire nuts (DD).
□ Connect the white wire from the AC power cord to
the white wire coming from unit using one of the
supplied wire nuts (DD).
□ Connect the green/yellow wire from the AC power
cord to the green/yellow wire coming from the unit
using one of the supplied wire nuts (DD).
□ Make sure the polarity is correct.
□ Attach the unit (A) and EVA gasket (F) to the
crossbar (EE) and secure using backplate screw (B)
and screw nut (C).
Please allow 30 seconds warm-up time after switching on.
Do not touch unit during warm-up time to avoid interruption of
start-up sequence. Push the RESET button after switching on.
Remove the security tape from unit and
plastic lens cover from camera after
installation.