SSeerrvviiccee
HHeeaadd eenndd iinntteerrffaaccee aasssseemmbbllyy rreeppllaacceemmeenntt
TToooollss RReeqquuiirreedd::
• T27 Torx driver
• 1/4'' hex wrench
• Torque wrench (in-lb)
PPrroocceedduurree::
1. Using a T27 Torx driver, remove and save the four screws that secure the head end top cover to the head end bottom
covers.
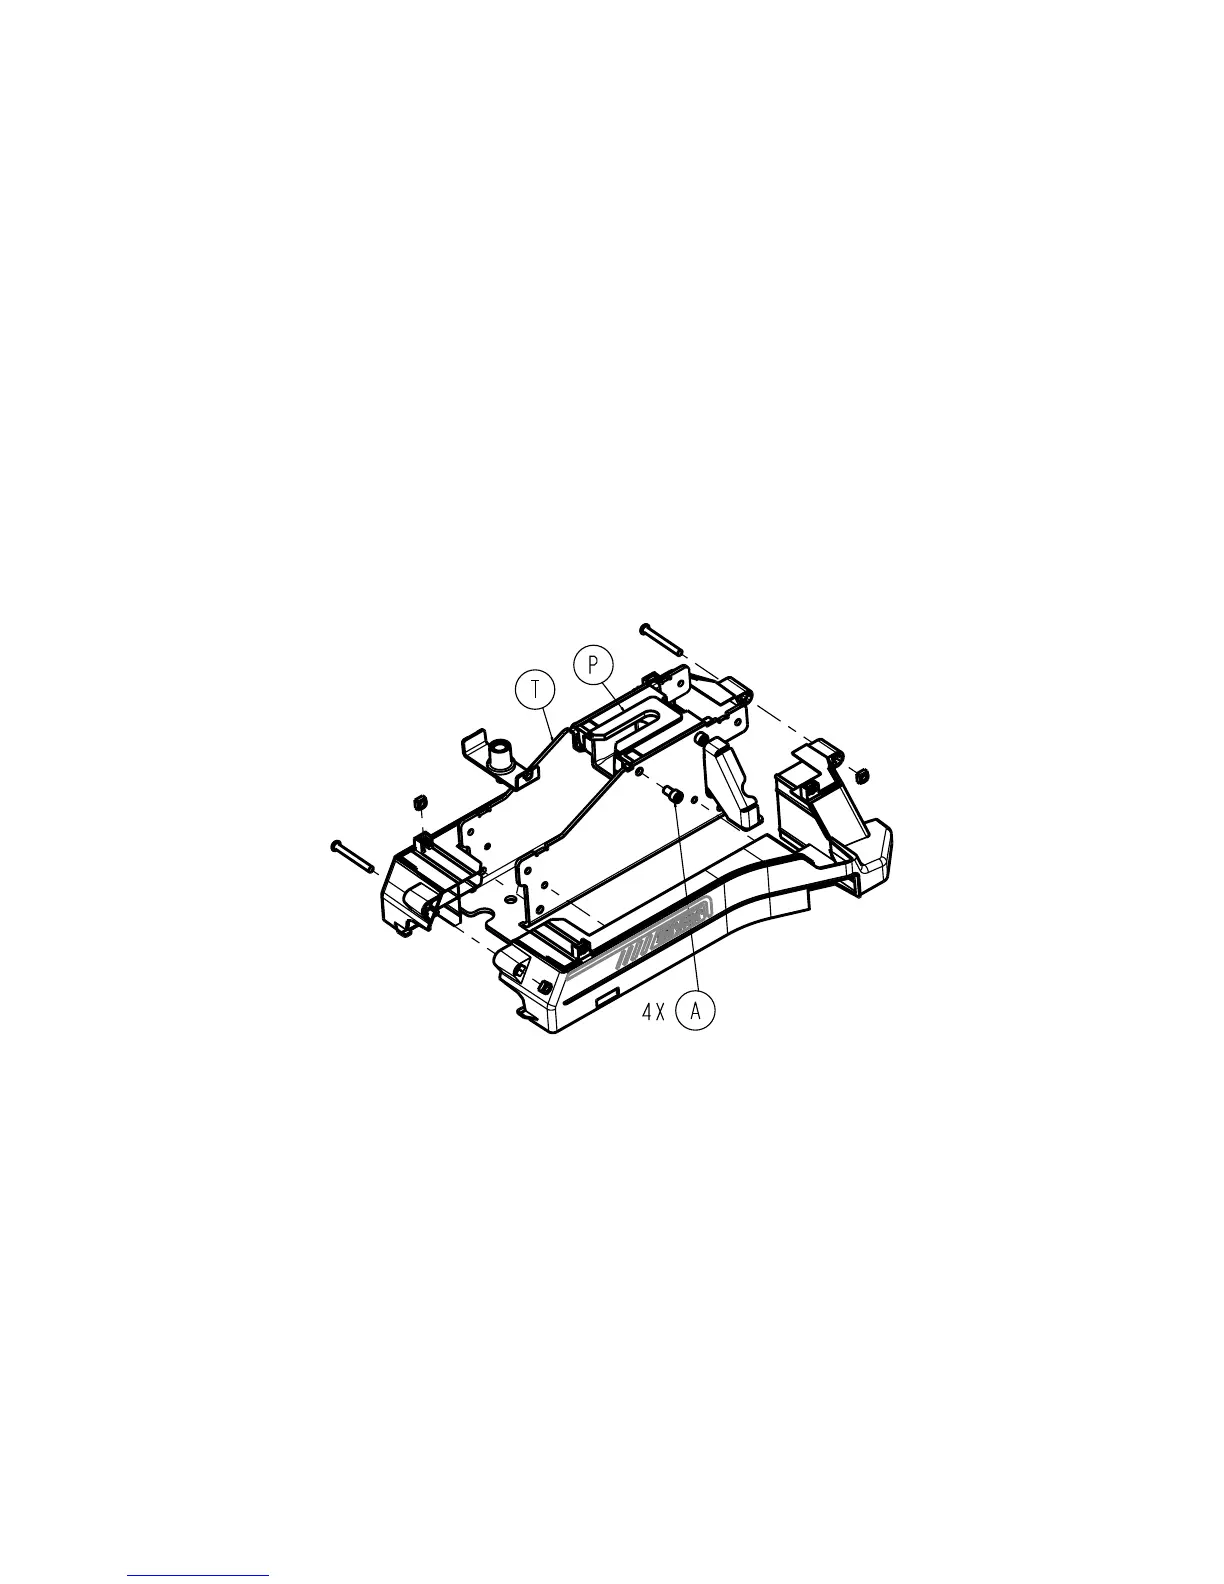
2. Using a ¼'' hex wrench, remove and save the four screws (A) that secure the head end interface assembly (P) to the
head end weldment (T) (Figure 2).
NNoottee -- Torque item (A) to 300 in-lb.
3. Remove and discard the head end interface assembly.
4. Reverse steps to reinstall.
5. Verify proper operation before returning the product to service.
Torque item A
to 300 ± 15 in-lb
FFiigguurree 22 –– RReeppllaacciinngg tthhee hheeaadd eenndd iinntteerrffaaccee aasssseemmbbllyy
FFoooott eenndd iinntteerrffaaccee aasssseemmbbllyy rreeppllaacceemmeenntt
TToooollss rreeqquuiirreedd::
• T27 Torx driver
• 1/4'' hex wrench
• Torque wrench (in-lb)
PPrroocceedduurree::
1. Using a T27 Torx Driver, remove and save the six screws that secure the foot end top cover to the foot end bottom
cover.
EN 14 6392-009-002 Rev E.4