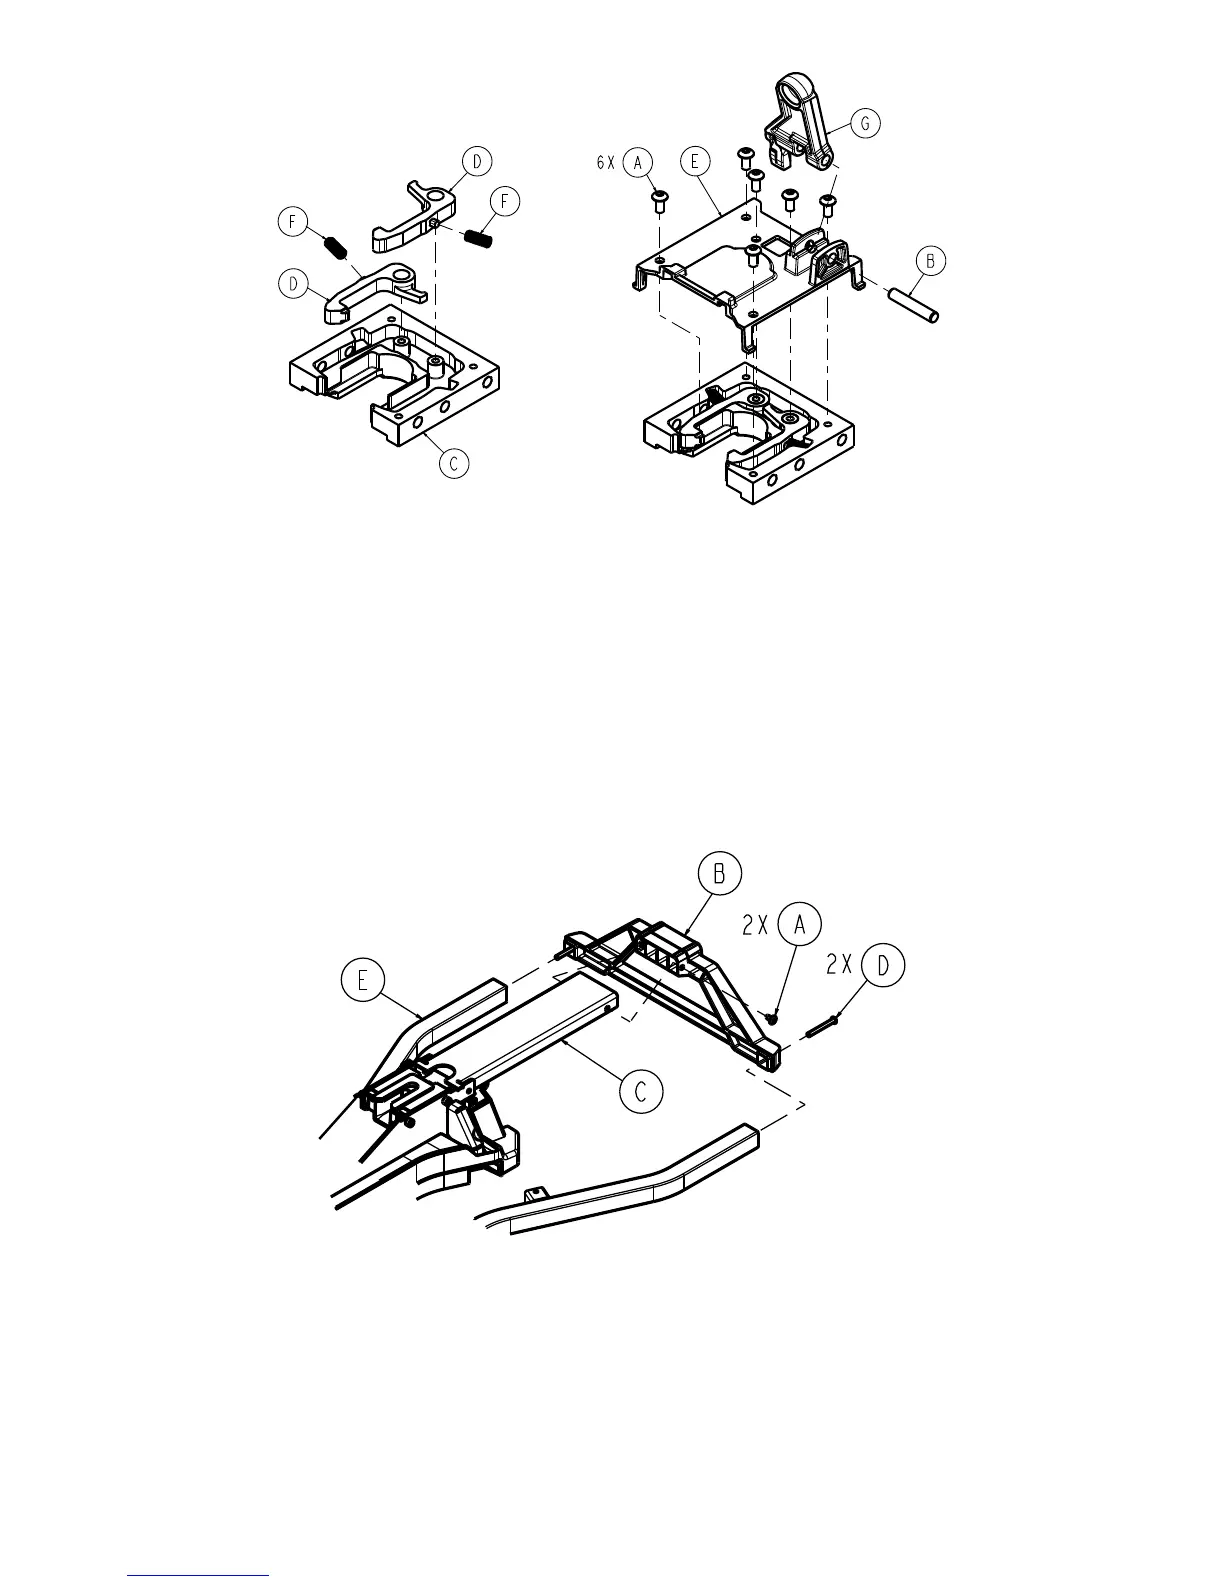
FFiigguurree 66 –– RReeppllaacciinngg tthhee ffoooott eenndd lloocckk ppaawwll
SSaaffeettyy bbaarr rraaiill ssuuppppoorrtt rreeppllaacceemmeenntt
TToooollss rreeqquuiirreedd::
• T27 Torx driver
• Tape measure
PPrroocceedduurree::
1. Using a T27 Torx driver, remove and save the two screws (A) that secure the safety bar rail support (B) to the safety bar
rail (C) (Figure 7).
FFiigguurree 77 –– RReeppllaacciinngg tthhee ssaaffeettyy bbaarr rraaiill ssuuppppoorrtt
2. Using a T27 Torx driver, remove and save the two screws (D) that secure the safety bar rail support (B) to the guide rails
(E) (Figure 7). Discard the safety bar rail support.
3. Using a tape measure, make sure that the tube connector (F) is secured into the guide rails (E) at a depth of 0.75 ±
0.125 in. (Figure 8).
EN 18 6392-009-002 Rev E.4