FFiigguurree 55 –– RReeppllaacciinngg tthhee hheeaadd eenndd pplluunnggeerr
FFoooott eenndd lloocckk ppaawwll rreeppllaacceemmeenntt
TToooollss RReeqquuiirreedd::
• T25 Torx driver
• 1/8'' punch
PPrroocceedduurree::
1. Remove the foot end interface assembly. (See
Foot end interface assembly replacement
(page 14)).
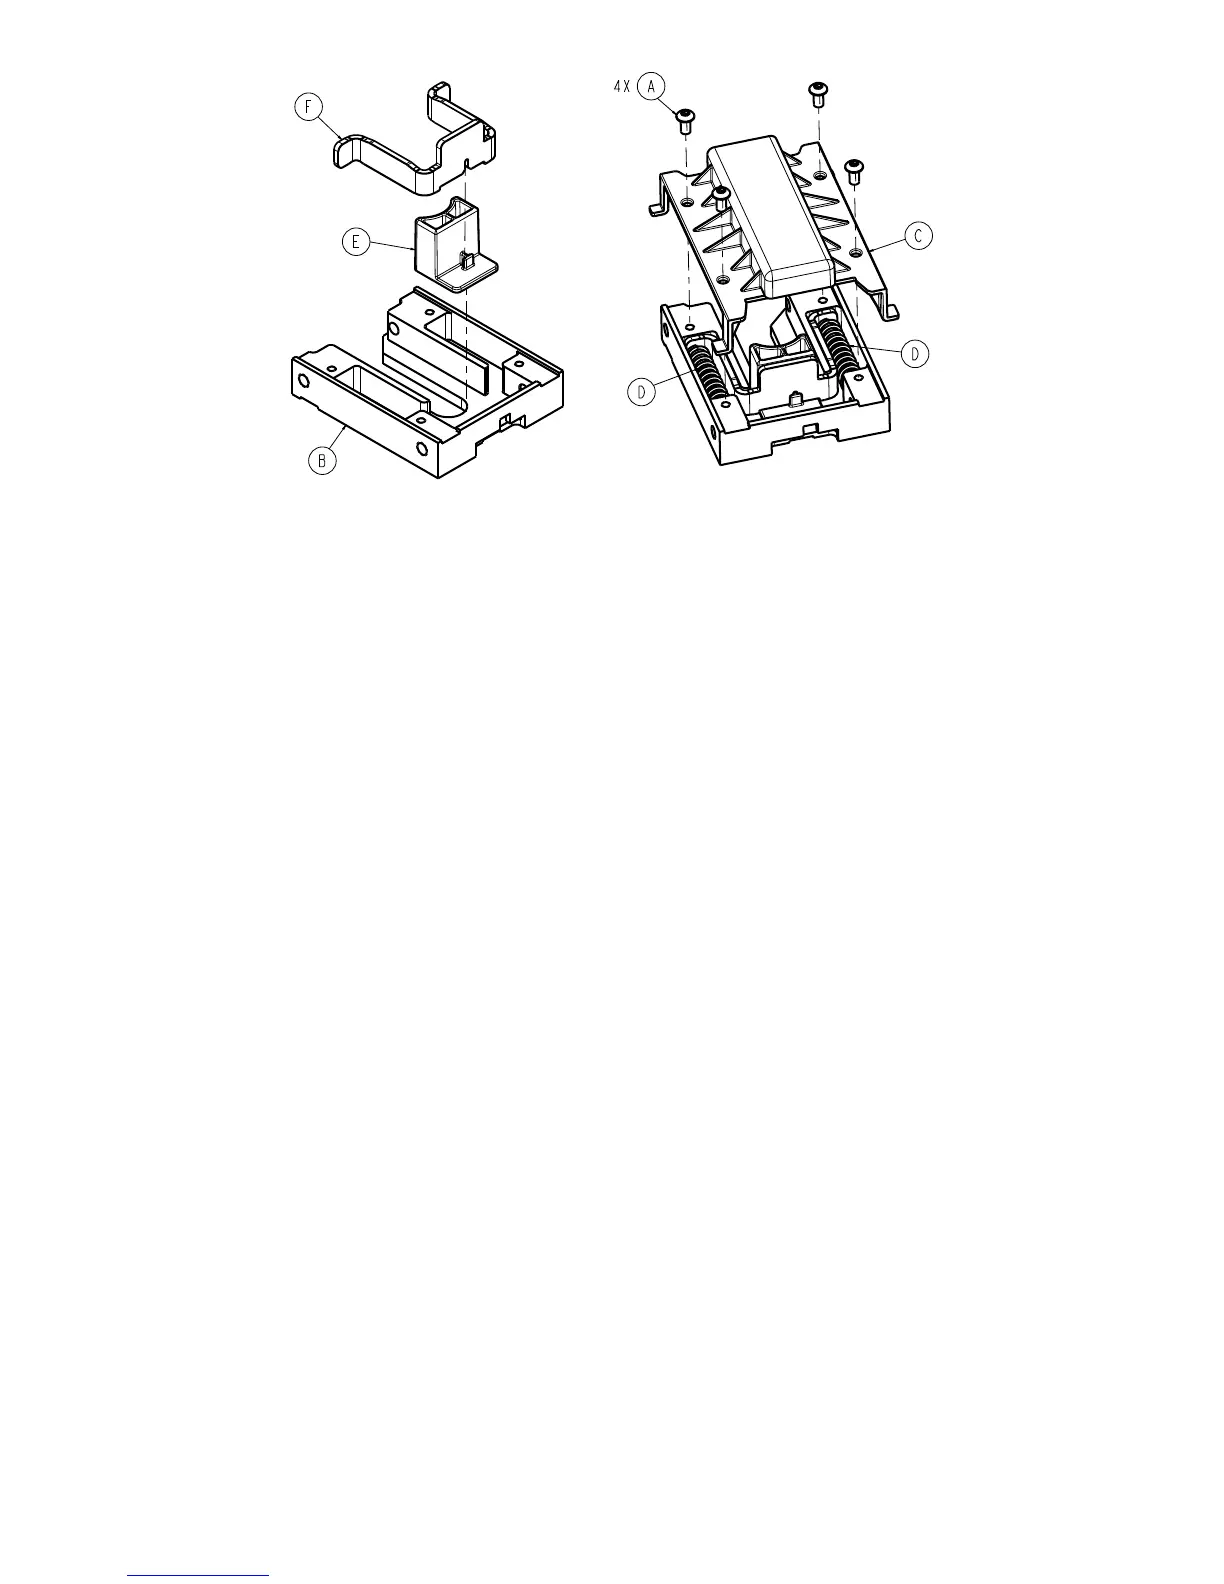
2. Using a 1/8'' punch, push the dowel pin (B) out of the release latch arm (G) (Figure 6). Save the dowel pin.
3. Using a T25 Torx driver, remove and save the six screws (A) that secure the pivot bracket to the foot end interface (C)
(Figure 6).
4. Remove and discard the lock pawl (D) (Figure 6).
NNoottee -- Make sure that the pawl spring (F) remains in place when you remove the lock pawl (Figure 6).
5. Reverse steps to reinstall.
NNoottee -- Fully insert the dowel pin during reassembly.
6. Verify proper operation before returning the product to service.
6392-009-002 Rev E.4 17 EN