- 7 –
Cont ...
2 LOCATION GENERAL
2.11 Access: For emergencies and maintenance the pump must be
easily accessible.
2.12 Do not run against a closed valve for periods longer than 5 minutes.
The water in and around the pump must not be allowed to freeze.
This will result in pump damage.
2.13 Do not under any circumstances use the supply cord fitted, as a
means to carry or lower the pump into position on installation.
Attach a rope sling to the handle.
2.14 When operating continuously to avoid overheating of the motor, the unit
must be installed in the vertical position and must be submerged to the
correct levels at all times. However, when the automatic float switch
option is selected, the pump may be operated partially submerged for
short periods (see float switch operation section
for further details).
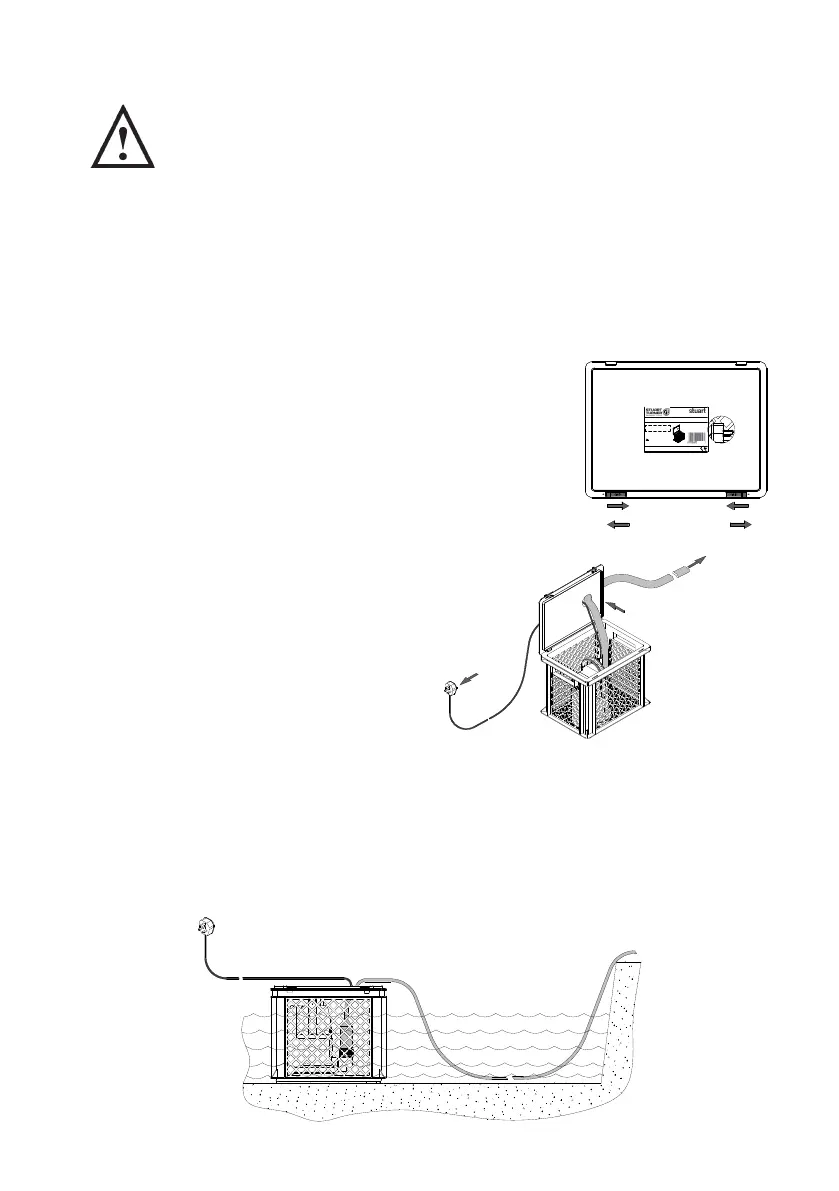
2.15 Setting up: Set up unit as shown below.
1. Open lid to access unit (Fig. 2).
2. Uncoil and feed both the
lay flat hose and the
supply cable through the
hole in the lid (Fig. 3).
3. Set switch to auto or
manual as required (see
Section 2.17).
FLOOD KIT
Stuart-Turner Ltd
RG9 2AD - ENGLAND
www.stuart-turner.co.uk
PART No:
Serial No:
46638
46638?
Duty Hd: 0.83 bar @ 4 l/min
Duty Hd: 0.10 bar @ 250 l/min
Head Max: 8.5 metre
min
H :0.003 m
7 m
LOCK DIRECTION
UNLOCK DIRECTION
Fig. 2
4. Close lid ensuring the lay flat hose is not trapped or kinked.
5. Place unit in flood water (Fig. 4).
6. Lay the hose out to drainage area as required and ensure it is not trapped,
twisted or kinked.
The unit is now ready for use.
Note: The hose may require adjusting on start up to remove any kinks and
have a good flow from the unit.
Fig. 4
To mains
supply
Ensure hose is not
trapped, twisted
or kinked
To drainage
as required
Fig. 3
To mains
supply
To
drainage