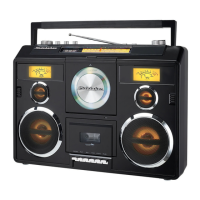
NOTE: These speakers are not magnetically shielded and may cause color distortion on the
screen of some TVs or video monitors. To avoid this, you may need to move the speakers
further away from the TV or monitor if unnatural color shifts or image distortion occurs.
RADIO OPERATION
1. Slide the FUNCTION SWITCH to RADIO position.
2. Select the desired FM mode by switching the FM/FM ST. BAND SELECTOR on unit tip
panel.
3. Tune to your desired station with the TUNING knob. If FM STEREO mode is selected and
you tune to an FM Stereo station, the FM STEREO LED Indicator will light.
4. Adjust the MASTER VOLUME knob to obtain the desired sound level.
FM & FM-STEREO RECEPTION
● Set the BAND SELECTOR to “FM” position. Stations will now be received in MONO mode.
When a FM station is weak or distorted, listening is usually improved by switching the band
selector to the FM (mono) position.
● Set the band selector to “FM-ST” position to receive stereo broadcasts. The FM-Stereo LED
indicator will light up to show a FM stereo station is detected.
TIPS FOR BEST RADIO RECEPTION
AM - The AM antenna is built inside the radio. If AM reception is weak, change the position of the
unit until the internal antenna picks up the strongest signal.
FM - If a stereo broadcast program is being received, the FM STEREO INDICATOR will light.
During FM Stereo reception, always keep the FM TELESCOPIC ANTENNA fully extended
for best performance. However, if FM reception is weak, try repositioning the unit near an
open window until you get the best reception.
CD OPERATION
PLEASE READ THIS IMPORTANT INFORMATION:
CD mechanisms used in devices like this are designed to fully read all commercial CDs. They
will also read self-compiled CD-R/CD-RW discs but it may take up to 10 seconds for playback to
start. If playback does not start, it is likely due to the quality of the CD-R/RW disc and/or the
compatibility of the CD compilation software. Manufacturer is not responsible for the playback
quality of CD-R/RW discs.
Do not attach a label or seal to either side of the CD-R/RW disc. It may cause a malfunction.
1. Slide the FUNCTION switch to CD/USB position. The display will show “- -“ briefly. If no CD
2. Grip the “OPEN” mark on the CD Door and pull gently to open it.
3. Carefully load an audio CD with its label side OUT ward in the CD compartment then
gently close the CD door.
4. The player will start reading TOC of the disc, total number of tracks on the CD will appear
on the LED DISPLAY after a few seconds.
5. Press the PLAY/PAUSE
button to start to play.
6. Adjust the MASTER VOLUME knob to obtain the desired sound.
7. To suspend playing, press the PLAY/PAUSE
Button. The play/pause indicator will be
flashing. To resume playing, press the PLAY/PAUSE
Button again. The play/pause
indicator will be solid on.
8. You can skip up or down to a specific track number by pressing the SKIP BACKWARD
button or skip forward
button. The LED Display will indicate the correct track number
selected.

 Loading...