Lithium Battery Safety Instructions
Do not burn or bury batteries. Do not puncture or crush. Do not disassemble.
Recycle Lithium batteries. Do not dispose of in the trash.
If the electrolyte in the cells should get on your skin, thoroughly wash with soap and water. If
in the eyes, rinse thoroughly with cool water. Immediately seek medical attention.
Use only chargers rated for Lithium cells. Be sure the charger's voltage and current settings
are correct for the battery pack being charged.
Charge batteries on a fireproof surface away from flammable items or liquids. Batteries
should NEVER be left unattended while charging. Only adults should charge the batteries.
Follow the manufacturer's instructions for charging the product and do not charge longer than
recommended. Unplug the charger when the battery is charged.
Recycle Rechargeable Batteries
Recycle your old rechargeable batteries at one of the many collection sites
in the U.S. and Canada. To find the site nearest you, visit
www.call2recycle.org or call toll-free 1-877-2-RECYCLE.
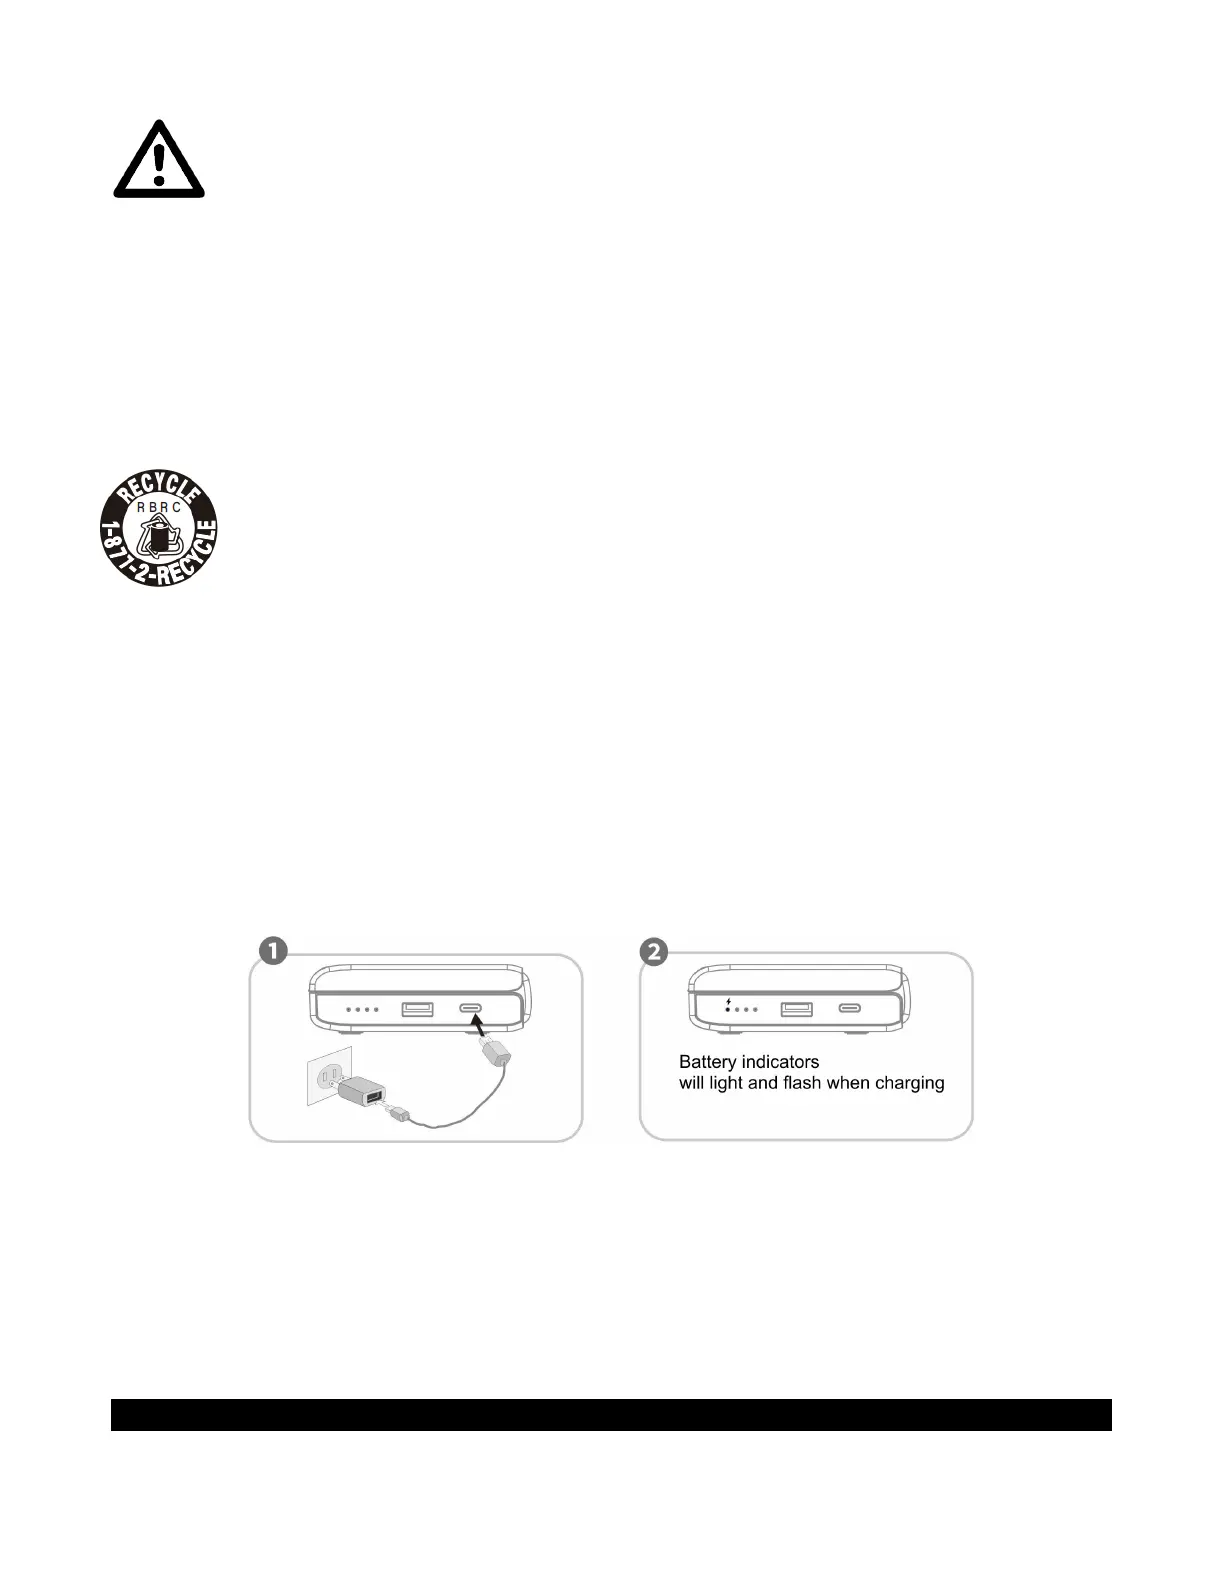
USB POWER
Charging the unit
1. Plug one side of the USB-C cable (included) to the USB-C PORT (#10) on the right side of
the unit.
2. Plug another side of the USB-C cable to the USB adaptor (included).
3. Ensure the AC adaptor is plugged into a 120V AC, 60Hz household outlet.
4. The BATTERY INDICATORS (#8) will turn on. The flashing LED will show the battery
level.
5. Four BATTERY INDICATORS (#8) will light up steadily when the built-in battery is fully
charged.
Notes:
• The USB power adaptor described above is the PD Quick Charger commonly used with
smartphones.
• This unit supports fast charging. The time required to fully charge the unit depends on the
power adapter power.
Remark:
When the built-in battery power remains around 10%, the last BATTERY INDICATOR (#8) will
start to flash.
CLOCK SETTING