Studer Innotec SA
BSP
14 V1.0.3 User Manual
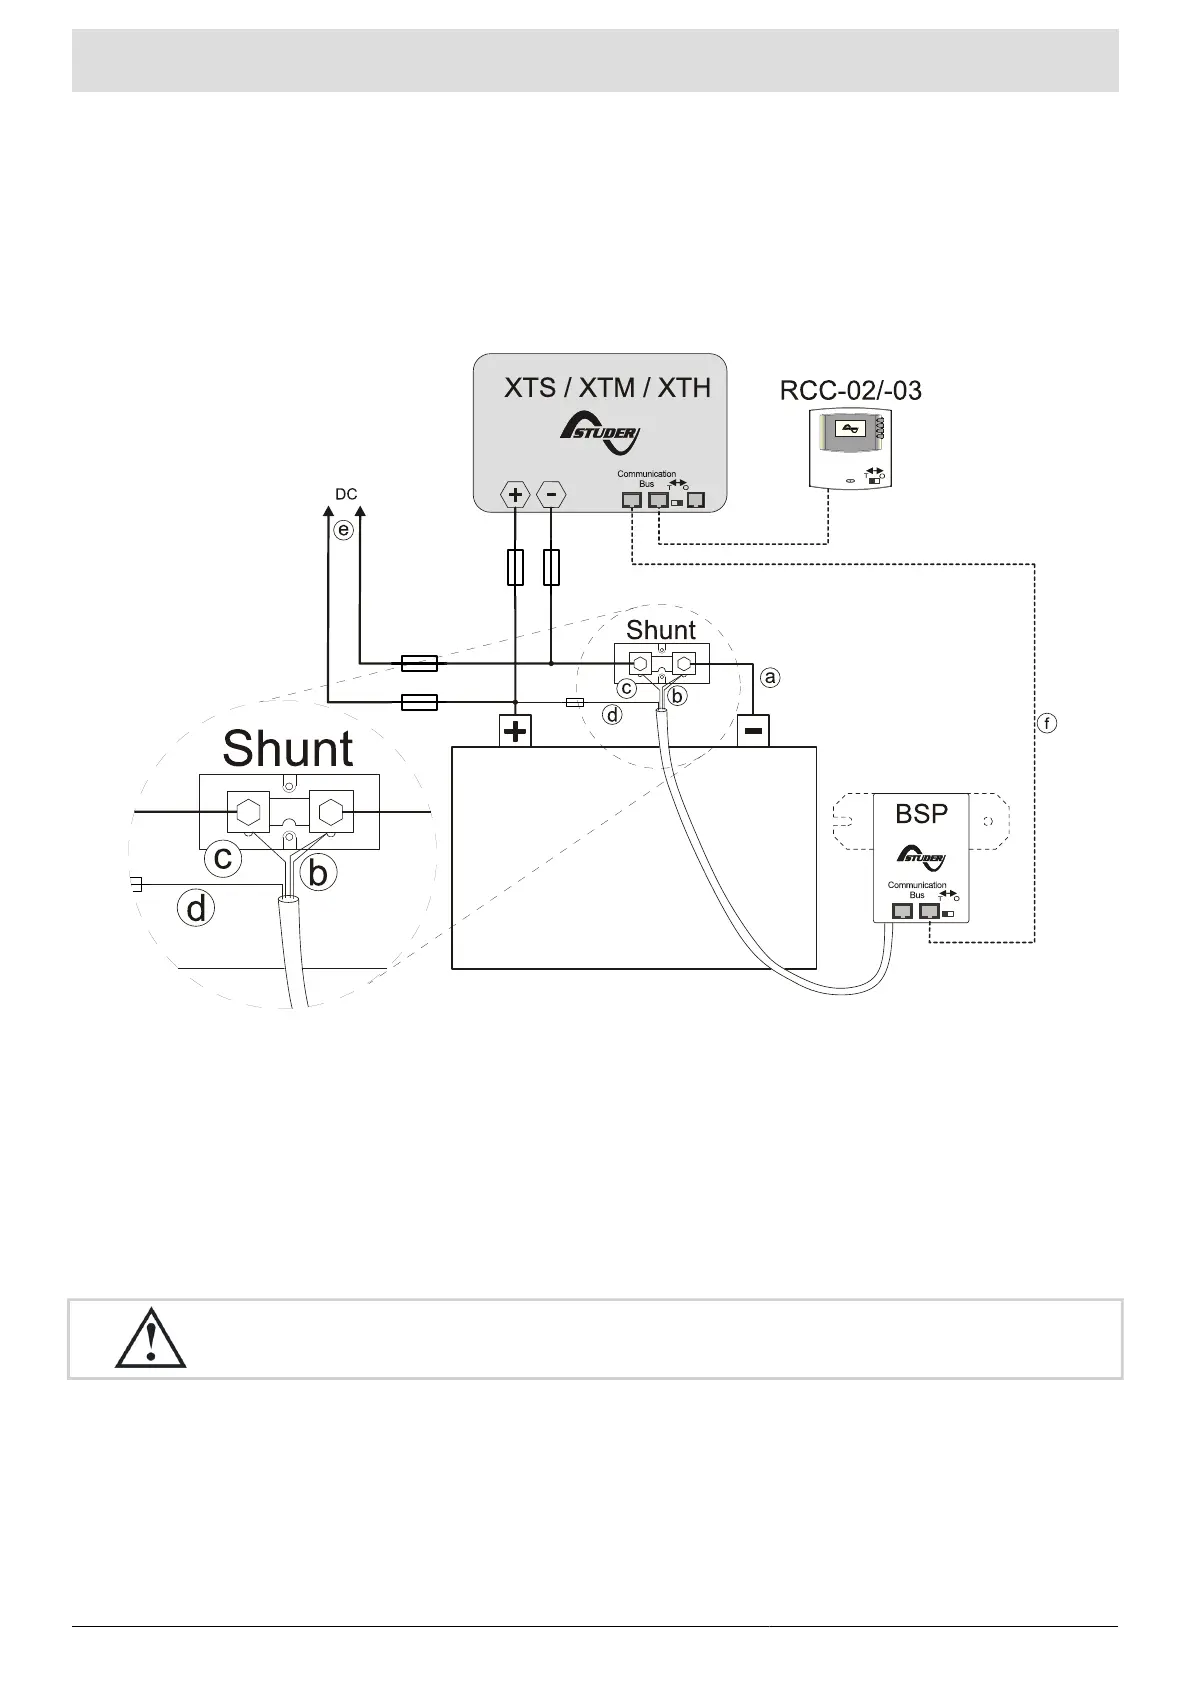
4. Installation
The BSP must be mounted as close as possible to the battery. In this way, the measurement perturbations
are minimized and the temperature sensor integrated in the box gives a more accurate measure of the battery
temperature. If the BSP has to be installed in another room, it is possible to use the temperature sensor BTS
that will be connected to the Xtender. In that case the temperature of the BTS will be automatically taken into
account for the state of charge calculation.
Figure 4.1. Connecting schematic of the BSP
4.1. Mounting
Ideally the BSP can be stuck directly to the battery. It can also be mounted close to the battery by means of
the fixing plate supplied with (see Figure 3.2 (p. 13)).
The direct mounting on the battery offers a more precise measurement of the battery temperature. While
changing the battery bank, the BSP will have to be stuck again with a new double-side adhesive.
The BSP must be mounted so as to avoid any contact with acid from the battery. It should
be taken care of fixing it vertically with the communication bus connectors downwards.
4.2. Shunt mounting
The shunt supplied with the device allows the measurement of the battery current. It must imperatively be
installed in series with the negative terminal of the battery. The connection (a) of the Figure 4.1 must be as
short as possible. For a good operating of the charge estimating algorithm, all the current must go through
the shunt. No other conductive component shall be connected to the negative terminal of the battery.