OnAir 2500 Digital Mixing Console
Quick Reference Guide 7
Document generated: 09.09.14
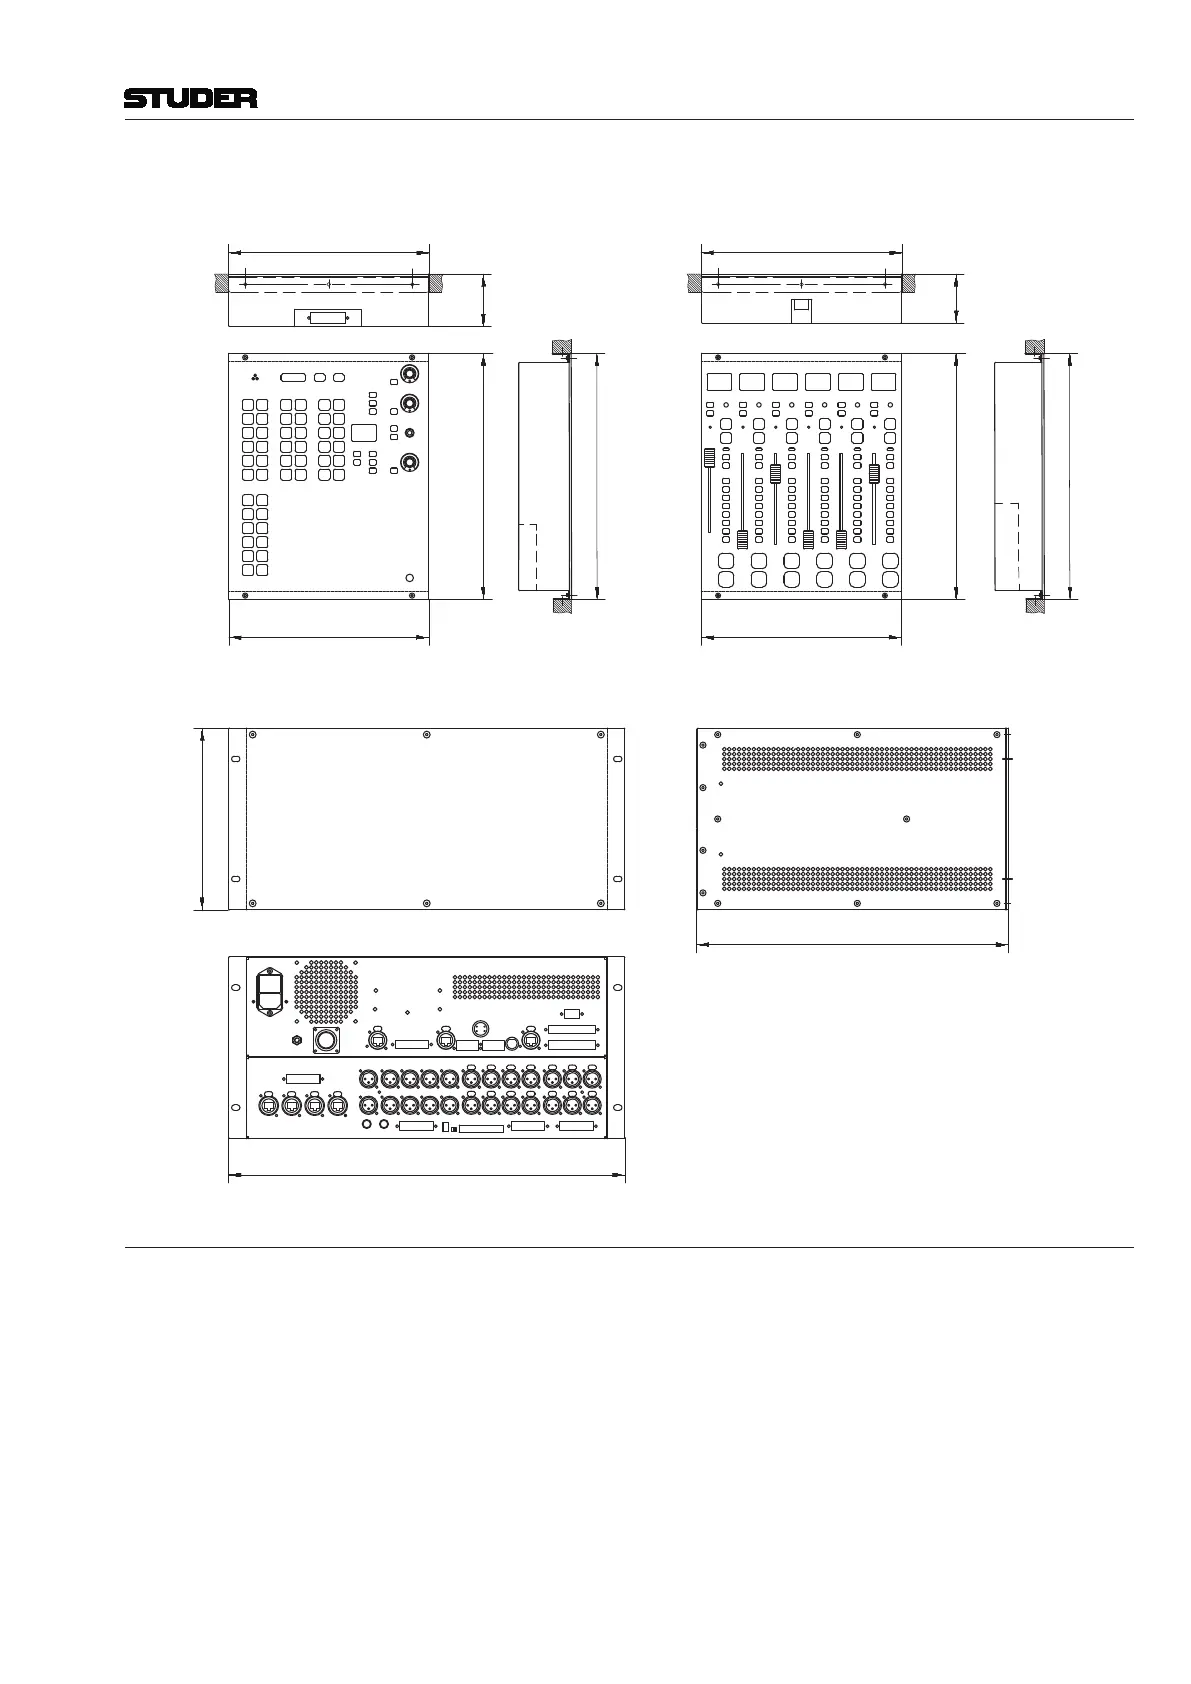
cut-out 301 mm / 11.85”
244 mm / 9.6”
Fader ModuleCentral Module
Core Frame
Front View
Rear View
cut-out 245 mm / 9.65”
300 mm / 11.8”
cut-out 301 mm / 11.85”
244 mm / 9.6”
300 mm / 11.8”
60 mm
2.4”
cut-out 245 mm / 9.65”
64 mm
2.6”
260 mm / 10.2”
269 mm / 10.6”
207 mm / 8.2”
39 mm / 1.6”
275 mm / 10.8”
284 mm / 11.2”
292 mm / 11.5”
Screen Module
483 mm / 19”
380 mm / 15”
222 mm / 8.8” (5U)
6 Setup of the Fixed-frame Version
Location The console must be set up on a flat surface. In any case, free air circulation
must be guaranteed through all the air vents on the console’s bottom, side,
rear and top. The air vents must never be covered with e.g. a notepad or a
manual. The console must never be placed on a soft surface, and the rubber
feet at its bottom must not be removed.
Temperature Regulations The unit must not be used in conditions of excessive heat or cold, near any
source of moisture, in excessively humid environments, or in positions where
it is likely to be subjected to vibration or dust. The ambient temperature range
for normal operation of the unit is +5...+35° C.
Assembly Fix the main screen with the four supplied screws to the mounting holes [1]
attheconsole’srear;amatchingAllenkeyissupplied.Connectthescreen’s
cable to the rear-panel SCREEN [2] socket.
 Loading...