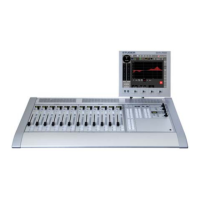
OnAir 2500 Digital Mixing Console
10 Quick Reference Guide
Document generated: 09.09.14
For additional information on ambient temperature, mains connection and
earthing please refer to the Operating Instructions file on this same CD.
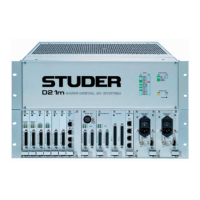
7 Setup of the Modulo Version
Mounting Thefadermodulesaswellasthecentralmodulecanbeush-mountedinto
atableorfurniture.Thecoreframecanberackmountedina19”rack.Free
air circulation must be guaranteed through all the air vents of the core frame
Wiring Fader- / TB modules Please note that the maximum distance between the core frame and the moni-
toring/TB module is 60m.
Please note that the maximum distance between the core frame and the fader
modules is 18m.
Cable Type Cat 5e, with shielded connectors on both ends
* Caution
Connectors are identical on ST MON, FADER MODULE and LAN
cables. Make sure not to mix them up since the ST MON and
FADER MODULE sockets carry DC supply voltage!
Wiring Central module / Screen Please note that the maximum distance between the core frame and main
screen and central module is 2m !
Temperature Regulations The units must not be used in conditions of excessive heat or cold, near any
source of moisture, in excessively humid environments, or in positions where
it is likely to be subjected to vibration or dust. The ambient temperature range
for normal operation of the unit is +5...+35° C.
Signal Connection Connect your inputs and output signals. For a basic test hookup a digital signal
(AES / EBU IN / OUT)orananaloglinesource(LINE IN)andapairofactive
monitorloudspeakers(CR LSP)orheadphones(DJ)willdo.
An optional talkback module can be connected to the optical ADAT 1 (ST MON)
input/output and to the ST MON socket.
Mains Voltage Thepowersupplyunitisauto-ranging;itcanbeusedformainsvoltagesin
arangeof100to240VAC,50to60Hz.
Power Connection Connect your signal input and output cables before connecting the console to
the mains outlet. Thesuppliedmainscable(withfemaleIEC320/C13socket)
mustbeconnectedtoamainsplugmatchingyourlocalstandard(German/
French,UKandUSversionssupplied)byatrainedtechnician,respecting
your local regulations. Plug the mains cable to the 100-240V~ mains inlet.
External PSU Anoptionalexternal/redundantpowersupplyunit(PSU)canbeconnected
to the 24V DC IN socket.
Earthing Some consideration must be given to the earthing arrangement of the sy stem,
at the center of which is the console chassis. The chassis is earthed to the
mains earth via the power supply or the earth terminal
. Ground loops
mayoccurwheresignalprocessingequipment,patchedtotheconsole,has
its signal earth commoned to the console chassis.
The console mustbeearthed,duetothemainsinput lter network being
 Loading...