19
66V 66V
4 Ω
72V 72V
8 Ω
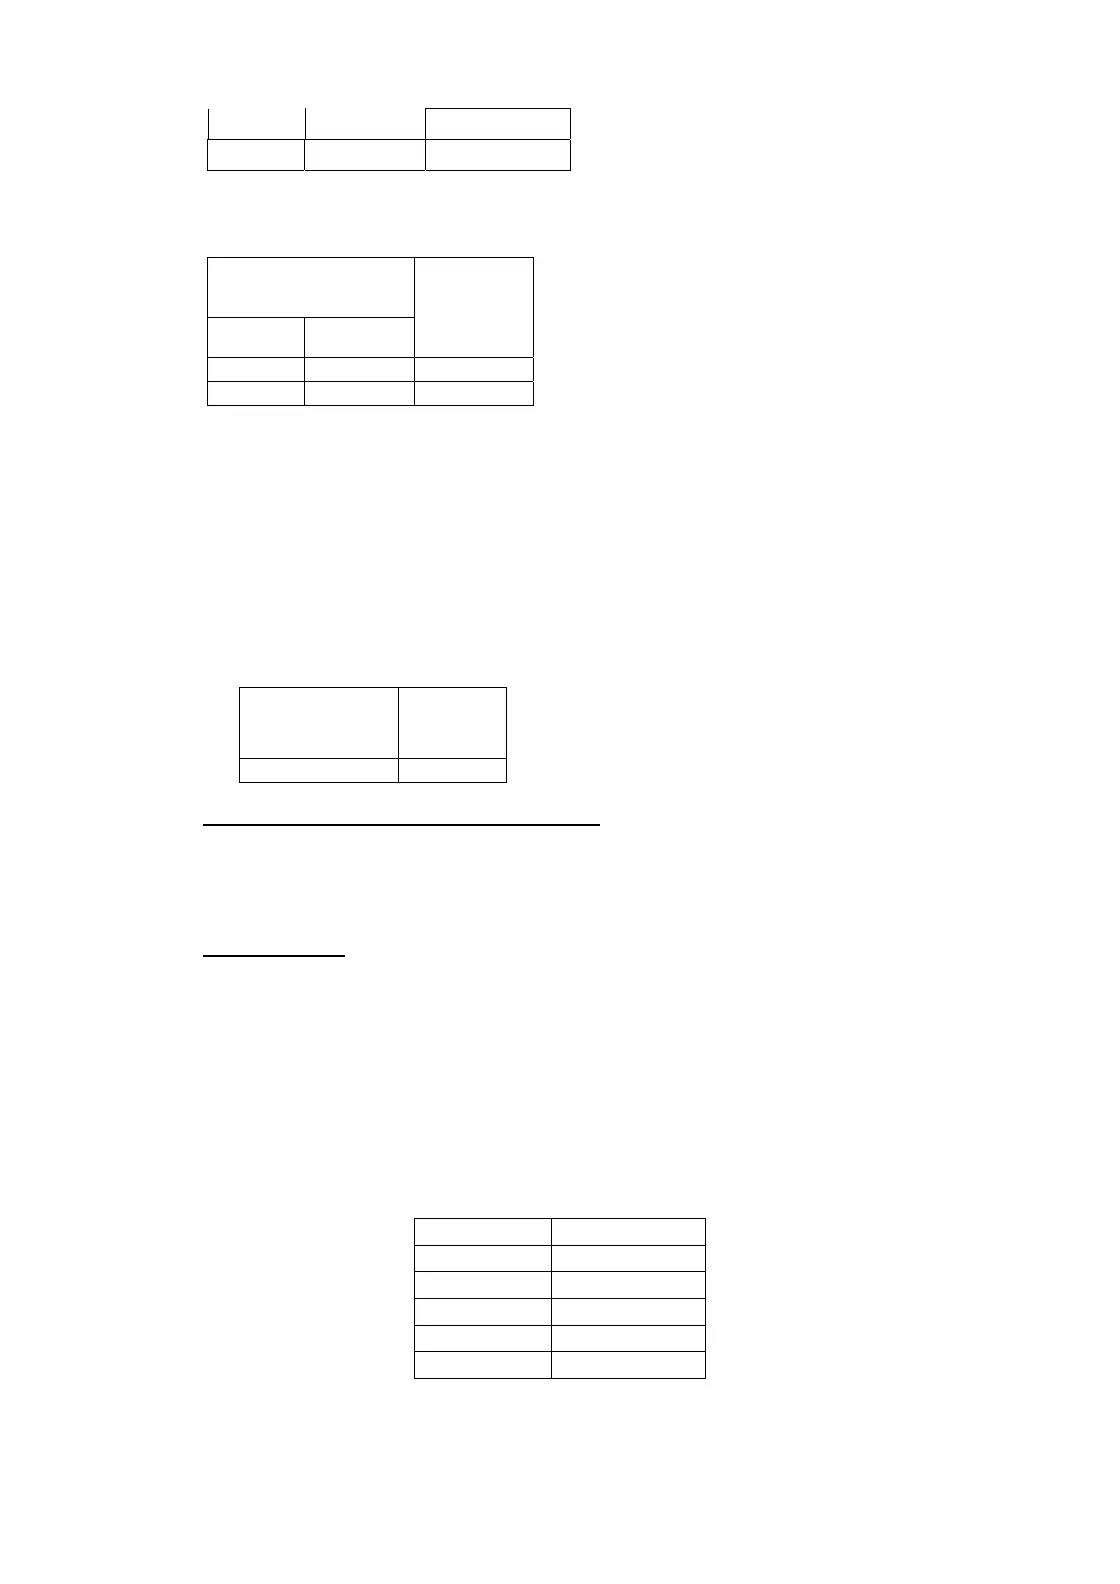
II. Stereo Mode Dual Channel Driven
- Both channels driven in various conditions
- Gain pot MAX.
- Feed 1KHz signal & adjust output at just clipping level.
Power Output in V
Ch 1 Ch 2
Load
59V 59V
4 Ω
66V 66V
8 Ω
III. Parallel Mode:
- Feed Input to Channel 1 only.
- Both channels connected to appropriate loads.
- Mono mode selected from the Back Plate mode selection switch.
- Check that you get the similar power as per Stereo mode.
- Make sure that the Channel 2 input is not connected.
IV. Bridge Mode:
- Input to Channel 1 only.
- Load connected to Bridge connector with load as specified.
- Channel 1 control MAX.
- Bridge mode selected from the Back Plate mode selection switch.
Power Output
(V)
Load
117V
8 Ω
4) SIGNAL TO NOISE LEVEL MEASUREMENT:
- Connect the Amplifier in Stereo Mode with 4 Ω loads.
- Check the output power level with the given frequency filters and observe the readings for both the
channel.
- Noise should be less than 2mV
5) LIMITER TEST:
- Output is set to 66V with rated sensitivity input in 4ohm load.
- Increase input to 5Vand keep the CH pot max.
- Output should be about 70V
6) LOW CUT MEASUREMENT:
- Connect the amplifier in stereo mode with 4Ω loads at 1 kHz.
- Feed input to Left channel at rated sensitivity and Set output to 30 V in 4Ω loads using gain control
pot.
- Drive single channel, Put the switch @ the rear into low-cut mode
- Using the XO control at the rear set the required frequency. Following are the frequencies at which
output is about 21V(+/-1V).
FREQ FREQ Variation
43Hz +/-5Hz
63Hz +/-5Hz
120Hz +/-10Hz
140Hz +/-10Hz
180Hz +/-25Hz
7) SUBWOOFERMEASUREMENTS