subzero.com
|
13
EXTERNAL DISPENSER
For external dispenser models, the glasswell bezel must be
removed before custom panels can be installed.
The total panel thickness in the glasswell area (including
backer and spacer, if used) can range from
1
/4" (6) to a
maximum 1
1
/8" (29). If the panel is thicker, the area must be
routed to 1
1
/8" (29) maximum thickness.
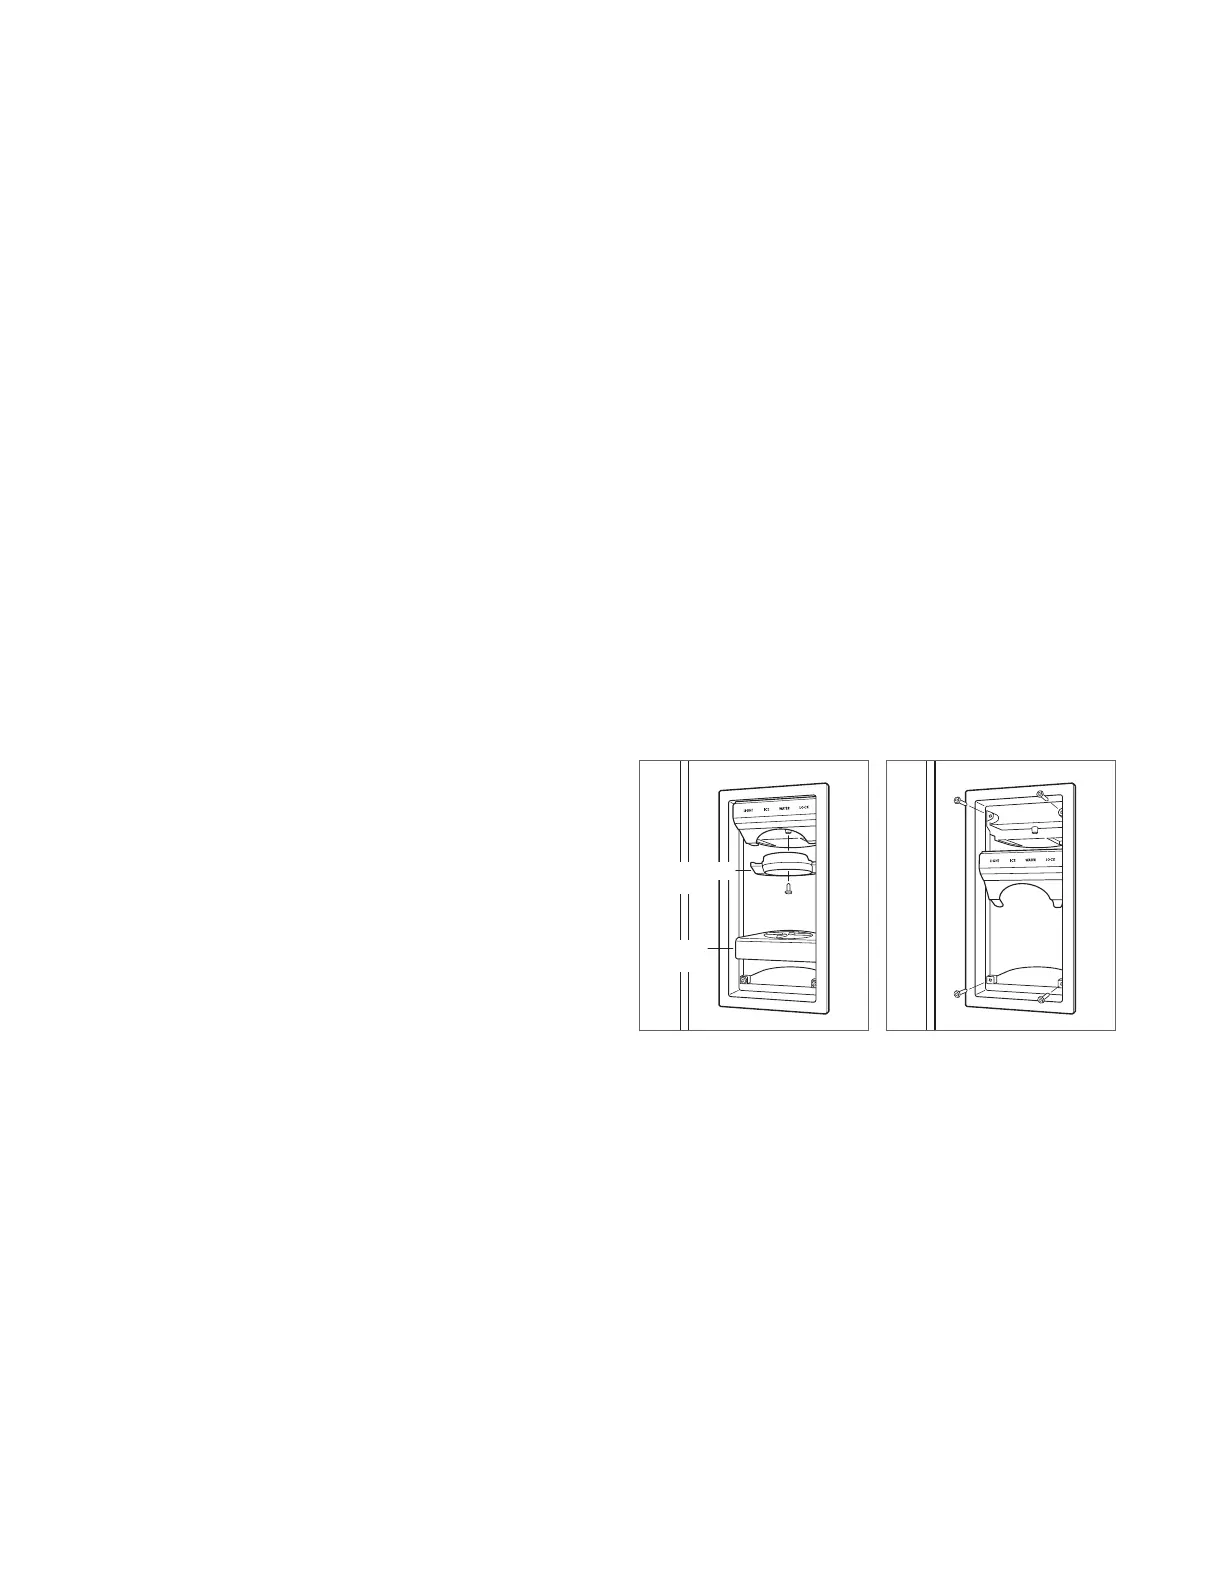
To remove the bezel, lift the water grille up and out. Remove
the dispenser chute by removing one screw from the center
of the chute. Once the chute is removed, rotate the control
panel downward and disconnect the wire harness. Remove
the bezel by removing the four screws. Refer to the illustra-
tions below.
Once custom panels have been installed, reverse the proce-
dure to reinstall the glasswell bezel.
PANEL INSTALLATION
Custom Panels
For overlay and ush inset applications, custom door and
grille panels must be installed. Panel size is critical for a
proper t. To verify panel requirements and dimensions,
refer to the Sub-Zero design guide at subzero.com/specs.
IMPORTANT NOTE: Flush inset applications require a
minimum
1
/2" (13) reveal on all sides.
Finish all sides of custom panels. They may be visible
when the door is open or through the window of glass door
models.
DISPENSER
CHUTE
WATER
GRILLE
Chute and water grille removal.
Glasswell bezel removal.
 Loading...