Electronics
M Series Wall Oven
M Series Wall Oven
2-11
#824974 - Revision C - November, 2016
Cooking Modes
General Cooking Mode Operation
Preheat stages are not active after the cavity reaches set temperature, even if the set temperature is changed•
without canceling the mode.
All element and fan operation is specified by factory settings.•
Each cavity has a timer to cancel a cooking mode that has been continuously active for 12 hours. •
The 12 hour cooking limit will be disabled in Sabbath and Dehydrate modes. •
The 12 hour cooking limit will not be initiated until after the expiration of a delayed start timer. •
Opening the cavity door during an active cooking mode will reset the 12 hour timer. •
Adjusting the cooking mode will reset the 12 hour timer. •
Adjusting the temperature will reset the 12 hour timer.•
A cooking mode can be cancelled by the “OFF” key or knob, a fault detection, power down mode, expiration of•
timed cook, or the expiration of the 12 hour timer.
A cooking mode can not be started when the oven door is locked or Motorized Door Lock (MDL) has an error.•
Delayed Start and Timed Cook Modes
Are set while programing a cooking mode. The cooking mode can be delayed up to 24 hours, and have a dura-•
tion of up to 11 hours and 59 minutes.
Preheat stages and preheat notifications are skipped at the expiration of the delayed start timer.•
The cook timer begins immediately if a delayed start has not been set. •
If a delayed start has been set, the cook timer begins at the expiration of the delayed start timer. •
At the expiration of the cook timer, the timer complete tone is activated and the cooking mode is canceled.•
GUI operation for Transitional, Contemporary and Professional models from standby mode:
1. For Professional models, turn knob to desired mode
For Transitional and Contemporary models, touch the GUI and the main menu will be displayed.
a. Touch QUICK START and the cooking mode screen will be displayed.
b. Scroll to desired cooking mode, then touch it.
2. Touch TIMED COOK on the GUI to the right of the TOD
3. TIMED COOK menu is displayed. Scroll time to amount of cook time desired - up to 11 hours and 59 minutes.
4. Touch SET, and the STOP TIME menu is displayed. The time shown is for a zero minute delay start - the
cook time + 0 minutes. A STOP TIME can’t be set prior to this time. Scroll to the desired STOP TIME.
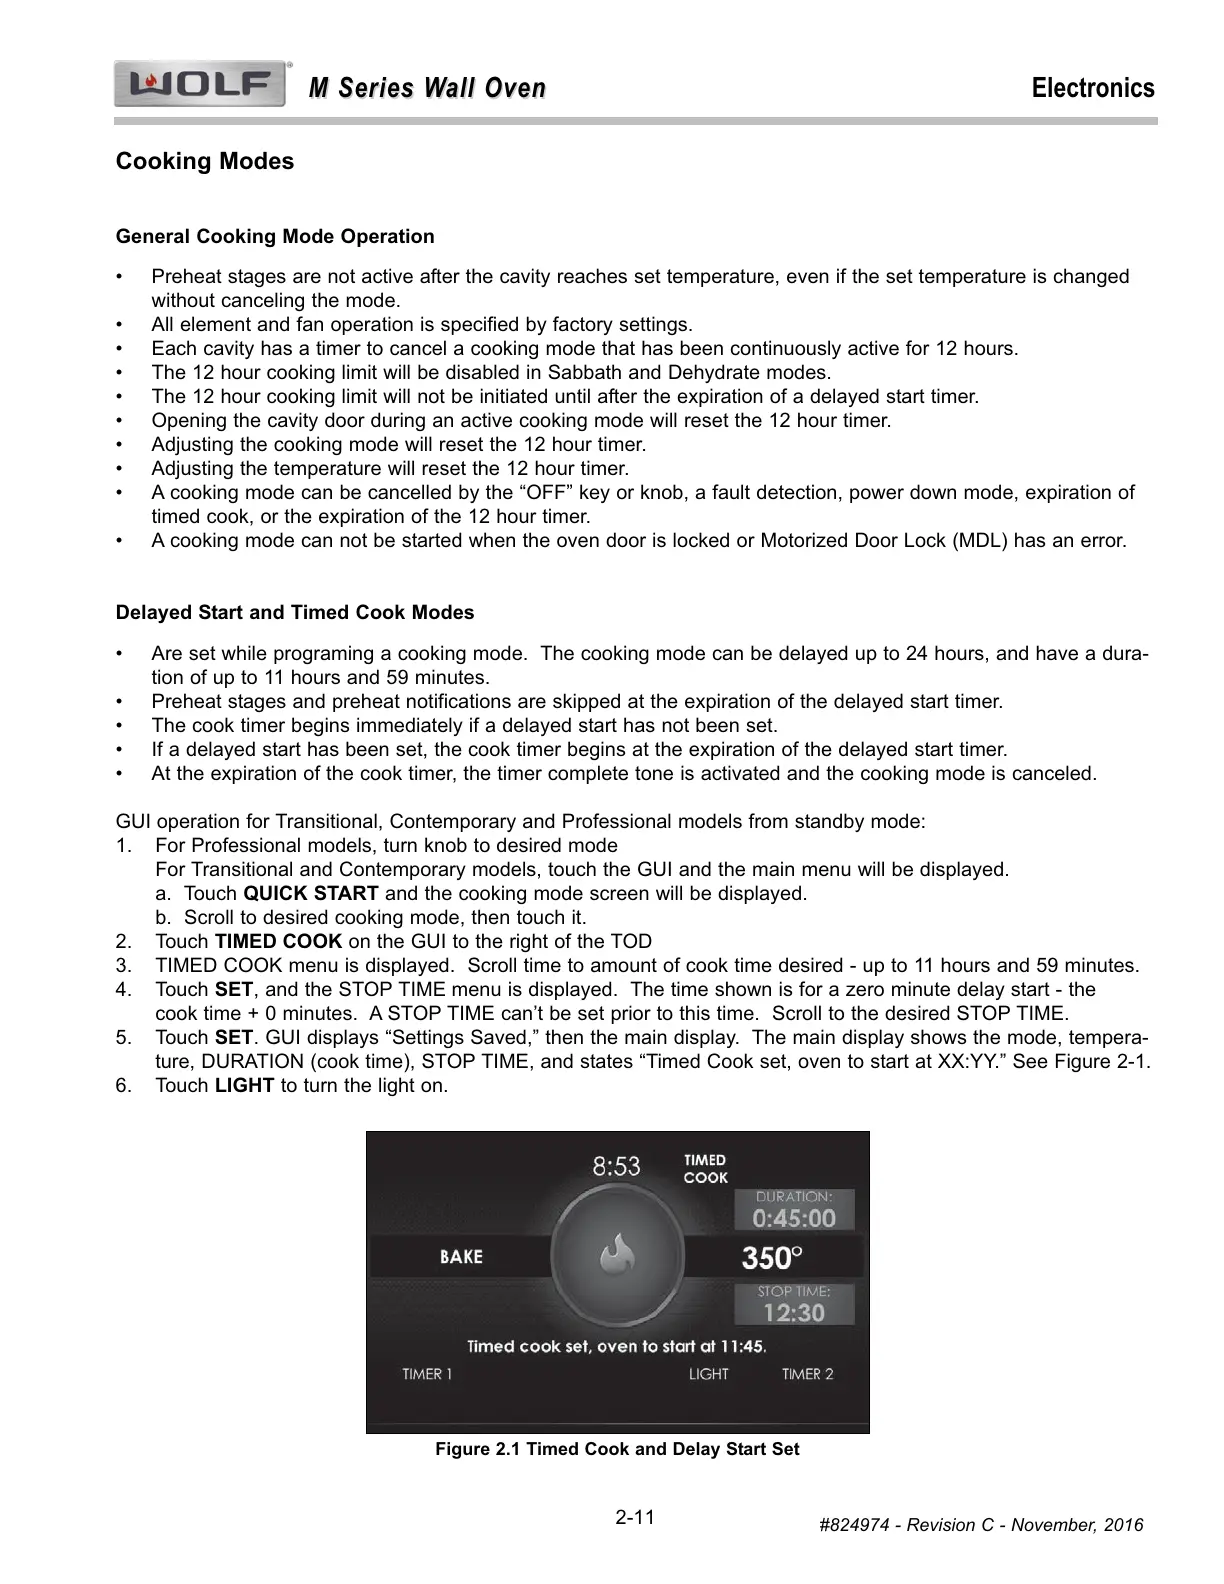
5. Touch SET. GUI displays “Settings Saved,” then the main display. The main display shows the mode, tempera-
ture, DURATION (cook time), STOP TIME, and states “Timed Cook set, oven to start at XX:YY.” See Figure 2-1.
6. Touch LIGHT to turn the light on.
Figure 2.1 Timed Cook and Delay Start Set
 Loading...