Component Removal
M Series Wall Oven
M Series Wall Oven
3-7
#824974 - Revision C - November, 2016
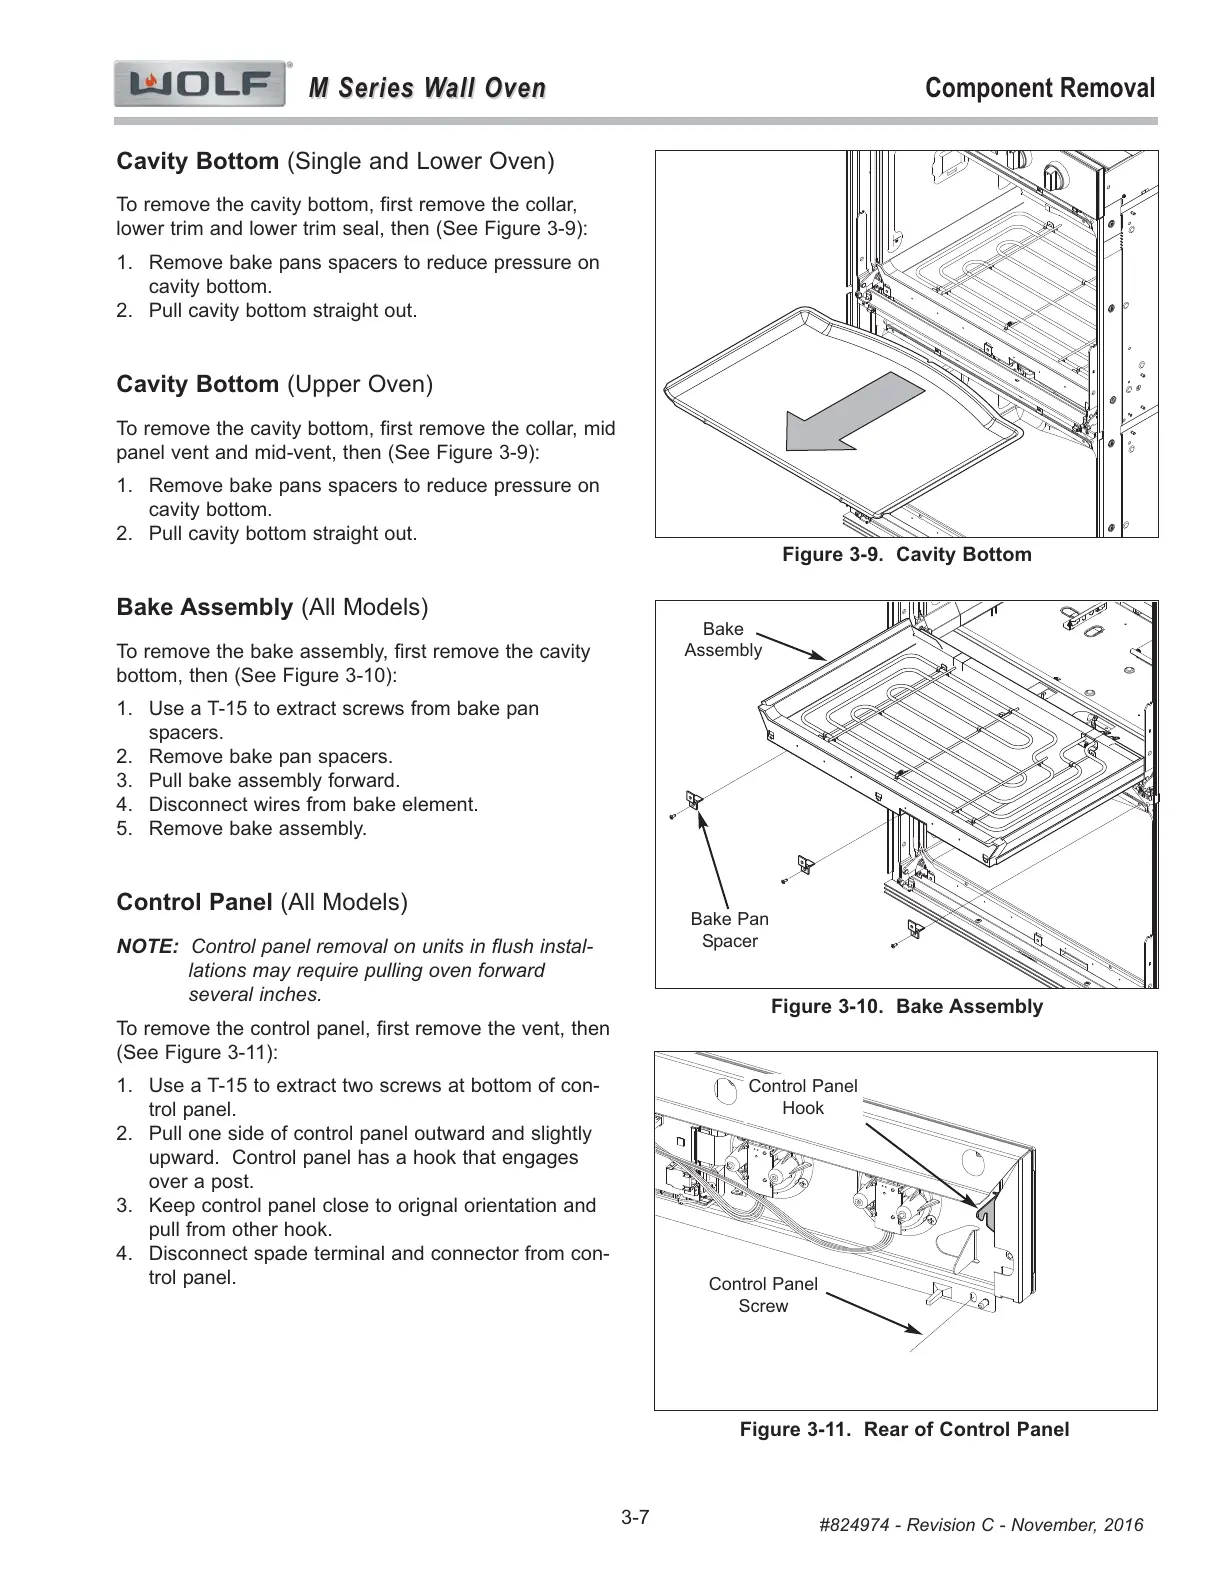
Figure 3-9. Cavity Bottom
Cavity Bottom (Single and Lower Oven)
To remove the cavity bottom, first remove the collar,
lower trim and lower trim seal, then (See Figure 3-9):
1. Remove bake pans spacers to reduce pressure on
cavity bottom.
2. Pull cavity bottom straight out.
Cavity Bottom (Upper Oven)
To remove the cavity bottom, first remove the collar, mid
panel vent and mid-vent, then (See Figure 3-9):
1. Remove bake pans spacers to reduce pressure on
cavity bottom.
2. Pull cavity bottom straight out.
Bake Assembly (All Models)
To remove the bake assembly, first remove the cavity
bottom, then (See Figure 3-10):
1. Use a T-15 to extract screws from bake pan
spacers.
2. Remove bake pan spacers.
3. Pull bake assembly forward.
4. Disconnect wires from bake element.
5. Remove bake assembly.
Control Panel (All Models)
NOTE: Control panel removal on units in flush instal-
lations may require pulling oven forward
several inches.
To remove the control panel, first remove the vent, then
(See Figure 3-11):
1. Use a T-15 to extract two screws at bottom of con-
trol panel.
2. Pull one side of control panel outward and slightly
upward. Control panel has a hook that engages
over a post.
3. Keep control panel close to orignal orientation and
pull from other hook.
4. Disconnect spade terminal and connector from con-
trol panel.
Figure 3-10. Bake Assembly
Bake
Assembly
Bake Pan
Spacer
Figure 3-11. Rear of Control Panel
Control Panel
Screw
Control Panel
Hook