6-16
#7013455 - Revision A - April, 2009
Component Access/Removal
International W
International W
ine Storage
ine Storage
(ICBWS)
(ICBWS)
Series
Series
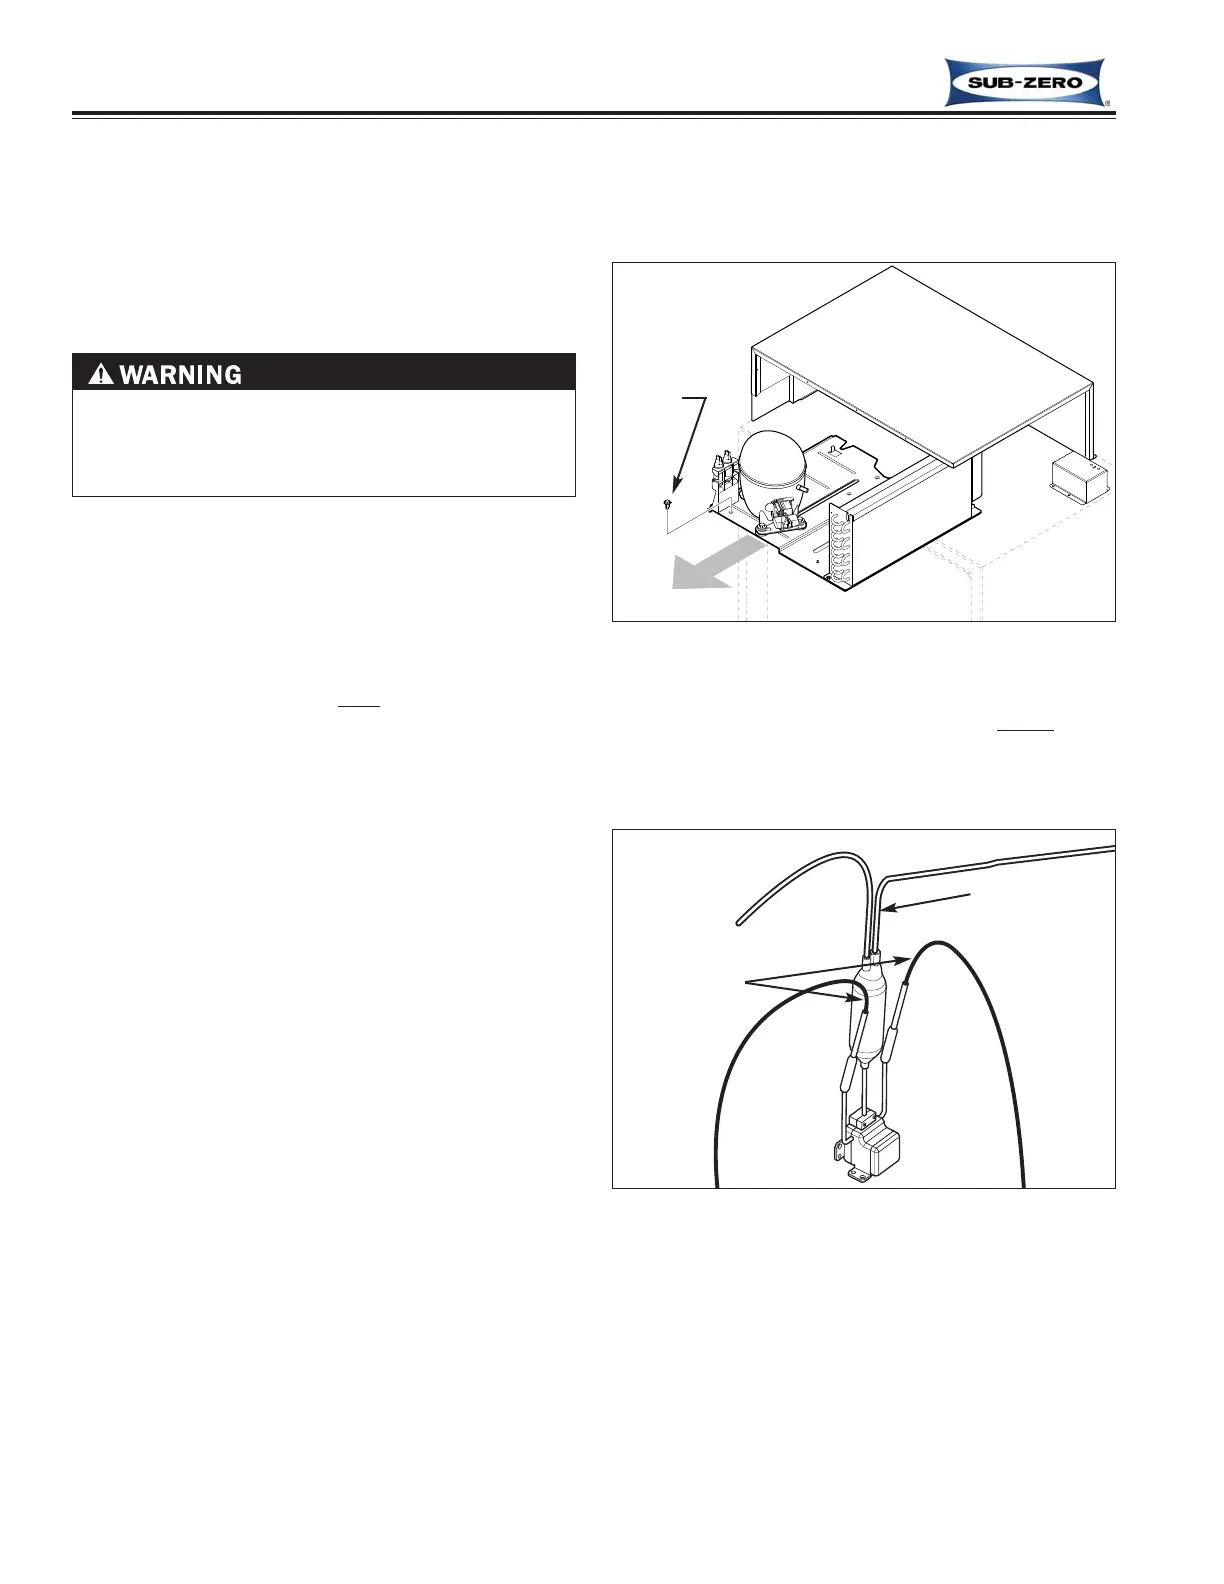
The sealed system components at the top of the appliance sit on a sliding unit tray. There is a slot in the unit tray
running from front to back, with a bolt positioned in the middle of this slot and attached to the top of the appliance.
This allows the tray to be pulled straight forward to aid
in sealed system repairs. (See Figure 6-33) When not
being moved for service, a bolt passing down through a
hole at the front of the unit tray holds it in place.
NOTES:
• Removing the condenser fan shroud assembly before
sliding the unit tray out will allow greater access to
sealed system components on the tray. See con-
denser Fan Shroud Assembly removal instructions
earlier in this section.
• When tapping into the sealed system, always use sol-
der-on process valves. Do NOT use bolt-on process valves as they are prone to leak.
• Whenever servicing the sealed system, the refrigerant valve assembly (which includes the filter-drier) MUST be
replaced.
Model ICBWS-30 Sealed System Components
Figure 6-33. Sliding Out the Unit Tray
UNIT COULD TIP FORWARD! MAKE SURE THE
ANTI-TIP BRACKETS ARE IN PLACE AND THE
UNIT IS PROPERLY ANCHORED BEFORE
ATTEMPTING TO SLIDE THE UNIT TRAY OUT.
Bolt
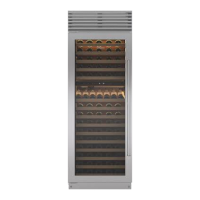
Figure 6-34. Refrigerant Valve Assembly Removal
Cut here
Cut here
Refrigerant Valve Assembly (Includes Filter-Drier)
The refrigerant valve assembly is secured to the unit
tray with screws.
To remove the refrigerant valve assembly, first capture
the refrigerant from sealed system, then (See Figure 6-
34):
1. With a tube-cutter, cut filter-drier inlet.
3. At refrigerant valve assembly, use a file to score a
line around the capillary tubes, one (1) inch (25
mm) or less from valve outlets, then fatigue capil-
lary tubes at this line until they separates.
NOTES:
• Do not sweat tubing apart. Doing so will induce
moisture into the sealed system.
• After capillary tube separates, check tubing for inter-
nal burrs. If burrs exist, repeat step 1 above.